Dell PowerEdge 850 User Manual
Page 126
2.
Remove the cooling shroud. See "
."
3.
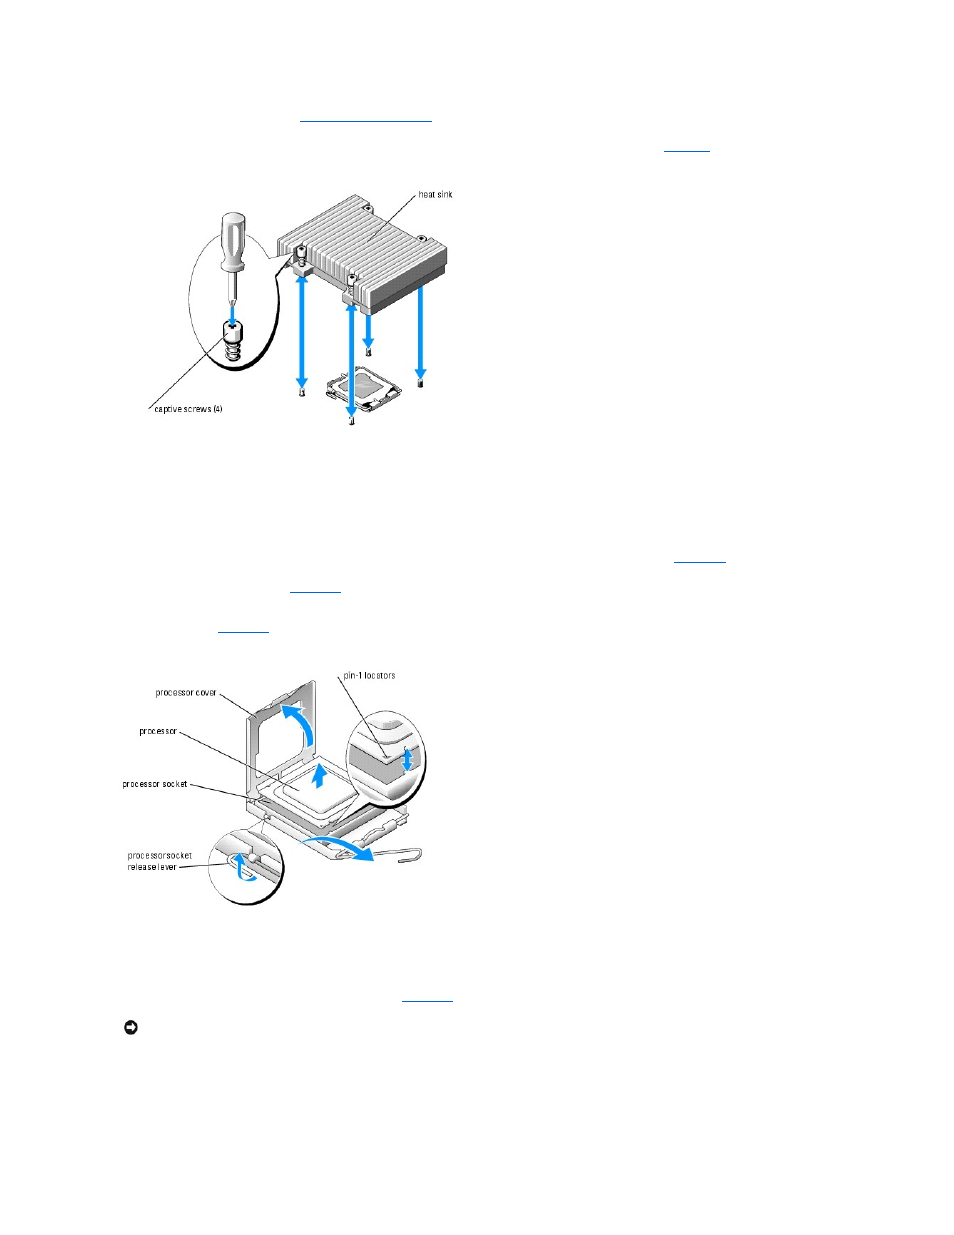
Figure 5-9. Installing and Removing the Heat Sink
4.
Wait 30 seconds for the heat sink to loosen from the processor.
5.
If the heat sink has not separated from the processor, carefully rotate the heat sink in a clockwise, then counterclockwise, direction until it releases from
the processor. Do not pry the heat sink off of the processor.
6.
Lift the heat sink off of the processor and set the heat sink upside down so as not to contaminate the thermal grease.
7.
8.
Open the processor cover. See
9.
Lift the processor vertically out of the socket. Leave the processor cover and release lever in the open position so that the socket is ready for the new
processor. See
Figure 5-10. Installing and Removing the Processor
10.
Unpack the new processor and heat sink.
11.
Ensure that the processor socket release lever is in the fully open position.
12.
Align the pin 1 corners of the processor and socket. See
.
13.
Set the processor lightly in the socket and ensure that the processor is level in the socket. When the processor is positioned correctly, press it gently to
seat it in the socket.
14.
Close the processor cover.
NOTICE:
You must position the processor correctly in the socket to avoid damaging the processor and the system board when you turn on the system.
Be careful not to touch or bend the pins on the socket.