Fan assembly, Removing the fan assembly, Installing the fan assembly – Dell PowerEdge 850 User Manual
Page 119
13.
To test the newly installed battery, see "
Troubleshooting the System Battery
" in "Troubleshooting Your System."
Fan Assembly
The fan assembly contains two fans and provides cooling for the processor and memory modules.
Removing the Fan Assembly
1.
Open the system. See "
Opening the System
" in "Troubleshooting Your System."
2.
Remove the cooling shroud. See "
."
3.
Disconnect the fan assembly's power cable from the system board. See
4.
Disconnect the PCI fan cable from the fan assembly connector, if present.
5.
Remove the data cable from hard drive 1 if installed. See
6.
Pull the cables out of the fan assembly's cable tray. See
.
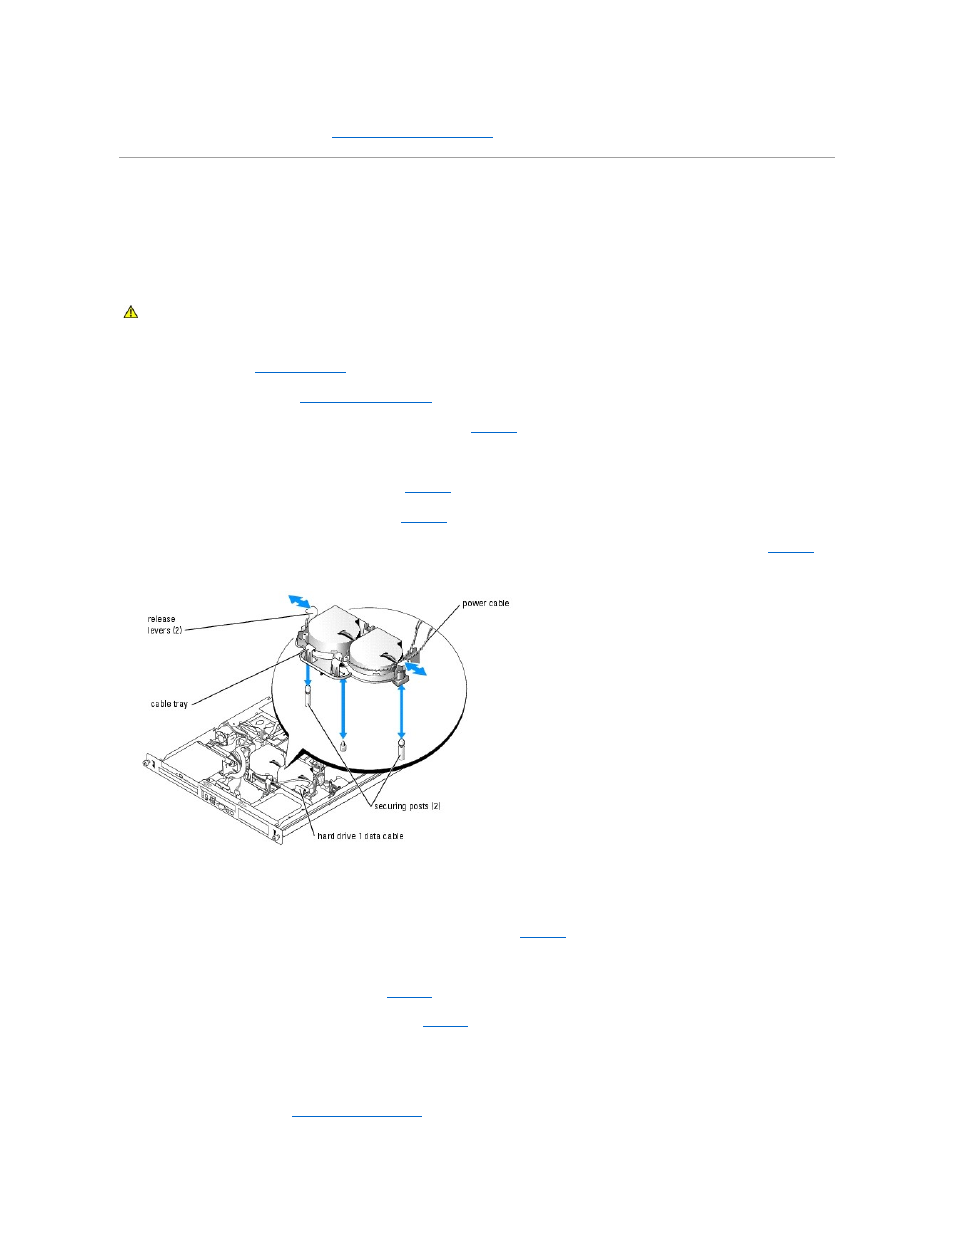
7.
Figure 5-3. Installing and Removing the Fan Assembly
Installing the Fan Assembly
1.
Align the holes in the fan assembly with the two fan assembly securing posts. See
.
2.
Lower the fan assembly until the release levers snap onto the securing posts.
3.
Route the cables in the fan assembly cable tray. See
.
4.
Reconnect the hard drive 1 data cable to the hard drive. See
.
5.
Reconnect the PCI fan cable to the fan assembly connector, if applicable.
6.
Reconnect the fan assembly power cable to the system board.
7.
Install the cooling shroud. See "
."
CAUTION:
Only trained service technicians are authorized to remove the system cover and access any of the components inside the system.
Before performing any procedure, see your Product Information Guide for complete information about safety precautions, working inside the
computer and protecting against electrostatic discharge.