Changing between tower and desktop orientations, Drive-panel inserts – Dell Precision 390 User Manual
Page 107
Back to Contents Page
Changing Between Tower and Desktop Orientations
Dell Precision™ Workstation 390 User's Guide
1.
Follow the procedures in
Before You Begin
.
2.
Remove the computer cover (see
Removing the Computer Cover
).
3.
Remove the front panel. See
Removing the Front Panel
.
4.
Remove the drive panel. See
Removing the Drive Panel (Tower Computer)
.
5.
Prepare the desktop computer's drive panel by adding or removing inserts as needed.
Drive-Panel Inserts
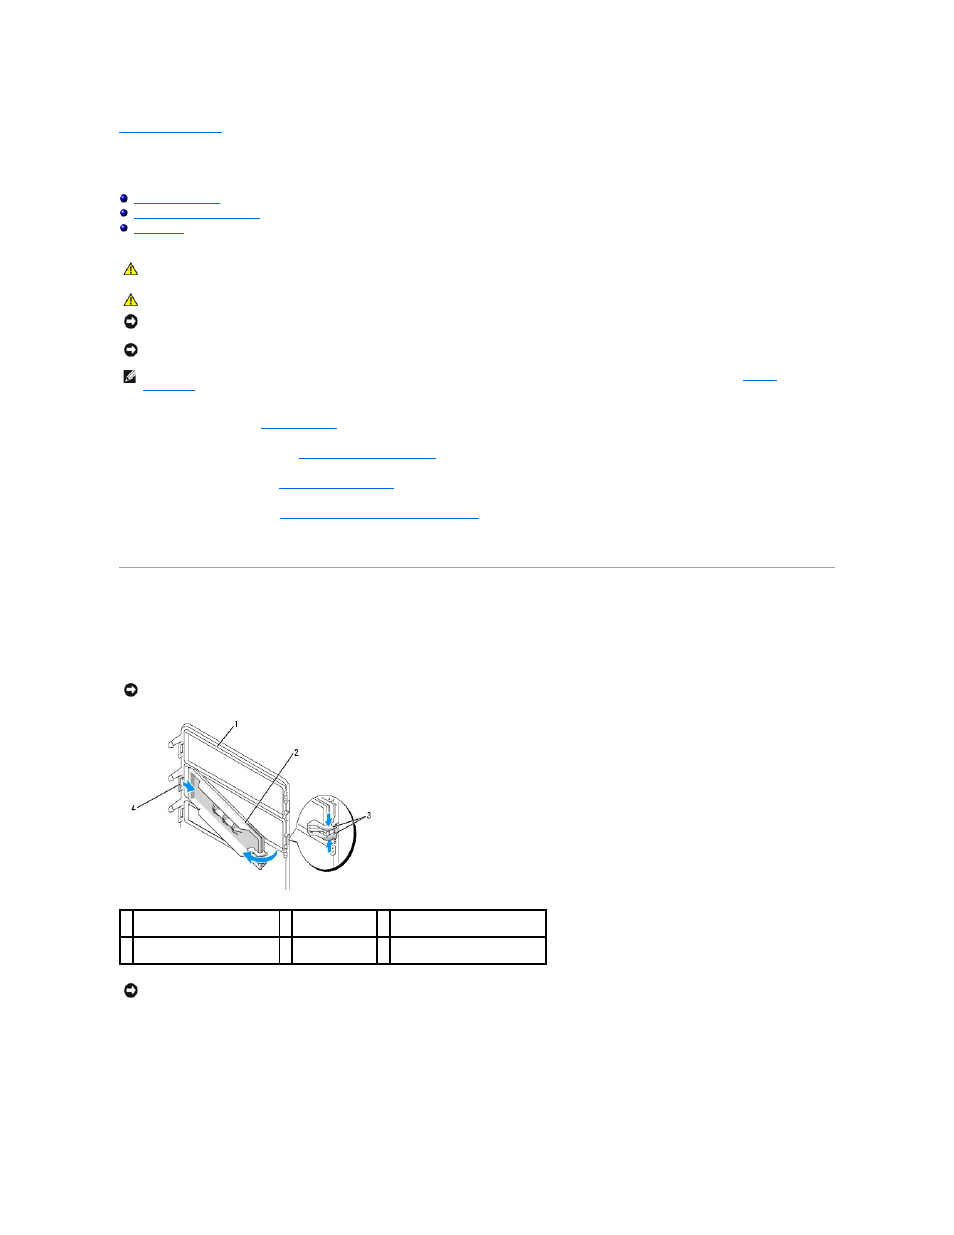
Removing Drive-Panel Inserts From the Desktop Computer Drive Panel
1.
On the inside of the drive panel, pinch the two drive-panel insert release tabs together and pull the insert out and to the right just enough to release it
from the drive panel.
2.
Set the drive-panel insert aside in a secure location.
CAUTION:
Before you begin any of the procedures in this section, follow the safety instructions in the Product Information Guide.
CAUTION:
To guard against electrical shock, always unplug your computer from the electrical outlet before opening the cover.
NOTICE:
To prevent static damage to components inside your computer, discharge static electricity from your body before you touch any of your
computer's electronic components. You can do so by touching an unpainted metal surface on the computer.
NOTICE:
To avoid damage to a drive, do not set it on a hard surface. Instead, set the drive on a surface, such as a foam pad, that will sufficiently
cushion it.
NOTE:
To change your computer to either the tower or the desktop orientation, you must use an optional kit available from Dell. See
Product
Information
for more details on ordering from Dell.
NOTICE:
Drive-panel inserts may contain screws on the inside. You can attach the screws to new drives that do not have any screws.
1 drive panel
2 drive-panel
insert
3 drive-panel insert release tabs
(2)
4 drive-panel insert tab in tab
slot
NOTICE:
To avoid breaking the drive-panel insert tab, do not pull the insert more than approximately 1 cm (½ inch) away from the drive panel before
sliding the tab out of the slot.