Installing a ssd hard-drive carrier – Dell PowerEdge C8000 User Manual
Page 45
Installing System Components
45
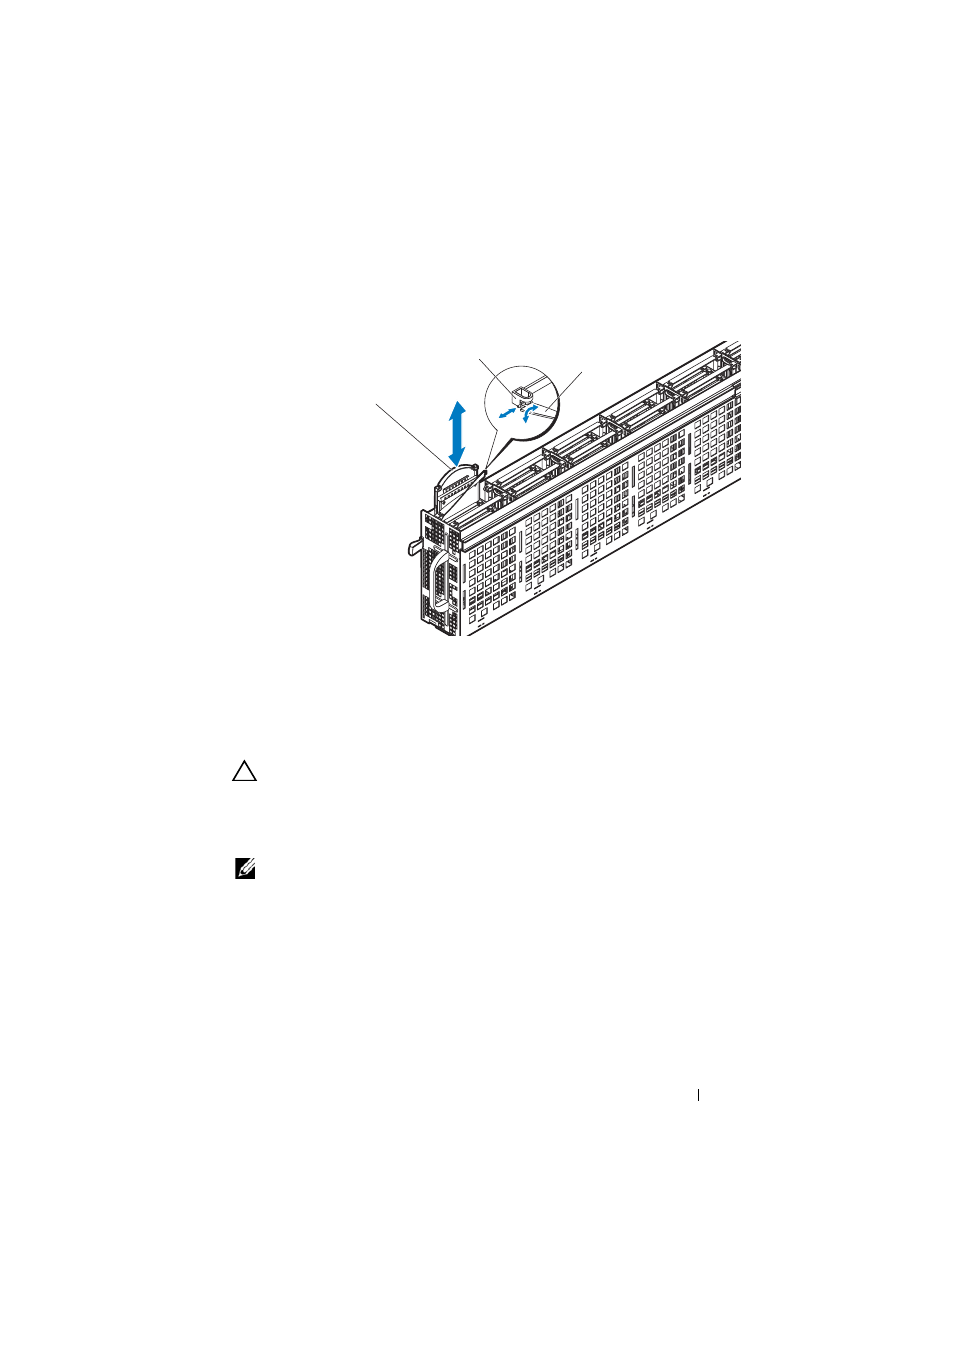
Figure 2-11. Removing and Installing a SSD
Hard-Drive Carrier
Installing a SSD Hard-Drive Carrier
CAUTION:
Many repairs may only be done by a certified service technician. You
should only perform troubleshooting and simple repairs as authorized in your
product documentation, or as directed by the online or telephone service and
support team. Damage due to servicing that is not authorized is not covered by
warranty. Read and follow the safety instructions that came with the product.
NOTE:
Orient the SSD hard-drive carrier so that the carrier’s strap handle is flush
against the wall of the hard-drive cage.
1 Rotate the expansion hard-drive carrier’s strap handle to unlock it from the
hard-drive carrier. See Figure 2-11.
2 Slide the SSD hard-drive carrier into the expansion hard-drive carrier until
the SSD hard-drive is fully seated.
3 Fit the t-shaped end of the expansion hard-drive carrier’s strap handle into
the notch and then twist to lock the strap handle. See Figure 2-11
4 Close the sled. See "Closing the Sled" on page 29.
1
SSD hard-drive carrier
2
expansion hard-drive carrier notch
3
expansion hard-drive carrier’s strap
handle
1
2
3