I/o panel, I/o-panel components, Removing the i/o panel – Dell Precision 690 User Manual
Page 104
Back to Contents Page
I/O Panel
Dell Precision™ Workstation 690 User's Guide
I/O-Panel Components
Removing the I/O Panel
1.
Follow the procedures in
Before You Begin
.
2.
Remove the computer cover (see
Removing the Computer Cover
).
3.
Remove any full-length expansion cards (see
Removing an Expansion Card
).
CAUTION:
Before you begin any of the procedures in this section, follow the safety instructions in the Product Information Guide.
CAUTION:
To guard against electrical shock, always unplug your computer from the electrical outlet before opening the cover.
NOTICE:
To prevent static damage to components inside your computer, discharge static electricity from your body before you touch any of your
computer's electronic components. You can do so by touching an unpainted metal surface on the computer.
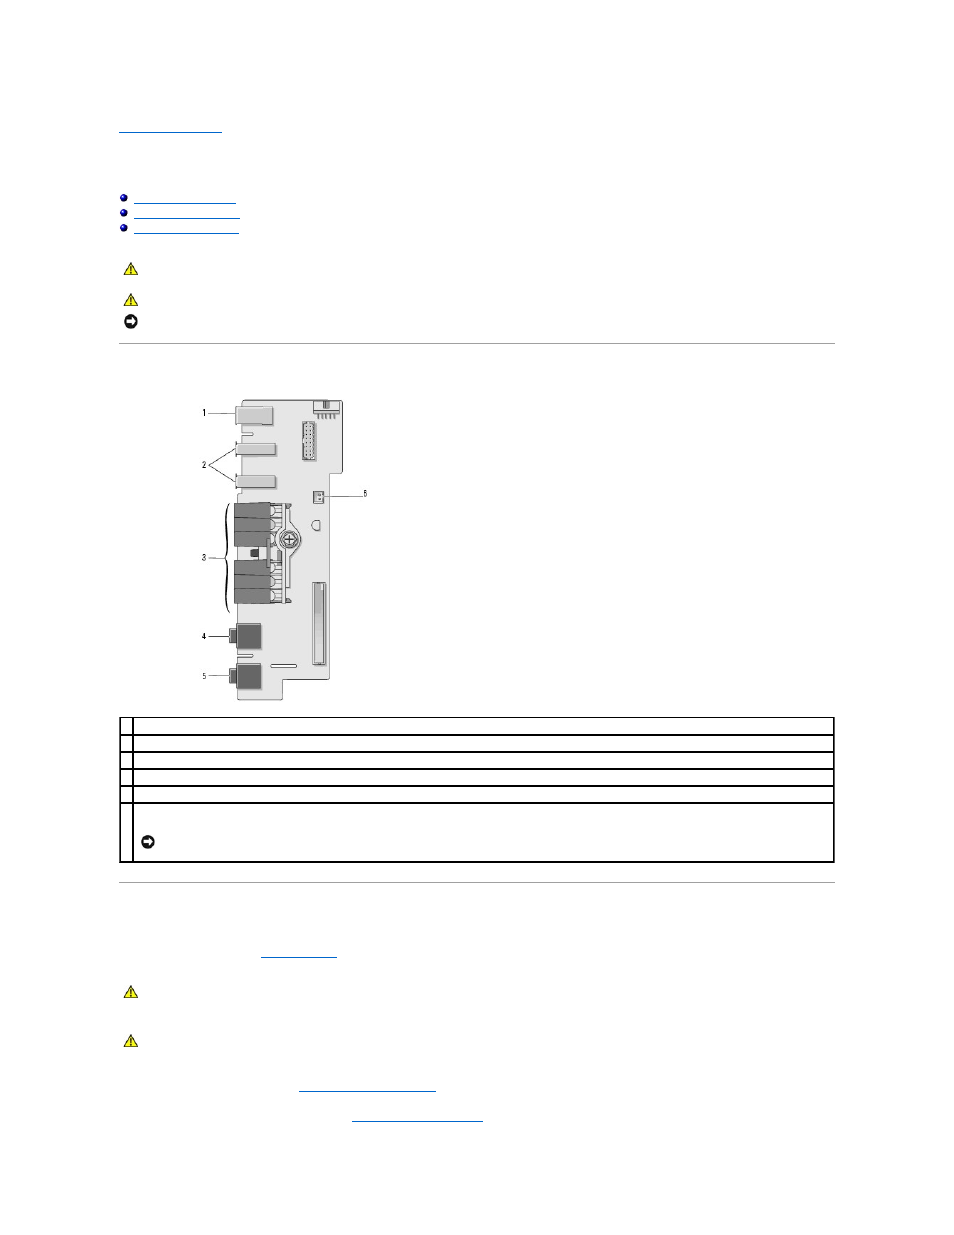
1 IEEE 1394 connector
2 USB ports (2)
3 diagnostic, hard-drive access, and network integrity lights
4 microphone connector
5 headphone connector
6
front-panel air temperature sensor
NOTICE:
The front-panel temperature sensor cable must be installed in this connector at all times while your computer is running or thermal
problems may result.
CAUTION:
Your computer is heavy (it has an approximate minimum weight of 55 lbs) and can be difficult to maneuver. Seek assistance before
attempting to lift, move, or tilt it; this computer requires a two-man lift. Always lift correctly to avoid injury; avoid bending over while lifting. See
your Product Information Guide for other important safety information.
CAUTION:
The computer stand should be installed at all times to ensure maximum system stability. Failure to install the stand could result in the
computer tipping over, potentially resulting in bodily injury or damage to the computer.