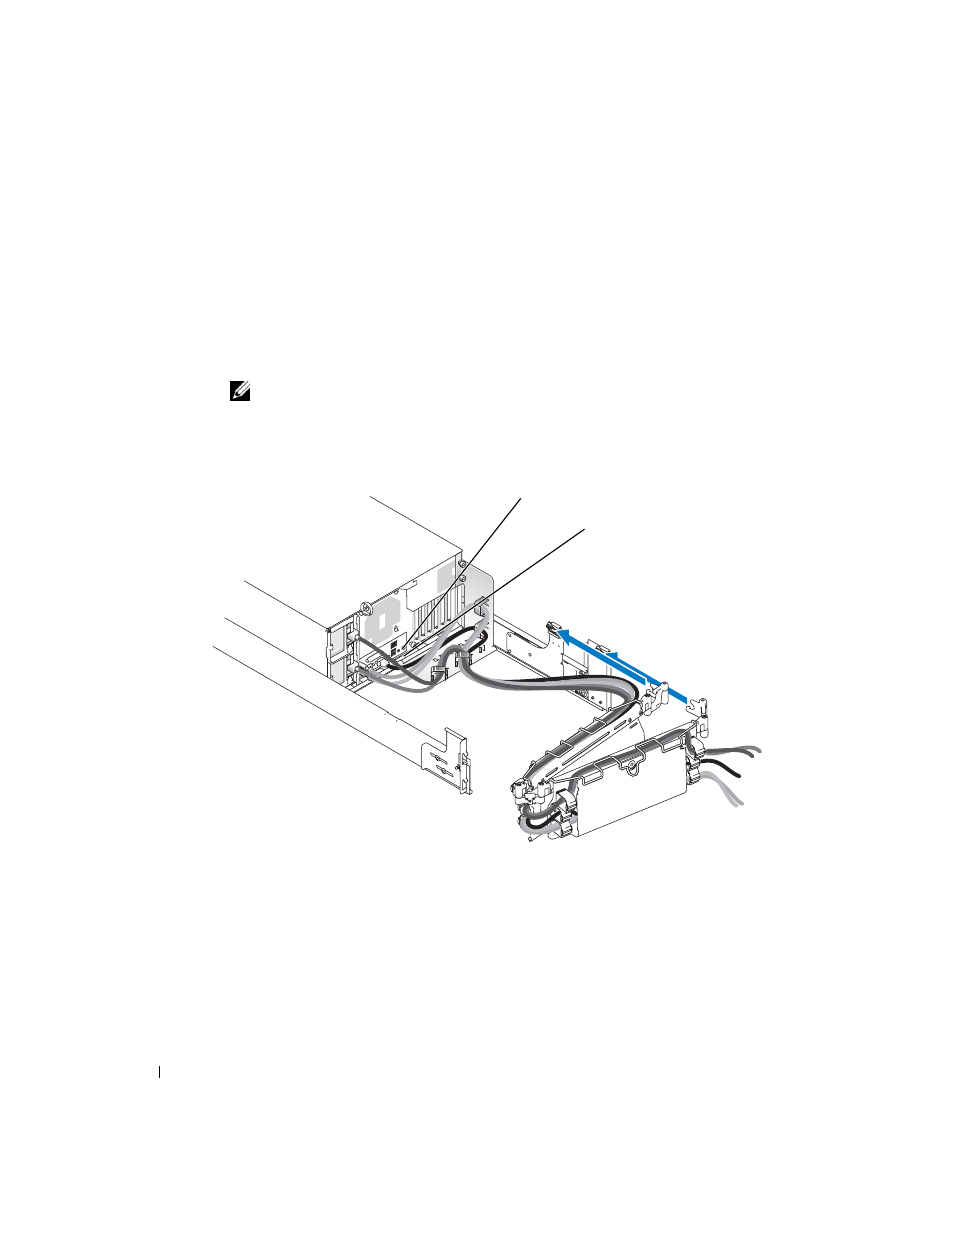
Figure 1-10, Routing the power cords – Dell PowerEdge 1800 User Manual
Page 20
1-18
Rack Installation Guide
12
Secure the cables to the cable-management arm:
a
After connecting the cables to the system, unscrew the thumbscrews that secure the
front of the system to the front vertical rail.
b
Slide the system forward to the fully extended position.
c
Route the cables along the cable-management arm, make any adjustments needed to
the cable slack at the hinge positions, secure the cables to the cable-management arm
with the straps, and close the wire covers over the cable-management arm.
NOTE:
As you pull the system out to its furthest extension, the slide assemblies will lock in the
extended position. To push the system back into the rack, press the slide release latch on the side
of the slide, and then slide the system completely into the rack.
Figure 1-10.
Routing the Power Cords
13
Slide the system in and out of the rack to verify that the cables are routed correctly and do
not bind, stretch, or pinch with the movement of the cable-management arm.
14
Open the wire cover of the cable-management arm and tighten the straps just enough to
ensure that the cable slack is neither too tight to cause excessive pinching nor too loose, yet
keep the cables from slipping as the system is moved in and out of the rack.
15
Secure the cable-management arm retainer to the back of the rack using the captive
thumbscrews (see Figure 1-8).
power cord plug
power receptacle housing