Figure 1-8, Installing the cable-management arm – Dell PowerEdge 1800 User Manual
Page 18
1-16
Rack Installation Guide
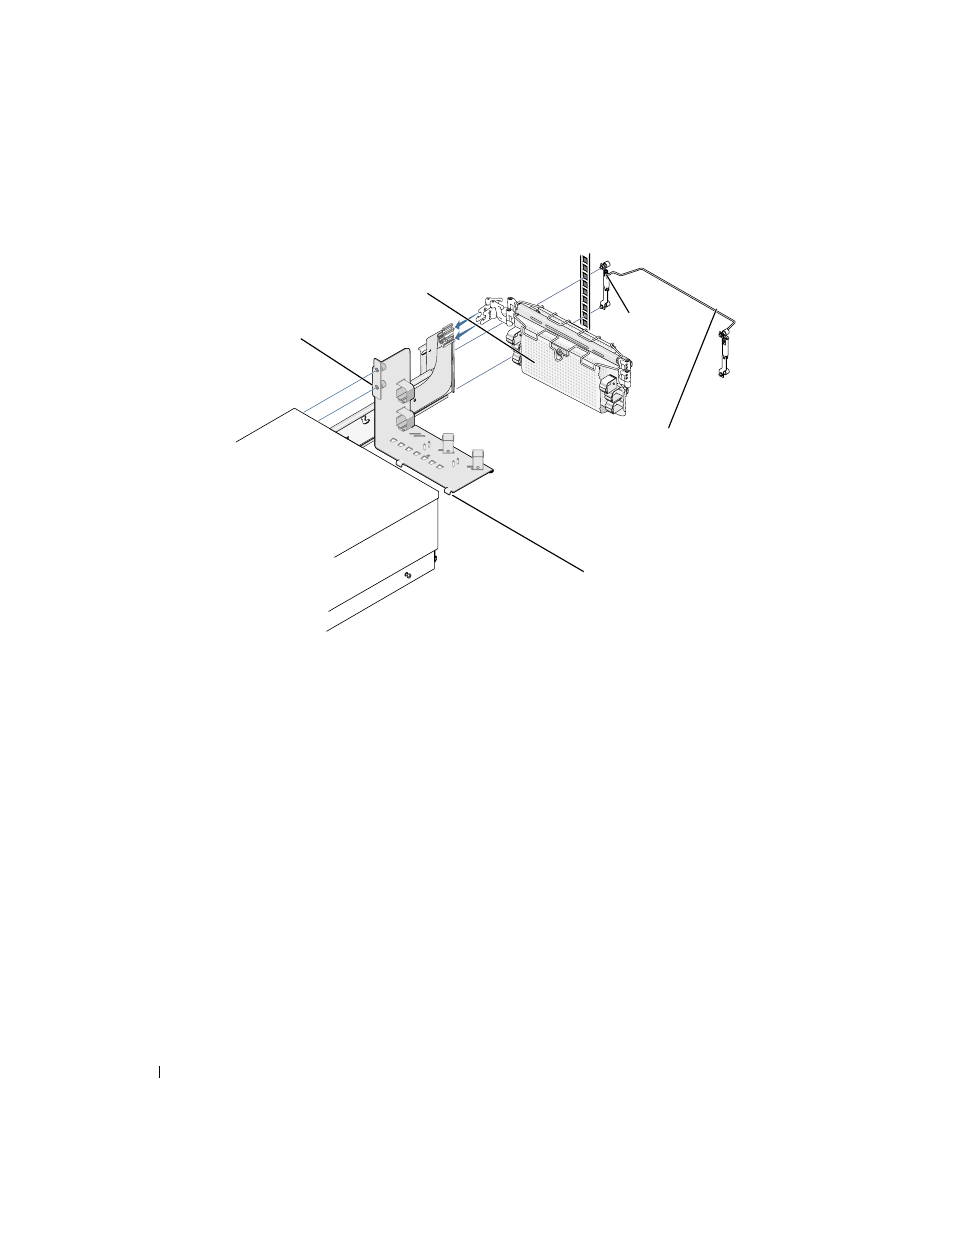
Figure 1-8.
Installing the Cable-Management Arm
2
Push the tab on the back end of the cable-management arm into the latch on the end of
the slide assembly (see Figure 1-8).
The latch clicks when locked.
3
Push the tab on the front end of the cable-management arm into a matching latch on the
inner segment of the slide assembly (see Figure 1-8).
The latch clicks when locked.
4
Install the system status indicator cable plug into its connector (see Figure 1-9).
5
Open the wire covers on the cable-management arm by lifting the center of the wire over
the top of the embossed round button on the front of the forward part of the arm and
lifting the wire over the top of a similar round button on the back part of the arm.
The wire cover swings open to enable cables to be routed within the arm.
6
Route the system status indicator end of the cable through the cable-management arm,
and install the indicator in its slot at the back end of the cable-management arm
(see Figure 1-9).
cable-management arm
back of system
captive
thumbscrew
cable tray
back of rack
metal tabs
cable-management
arm retainer