Install wing box frames – Great Plains 3S-3000HDF Predelivery Manual User Manual
Page 13
Assembly 11
12/09/2009
195-068Q
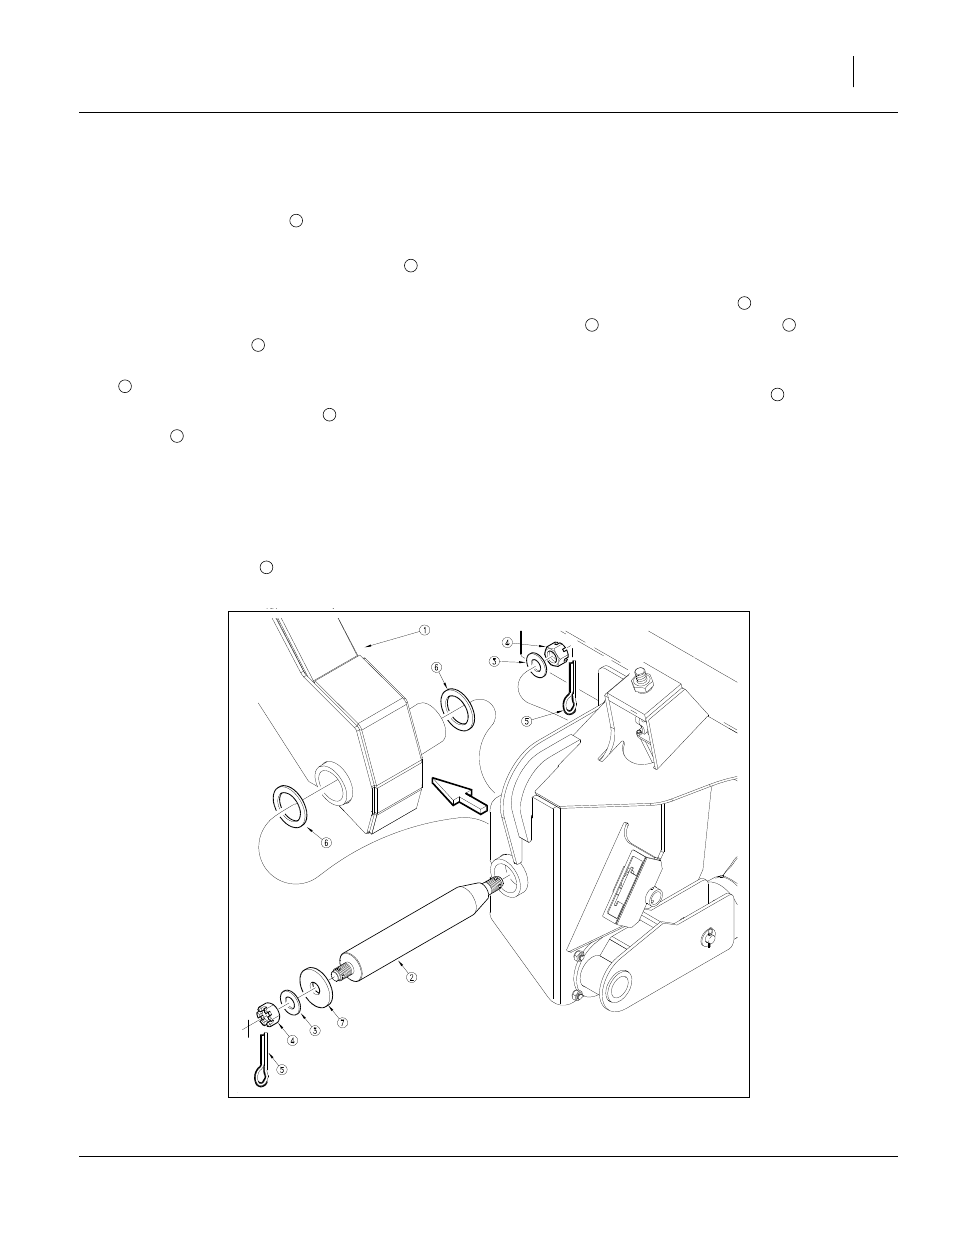
Install Wing Box Frames
Refer to Figure 5
11. Unfold the wing toolbars
until they contact the
center box frame.
12. Remove the horizontal tool bar pivot pins
from
the wing box frames. Position a wing box frame
pivot to line up with the pivot tube on the wing tool-
bar.
13. Install the pivot pin
from the front (with the taper
pointing back) placing one
1
/
4
in thick thrust washer
on each side of the tool bar pivot.
14. Assemble a 1
1
/
4
in flat washer
, and 1
1
/
4
in hex slot-
ted nut
on the back side of the pin.
Torque this rear nut to 600 ft-lbs to properly seat the
pin into the taper before proceeding with the assem-
bly. Use the cotter pin hole on the front end of the
pin to prevent rotation while you tighten the rear nut.
15. After torquing to 600 ft-lbs, secure the nut with a
5
⁄
16
x 2
1
/
2
in cotter pin
by rotating the slot in the nut
to the next available cotter pin hole in the pin.
There are two cross holes so the slot in the nut
should align with a hole with less than
1
⁄
12
additional
rotation of the nut.
16. Install the large hinge washer
, the 1
1
/
4
in flat
washer
, and the 1
1
/
4
in slotted nut
on the front
side of the pin.
17. Torque the front 1
1
/
4
in slotted nut to 400 ft-lbs and
assemble the
5
⁄
16
x2
1
/
2
in cotter pin
in the next
available cross hole.
Note: Torquing the rear nut (on the tapered end of the
pin) is easiest when the opener frames are low-
ered. Consider waiting until the hydraulics are
charged and the openers lowered before torquing
the horizontal pin 1
1
/
4
in nuts. Always torque the
rear nuts before drawing up the front nuts.
Figure 5
Wing Box Pivot
15610
1
2
2
6
3
4
5
7
3
4
5