Great Plains 3S-4000HD Assembly Instructions User Manual
Page 16
12
3S-4000/F/HD/HDF SGS
Great Plains Manufacturing, Inc.
133-322M
2012-12-11
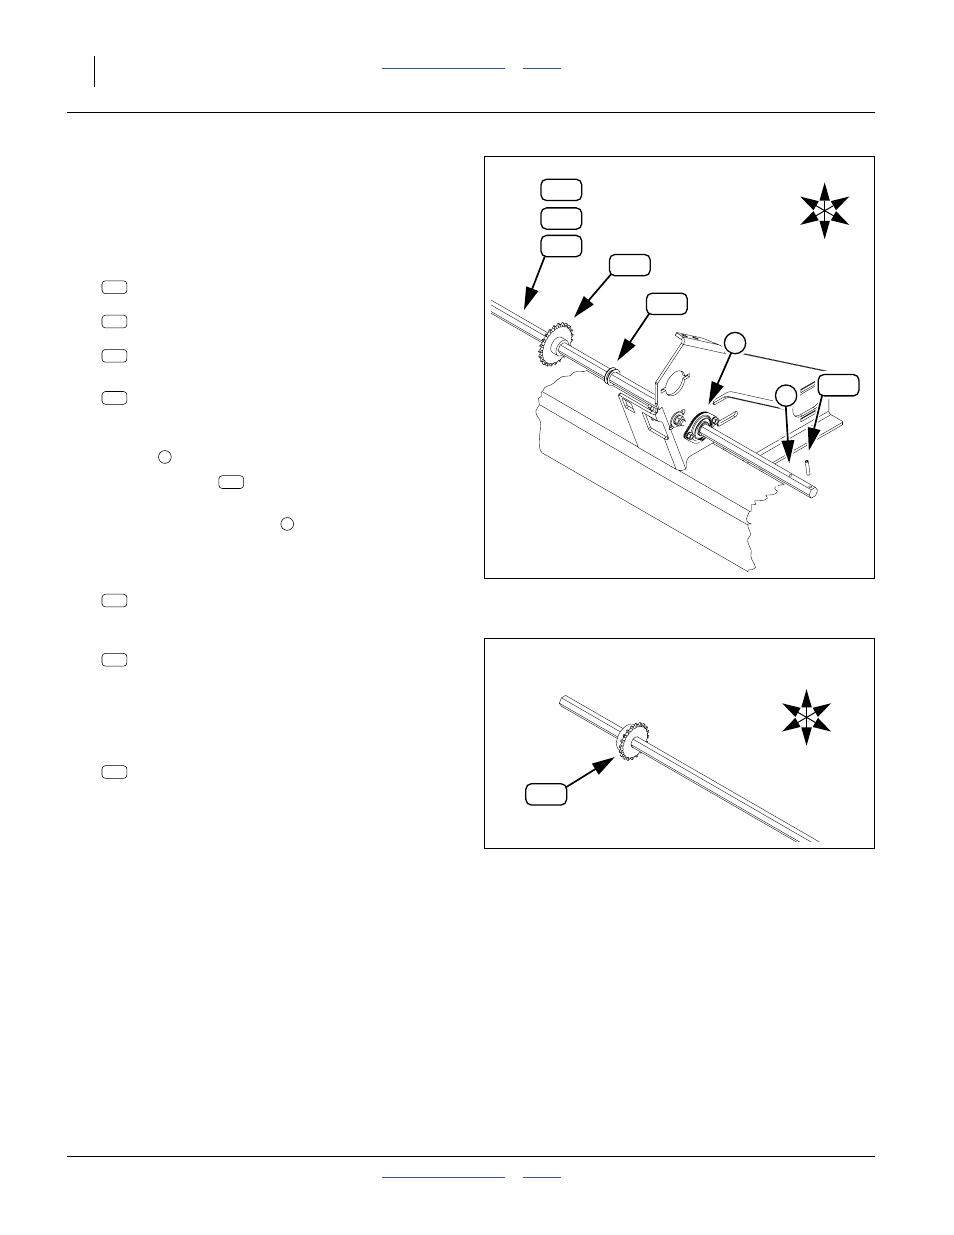
Refer to Figure 15, which depicts the clutch bearing plate with
numerous components removed for clarity.
Jackshafts are different lengths for each drill section.
These steps are otherwise identical. Start with the left
drill section.
47. Select one each new:
For the left section, the 90 inch shaft:
195-272D HEX SHAFT 7/8,4000 FERT JS LH
For the center section, the 72.75 inch shaft:
195-270D HEX SHAFT 7/8,4000 FERT JS CTR
For the right section, the 48.5 inch shaft:
195-271D HEX SHAFT 7/8,4000 FERT JS RH
48. Select one each new:
805-180C PIN ROLL 1/4 X 1 1/2 LG PLT
49. From the right side of the clutch bearing plate, insert
the shaft end with the pin holes through the
bearing
installed at step 43.
50. Drive the roll pin
through the hole nearest the
end of the shaft.
Note: Leave the other pin hole
open until step 71. The
shaft needs to slide aside to mount the Small
Seeds drive and accept the other end of the shaft.
51. Select two new:
804-061C WASHER MACH 1.50 X 1.00 X 18GA
Slide them onto the shaft from the right side.
52. Select one new:
808-256C SPKT 40C23 X 7/8 HEX BORE
Orient it with the side having the wider hub to drill
left (toward the clutch bearing plate). Slide it onto
the shaft from the right side.
Refer to Figure 16
53. Select one new:
808-194C SPKT 40B22 7/8 HEX BORE & SS
Orient it with the set screw hub to drill right and slide
it onto the shaft. Use the set screws to temporarily
secure it about 10 inches (25 cm) from the end of
the shaft.
54. Repeat step 47 through step 53 for the center and
right drill sections.
U
D
F
B
L
R
120
1
2
147
142
144
119
118
Figure 15:
Jackshaft at Clutch Bearing Plate
27441
120
118
119
144
1
144
2
142
U
D
F
B
L
R
146
Figure 16:
B22 Sprocket on Jackshaft
27441
147
146