Adjusting 10 series disc contact, 10 series seed firmer adjustments, 10 series keeton adjustment – Great Plains 3N-4020 Operator Manual User Manual
Page 77
Great Plains Manufacturing, Inc.
Adjustments
73
2013-10-29
196-359M
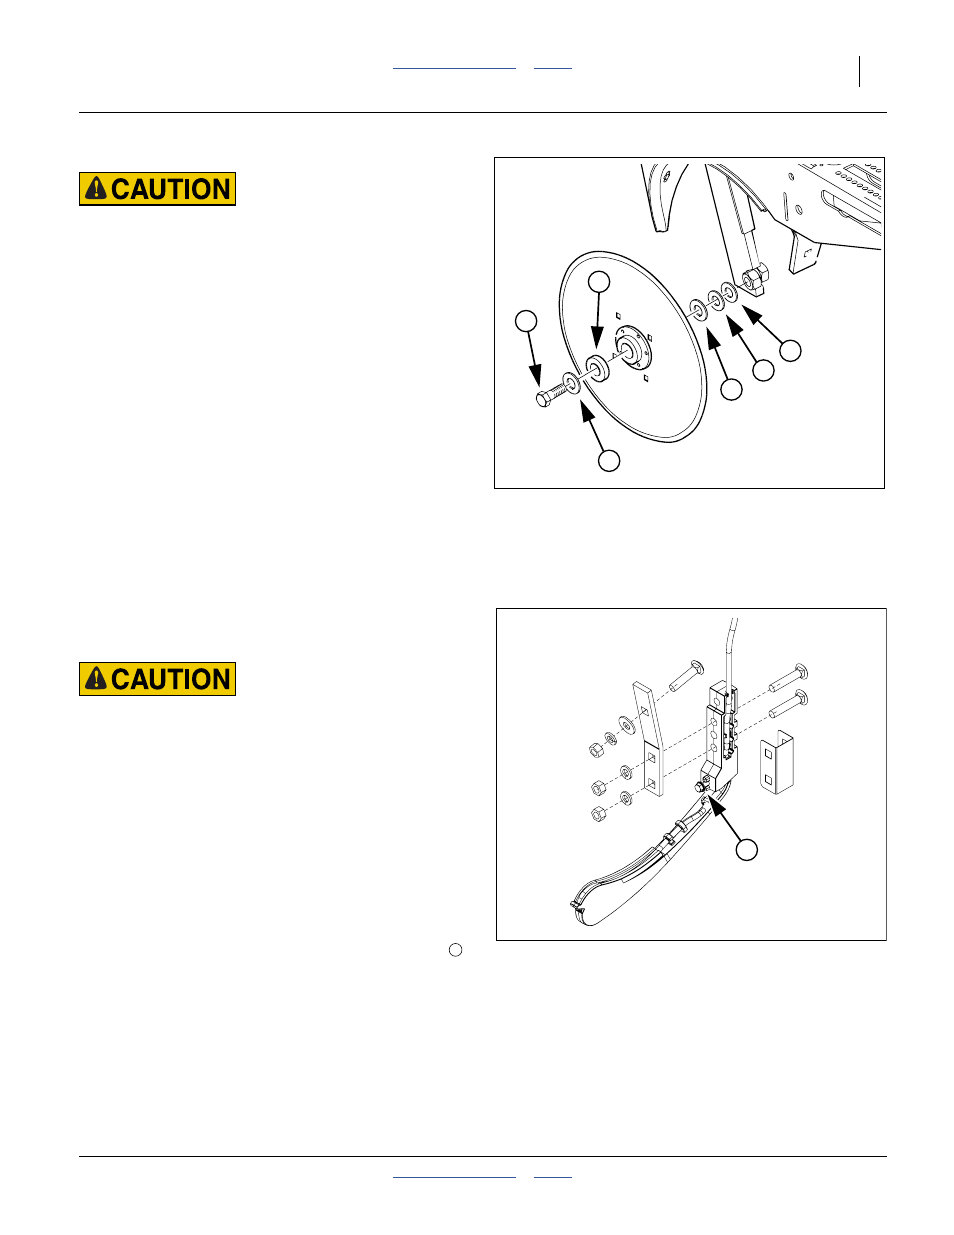
Adjusting 10 Series Disc Contact
Sharp Object Hazard:
Row unit disk blades may be sharp. Use caution when making
adjustments in this area.
Refer to Figure 107
1.
Raise the drill and install the transport locks.
2.
Remove the bolt retaining the opener disc on one
side. Carefully remove the disc, noting how many
spacers are outside the disk and inside the disk. Do
not lose the hub components and spacer washers.
3.
To reduce the spacing between the discs (the normal
case), move one spacer washer from the inside to
the outside of the disc.
4.
Re-assemble and check disc contact.
10 Series Seed Firmer Adjustments
10 Series row units include a seed flap, and accept one
of two optional seed firmers.
The seed flap requires no adjustment, but may need to
be replaced if worn, and may need to be shortened if an
optional seed firmer is added after initial delivery.
Sharp Object Hazard:
Row unit disk blades may be sharp. Use caution when making
adjustments in this area.To adjust the Keeton Seed Firmer,
lower the planter until the disks of the row units are resting on
the ground.
10 Series Keeton Adjustment
The optional Keeton Seed Firmer is an engineered poly-
mer shape that slides down the seed trench. It traps
seeds as they exit the seed tube and firms them into the
bottom of the “V”.
Refer to Figure 108
The Firmer is provided with a preset tension which is rec-
ommended for using the first year. The tension screw
can be tightened in subsequent years according to your
needs. Firmers should provide just enough tension to
push seeds to the bottom of the trench.
Figure 107: 10 Series:
Adjusting Disk Spacers
26385
2
1
3
3
3
3
Figure 108: 10 Series:
Keeton Seed Firmer
26390
1
1