Console functions, Basic operation, Power up – Great Plains 3N-4020 Operator Manual User Manual
Page 41: Seed rate, Power off, Console functions basic operation, Power up seed rate power off
Great Plains Manufacturing, Inc.
Hydraulic Drive Operation
37
2013-10-29
196-359M
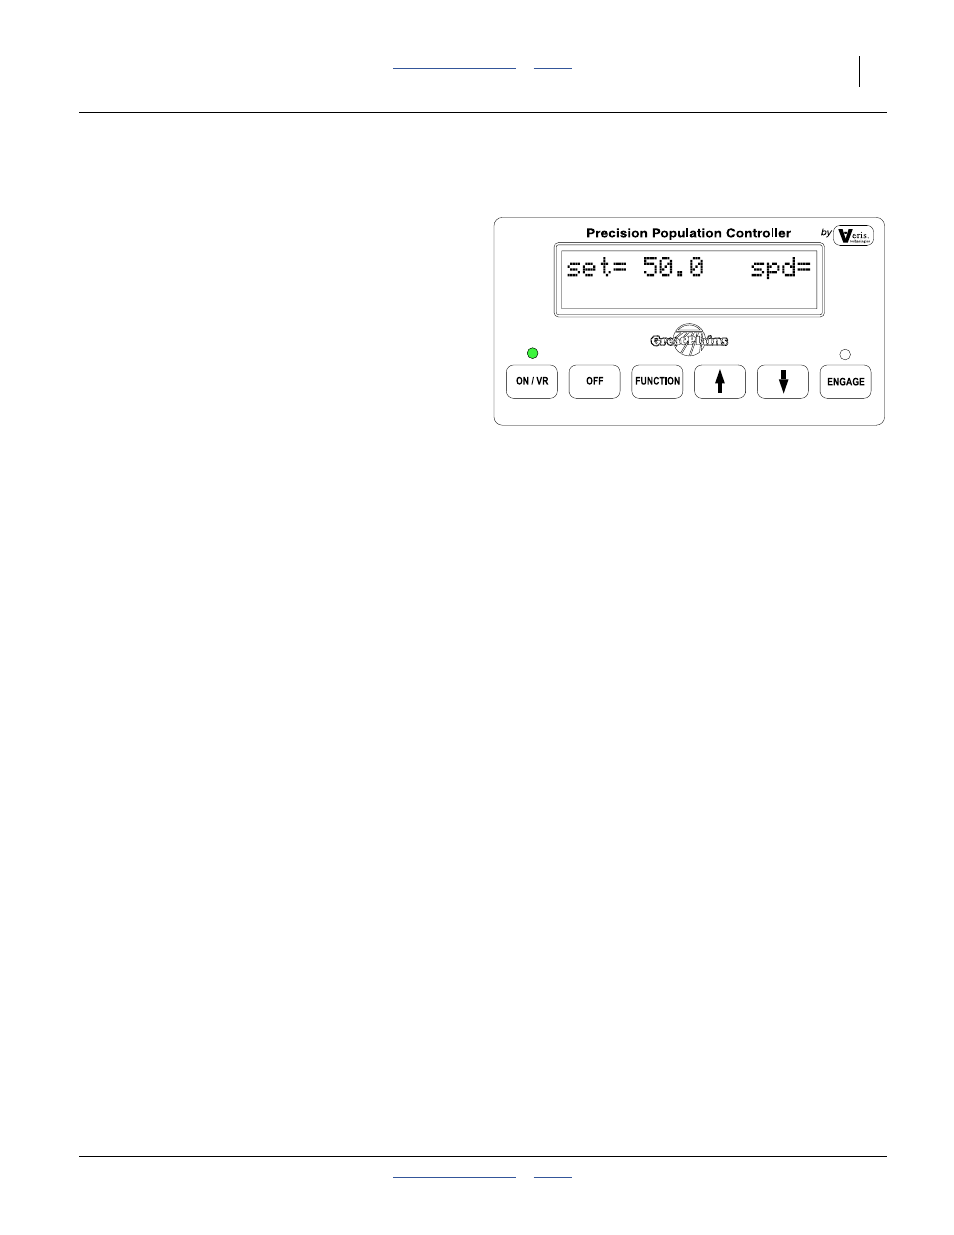
Console Functions
Refer to Figure 36 (depicting the console in Manual mode)
Basic Operation
Power Up
Refer to Figure 36
To power-on the controller, press the ON/VR button
once. This powers up the console in Manual mode, and
also powers up the external module on the drill (if con-
nected).
The green LED above the button illuminates, and a dis-
play appears showing:
set=
the currently active seeding rate
Shortly thereafter the display also shows:
spd=
(over 0.0), the current speed, and
out= 0.0
, the current system operating rate.
Once the console is powered up, the ON/VR button tog-
gles between Manual and VR (Variable Rate) mode.
Note: It is possible to enter all setup information with the
console connected to power, but disconnected
from the drill. Operations requiring motion, such
as calibrations, must be performed hitched (but
generate harmless errors if undertaken with only
the console powered).
Seed Rate
In Manual mode, use the
⇑
/
⇓
arrow buttons to set the
desired seed rate (in pounds/acre or kg/ha). Or use
FUNCTION to select Preset mode, and the
⇑
/
⇓
arrow
buttons to alternate between preset rates (see page 54).
In VR mode, the seed rate is set by an external “recipe”
program or external controller. The
⇑
/
⇓
arrow buttons can
override the current rate. VR mode is not documented in
this manual.
Power Off
Press the OFF button to shutdown.
• ON/VR button:
turns drive system on.
Press twice for VR (Variable Rate) mode.
• OFF button:
used to shut off Console.
Note: This also turns off power to the external control-
ler module and ground speed radar.
• FUNCTION button:
used in Calibration modes, and to programming Pre-
sets and downloading recipes.
•
⇑
/
⇓
Arrow buttons
used to change rates manually, enter setup data and
select options.
• ENGAGE button:
press to start drive.
Note: ENGAGE button must also be pressed to start
drive operation.
Note: Drive does not run unless light above both ON/VR
and ENGAGE buttons are illuminated.
Figure 36
Controller Button Functions
22710