Scraper installation – Great Plains 1007NT Operator Manual User Manual
Page 80
76
1007NT
Great Plains Manufacturing, Inc.
150-290M
10/06/2010
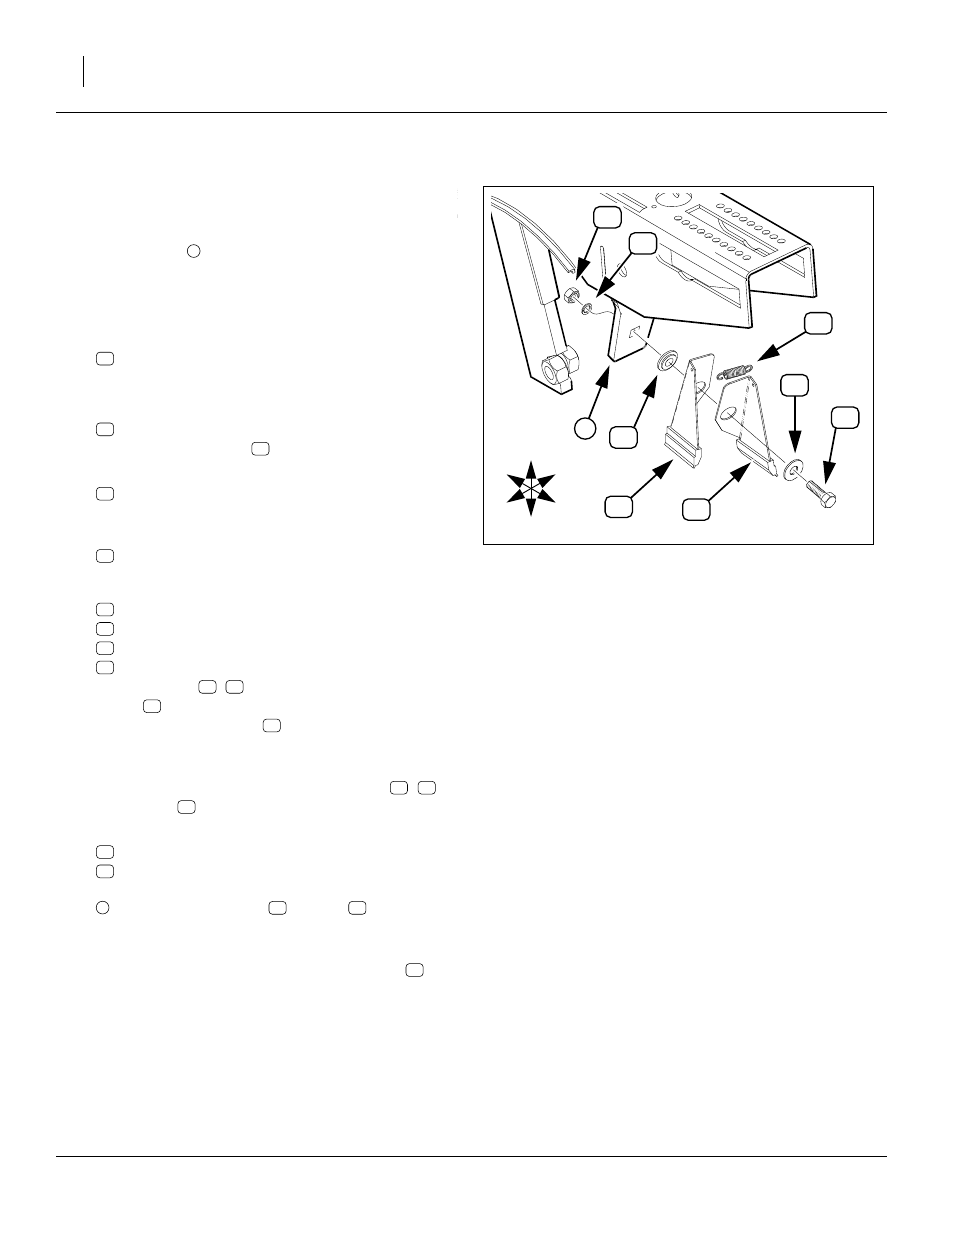
Scraper Installation
Optional carbide disc scrapers are not factory installed.
Start with row 1 (left-most row unit):
1.
Remove one or both disc blades to gain safe access
to the mount
. Note the position of bushings and
spacers for correct re-assembly (page 45).
2.
Remove the existing slotted scraper.
Select one:
802-079C HHCS 3/8-16X1 1/4 GR5
If Seed-Lok is present, or also being mounted,
also select one:
804-013C WASHER LOCK SPRING 3/8 PLT
Place the lock washer
on the bolt.
4.
Select one:
804-012C WASHER FLAT 3/8 SAE PLT
Place this flat washer on the bolt.
5.
Select one:
890-357C SCRAPER-SPRING LOAD-AIR DES
If the blades were not completely pre-assembled,
select one each:
K7090 AIR DESIGN SCRAPER LH SIDE
K7091 AIR DESIGN SCRAPER RH SIDE
K7092 AIR DESIGN SCRAPER SPACER
K7093 AIR DESIGN SCRAPER 15LB SPRING
Nest one side (
,
) behind the other. Connect the
spring
between the sides, using the small top
holes. Insert the spacer
from the front, with the
narrow raised center to the rear (in the large blade
holes).
6.
Insert the bolt through the scraper blades (
,
)
and spacer
.
7.
If no Seed-Lok is present, select one each:
804-013C WASHER LOCK SPRING 3/8 PLT
803-014C NUT HEX 3/8-16 PLT
Secure the scraper assembly to the scraper mount
using the lock washer
and nut
.
8.
If a Seed-Lok is present (not shown), secure the
scraper assembly to the Seed-Lok, using a threaded
hole present in the Seed-Lok. The hex nut is
unused.
9.
Re-mount the removed disc blade.
Figure 70
Scraper Installation
19000
1
30
33
32
38
35
36
U
D
L
R
R
F
37
31
30
33
33
32
34
35
36
37
38
35
36
38
37
35
36
37
33
31
33
31
31