Install left-center extension, Install center-right extension, Install right-rear extension – Great Plains 3N4010HDA Predelivery Manual User Manual
Page 38: Install rear hitch extension
36
3N-4010HDA and ADC2350B
Great Plains Manufacturing, Inc.
196-444Q
10/10/2008
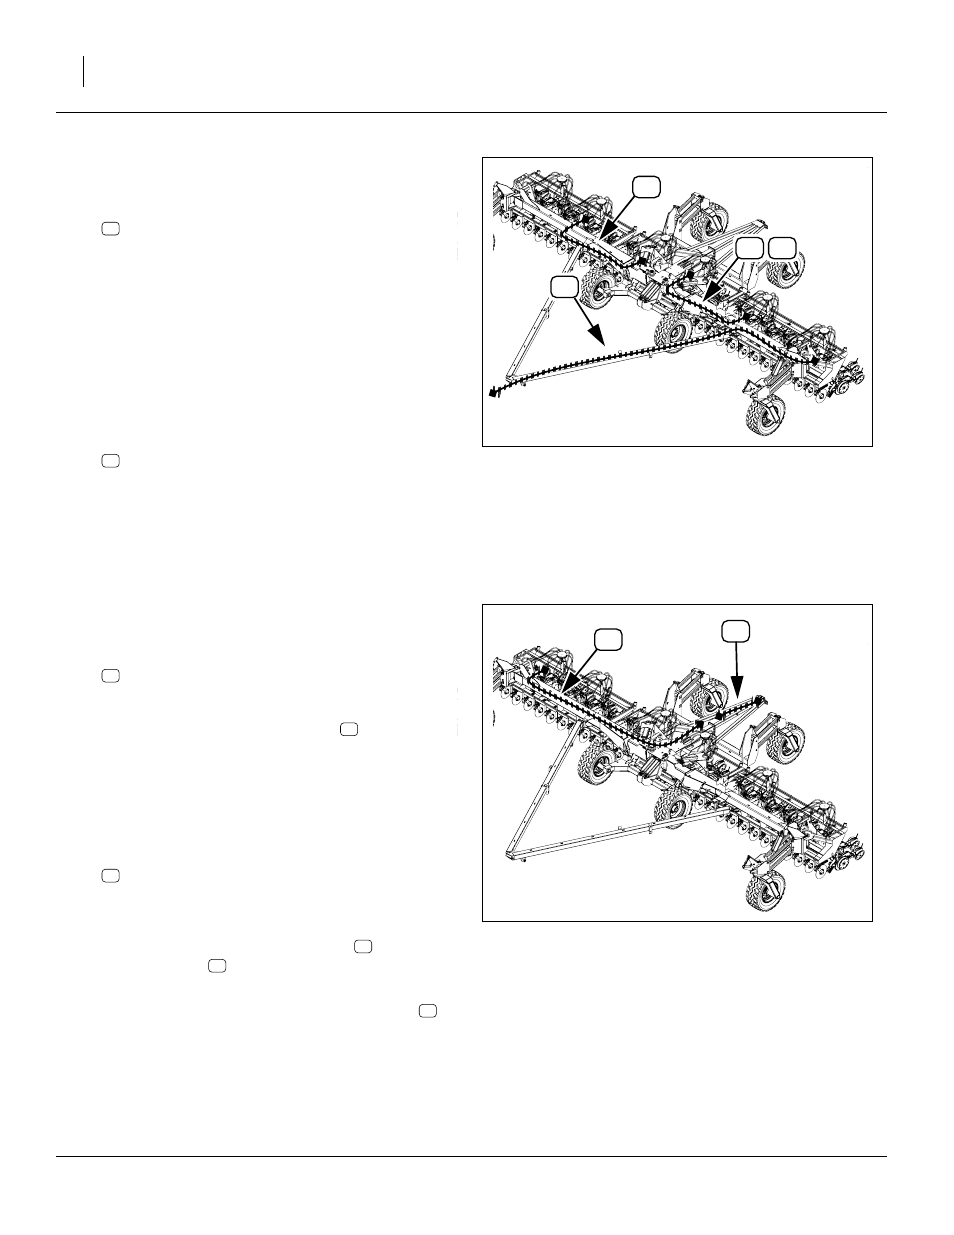
Install Left-Center Extension
Refer to Figure 47 and Figure 45 on page 35
118. Select two:
467980141 10’ EXT HARNESS
One harness is supplied with the drill, the other with
the air cart. Interconnect them, making one cable.
Connect the plug end of the extension to the WSMB
harness at Tower 2 (left mid-wing). Route the har-
ness through the hoop at the left wing pivot. Con-
nect the receptacle end to the WSMB harness at
Tower 3 (left side of center).
Install Center-Right Extension
Refer to Figure 47 and Figure 45 on page 35
119. Select one:
467980140 DJ 20’ HARNESS EXT
This harness is supplied with the blockage kit.
Connect the plug end of the extension to the WSMB
harness at Tower 4 (right side of center). Route the
harness through the hoop at the right wing pivot.
Connect the receptacle end to the WSMB harness
at Tower 5 (right mid-wing).
Install Right-Rear Extension
Refer to Figure 48 and Figure 45 on page 35
120. Select one each:
467980143 INT AG 25’ HARNESS, WSMB EXT
This harness is supplied with the blockage kit.
Connect the plug end of extension
to the WSMB
harness at Tower 6 (right wing, right end). Route the
harness through the hoop at the right wing pivot.
Route it down the center section to the rear hitch.
Install Rear Hitch Extension
Refer to Figure 48 and Figure 45 on page 35
121. Select one each:
467980360 3’ REAR HITCH HARNESS
This harness is supplied with the air cart, and not
with the drill or blockage kit.
Connect the receptacle of extension
end to har-
ness extension
. Route it down the center section
to the rear hitch.
122. Secure the round receptacle end of extension
in
the rear hitch bulkhead.
123. Use all remaining cable tie to secure all hoses and
harnesses, including the lift switch cable @ at the
rear hitch. Allow slack for cart hitching at rear, and
at pivots for folding. Allow slack at towers for raising
and lowering.
Figure 47
Blockage Harness Route (1 of 2)
27031
68
69
95
69
69
95
Figure 48
Blockage Harness Route (2 of 2)
27031
70
96
96
96
70
96
70
70