Winchester Repeating Arms 101 User Manual
Page 28
26
27
adjustment on each stud is equal up and down. When
you have determined a possible setting, lightly tighten
the stock adjustment screws and then shoulder the
firearm to test the setting. Drop adjustments are a
matter of trial and error. Adjust a little at a time until
you obtain the desired sight picture on the rib.
3. Once your desired drop at comb is obtained, secure
the cheekpiece in place by tightening the two stock
adjustment set screws on the right side of the
cheekpiece. Drop is now set on your shotgun.
b
arrel
p
orting
(S
pecial
m
oDelS
)
Some target models feature ported barrels that reduce
recoil and muzzle jump. Reducing recoil not only
increases comfort when shooting, but increases accuracy
because it is easier to pick-up the second clay target faster
due to decreased recovery time following the first shot.
Carbon can build up in the ports after shooting. To clean
them use a good quality powder solvent and pipe cleaners
to scrub away debris.
barrel Porting increases noise and MuZZle
blast. always wear hearing Protection, and
instruct bystanders to wear hearing
Protection, to Prevent hearing loss or daMage.
m
aintenance
of
o
il
f
iniSh
S
tockS
Keeping the oil-finished wood surfaces on your firearm
looking their best requires only a small amount of
maintenance. When the surfaces become spotted or dull,
the affected area(s) can be treated using rubbing alcohol
on a soft, lint free cloth and allowed to dry. A small
amount of a linseed oil-based finish, such as Watco
®
Danish Oil Finish, Deft
®
Danish Oil Finish, or Formby’s
®
Tung Oil Finish should then be applied to the surface of
the wood with a soft, lint free cloth according to the
manufacturers’ instructions. To treat the checkering,
a small amount of oil-based finish can be applied and
then distributed evenly using a toothbrush or other soft
bristled brush.
m
oDelS
With
S
pecial
f
iniSheS
As with any firearm, the only way to preserve its
pristine condition and collector appeal is to never
handle or fire it, which in turn would deprive you of
much of the enjoyment that comes with owning a fine
Winchester firearm.
While special finishes such as engraving and gold plating
greatly enhance the aesthetic appeal of your shotgun,
please be aware that they are no more durable, and in
some cases may even be slightly less durable than more
common firearm finishes.
2. Loosen both the comb adjustment stud screws
located in the top of the stock adjustment studs
using the larger (3mm) Allen wrench that is provided
(Figure 23, page 25). It only takes a fractional ¼ turn
to loosen them adequately.
3. Slide each stud equally in the desired direction.
Each mark indicates
1
⁄
16
".
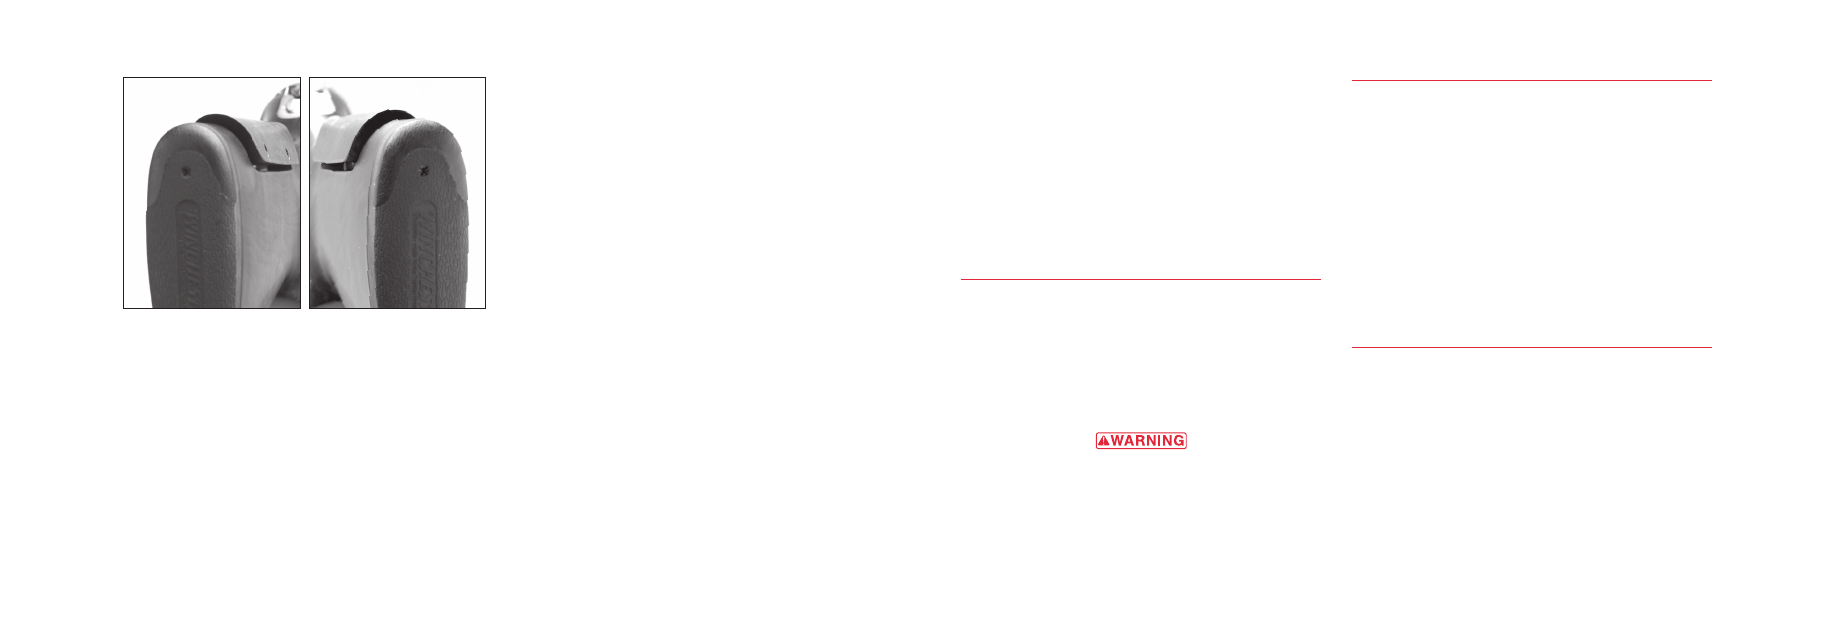
4. Move the studs to the right for cast off (Figure 24).
5. Move the studs to the left for cast on (Figure 25).
6. Right-handed shooters may desire some cast off, with
left-handed shooters preferring some cast on. The
terminology is the same for right- or left-handed
shooters. The net effect is to move the cheekpiece to
allow the face to move farther over the stock for
better eye-to-rib alignment.
7. When properly set, the front and rear sight beads
should line up perfectly each time you shoulder
your shotgun.
8. Tighten the stock adjustment screws. Be careful not to
over tighten.
9. Replace the cheekpiece onto the studs. If drop at
comb has already been set to your desired height,
tighten the two comb retaining screws securely.
If drop has not been set, leave the retaining screws
loose and proceed to “Adjusting Drop at Comb.”
a
DjuSting
D
rop
at
c
omb
Adjusting the drop at the comb allows you to align your
eye perfectly with the plane of the rib.
The drop measurement is determined by measuring the
distance between the plane formed by the top of the rib
and the top of the cheekpiece itself. The higher the
cheekpiece, the lower the drop. To set drop, perform
the following:
1. Loosen the two stock adjustment set screws on the
right side of the cheekpiece (if they were not left loose
after setting the cast) using a 3mm hex (Allen)
wrench. The cheekpiece will now move freely, up and
down on the stock adjustment studs.
2. Position the cheekpiece on the studs at the desired
drop up or down on the stock. Make sure the
Cast On
FIGURE 24
Cast Off
FIGURE 25