Winchester Repeating Arms 101 User Manual
Page 19
a
mmunition
use only shells oF the correct gauge and
length. the gauge and length oF the chaMber is
inscribed on the side oF the barrel. do not use
aMMunition other than what is inscribed on the
side oF the barrel. exaMine every shell you Put
in your shotgun. Failure to Follow this warning
could result in serious injury or death and
cause daMage to your shotgun.
use shells oF the correct length. do not use 3"
or 3½" shells in a barrel with a 2¾" or 2½"
chaMber, or 3½" shells in a barrel with a 3"
chaMber.
doing so can result in a builduP oF
dangerously high Pressures. Failure to Follow
this warning could result in serious injury or
death and cause daMage to your shotgun.
do not Put a 16 gauge shell or a 20 gauge shell
in a 12 gauge shotgun. do not Put a 28 gauge
shell in a 20 gauge shotgun. do not Put a .410
bore shell in a 28 gauge shotgun. never Put
Metallic shells oF any Kind in a shotgun.
sPeciFically, never Put centerFire riFle or
Pistol shells in a shotgun chaMbered For .410
bore. Failure to Follow this warning could
result in serious injury or death and cause
daMage to your shotgun.
The most certain way to bulge or rupture a shotgun barrel
is to load a smaller gauge shell into a larger gauge chamber.
The smaller gauge shell will not fall completely through
the barrel; its rim is caught by the front of a larger gauge
chamber or at the larger gauge’s choke. Your shotgun will
misfire (with the chamber appearing to be empty). It is
then possible to load the correct gauge shell behind the
smaller gauge shell. If the shotgun is then fired, the result
will be a so-called “12-16, 12-20, 20-28 or 28-.410 burst”
which can cause extensive damage to your shotgun and
possible serious injury to you and others.
We can assume no responsibility for incidents which occur
through the use of shells of nonstandard dimension or
those developing pressures in excess of SAAMI (Sporting
17
Disassembling your shotgun into its two assembly
components is an ideal way to ready your shotgun for
storage and cleaning. Many luggage-style cases require
doing this. It is also a way to add an extra measure of
safety when storing your firearm.
1. Make sure your shotgun is unloaded and make sure
that the “safety”/selector is in the on safe position.
2. Remove the forearm by pulling outward on the
forearm release latch and pulling the forearm away
from the barrels. Pull the front-most end of the
forearm away and slightly forward, completely
detaching it from the barrel set and the front of
the receiver.
use care when reMoving the ForearM. do not
Pull down too hard on the ForearM or Pull it
away FroM the barrels too Far. doing so May
cracK the ForearM.
3. Grasp the barrels ahead of the receiver and push the
top lever to the right with your thumb. Rotate the
barrels downward until they separate from the
receiver. Be sure to support the barrels and buttstock
carefully. When the barrels are fully down, carefully
lift the hinge portion of the barrels (at the receiver)
upward out of the receiver, separating the barrels from
the receiver (Figure 16).
4. If you are cleaning your shotgun, this is the ideal level
of disassembly.
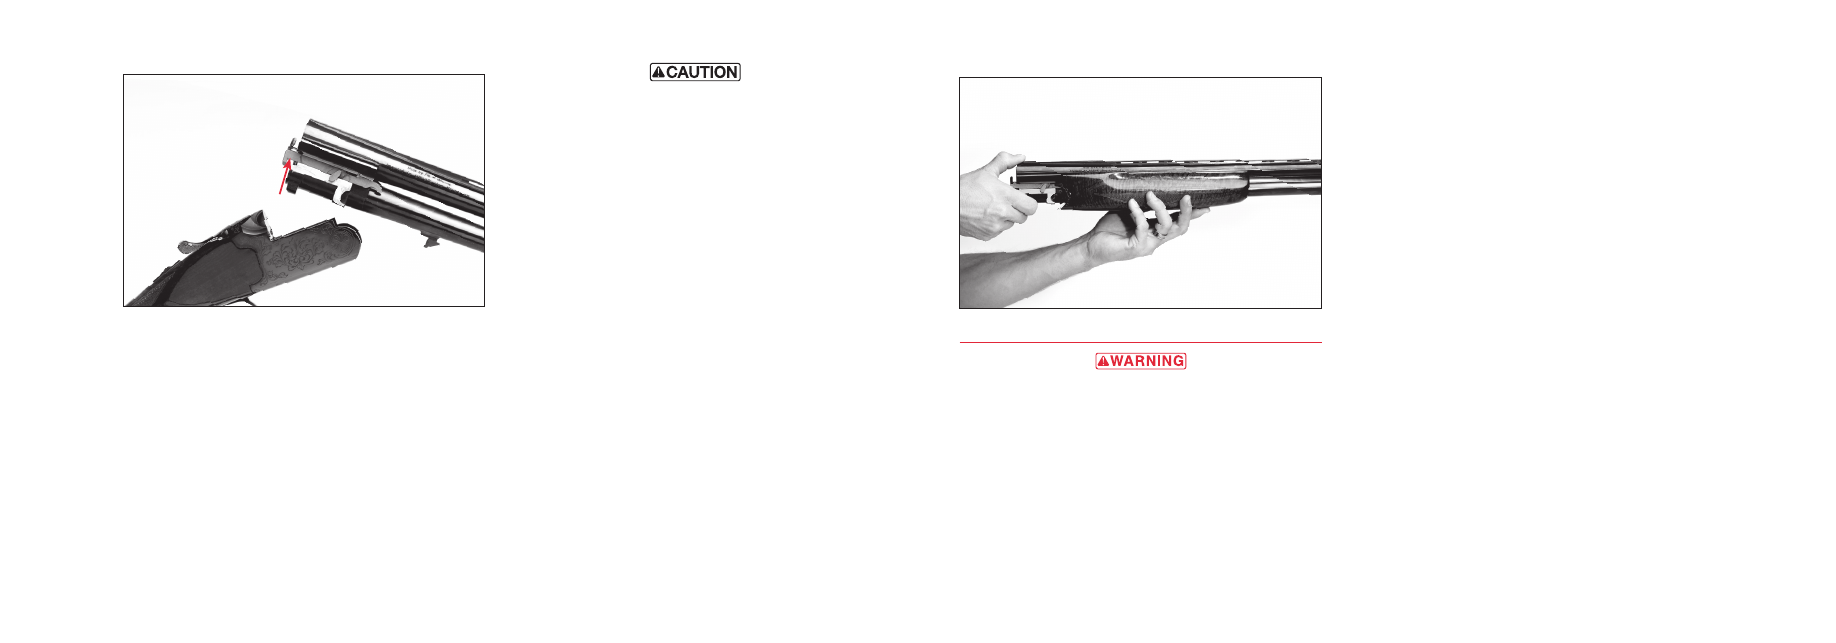
5. When cleaning is completed, reattach the forearm to
the barrels for storage. This is done very easily when
the barrels are detached. Simply align the forearm
extension along the bottom of the barrel so that the
forearm extension aligns with the rails on each side
of the chambers. Make sure the ends of the rails line
up with the rear top edge of the forearm (Figure 17,
page 17). The forearm can be angled slightly or
positioned parallel with the barrels. Press with even
pressure using both hands, front to back, along the
forearm. As the forearm snaps into position, the
release latch may briefly protrude from the bottom of
the forearm. It will snap down flush with the forearm
when it is secured in position correctly.
16
FIGURE 16
Lift up and out to separate the
barrels from the receiver.
FIGURE 17
Line up the forearm with the chamber
rails and barrels and snap into place.