Quick robotic torch – Tweco Quick Robotic Torch User Manual
Page 13
3-9
Quick Robotic toRch
SM-QRTORCH
INSTALLATION AND DISASSEMBLY
(h) Remove the steel hose clamps from the various hose
assemblies. Using pliers, position the tabs on the steel
clamps to allow the clamp to be held. Twist the tab
clockwise until the clamp breaks apart.
CAUTION
Do not bend the nipple(s) while twisting the tab(s)
to break the clamp apart.
(i) Remove the cable hose connector away from the
existing cartridge kit.
(j) Follow the above steps in reverse order to re-assemble
the new cartridge kit.
CAUTION
When connecting the cablehoz connector, be
sure to apply a high strength thread locking
adhesive compound to the threads of the brass
block assembly before threading the cablehoz
connector onto the block. This connection must
be tightened to a torque of 120 inch/pounds.
Failure to tighten this connection properly could
cause the power cable to overheat.
(k) Use the clamps, supplied with the cartridge kit, to
hold the inch switch cable in place. Refer to Figure
3-11.
CLAMP
Art # JB-00023
Figure 3-11: Location of Clamps
2. Follow the steps below to replace the cartridge kit on a
QRW and QRW-S torch and cable assemblies:
(a) Follow Steps (a) through (g) for removing the cartridge
kit on QRA, QRAS, QRWA, and QRWAS series torch
and cable assemblies.
(b) When replacing or re-installing the cartridge kit having
the nozzle sensing feature, the wire lead for the nozzle
sensing must be disconnected or connected inside
the molded housing.
(c) Using needle-nose pliers, pull the existing wire
lead away from the cartridge kit to the connector
assembly.
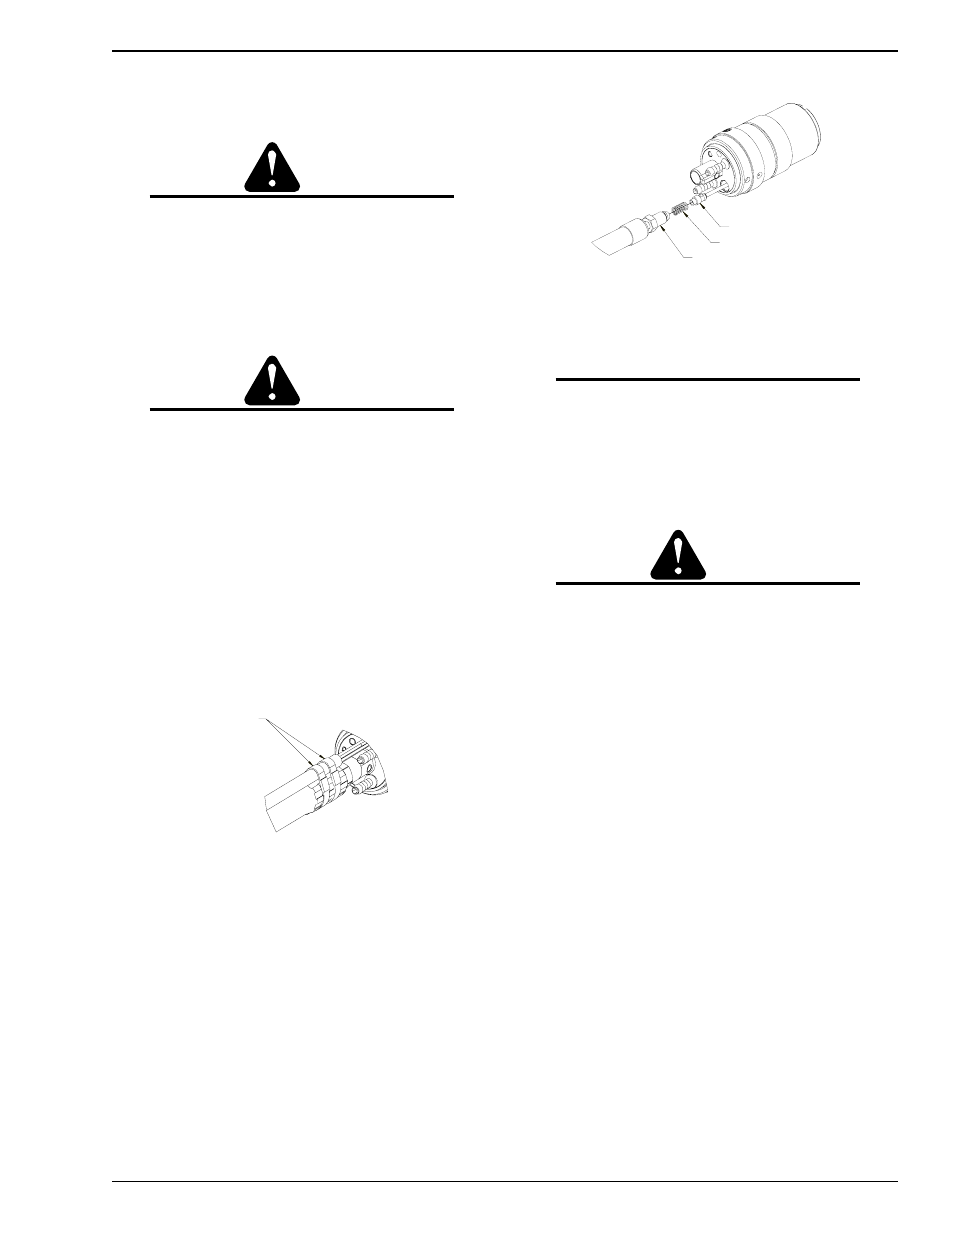
(d) Remove the threaded power cable connection from
the block assembly. Refer to Figure 3-12.
VALVE
SPRING
POWER CABLE
Art # JB-00024
Figure 3-12: QRW Series Check Valve
(e) Re-insert the lead wire coming from replacement
cartridge kit into the connector assembly.
NOTE
Make sure the components making up the check
valve remains inside of the block assembly. If the
components are removed, make sure they are
installed as shown in Figure 3-12.
(f) Follow Steps (a) through (g) in reverse order to
re-assemble the new cartridge kit.
CAUTION
When connecting the cablehoz connector, be
sure to apply a high strength thread locking
adhesive compound to the threads of the brass
block assembly before threading the cablehoz
connector onto the block. This connection must
be tightened to a torque of 30-35 inch/pounds.
Failure to tighten this connection properly could
cause the power cable to overheat.