Section 3 torch: installation, 3t.01 torch connections, 3t.02 setting up mechanical torch – Tweco CutMaster 12mm-20mm-25mm User Manual
Page 27: Section 3 torch: installation t-1
CUTMASTER 12mm, 20mm, 25mm
Manual 0-5117 3T-1 INSTALLATION
SECTION 3 TORCH:
INSTALLATION
3T.01 Torch Connections
If necessary, connect the torch to the Power Sup-
ply. Connect only the Thermal Dynamics model
SL60 / Manual or SL100 / Mechanical Torch to
this power supply. Maximum torch leads length
is 100 feet / 30.5 m, including extensions.
WARNING
Disconnect primary power at the source before
connecting the torch.
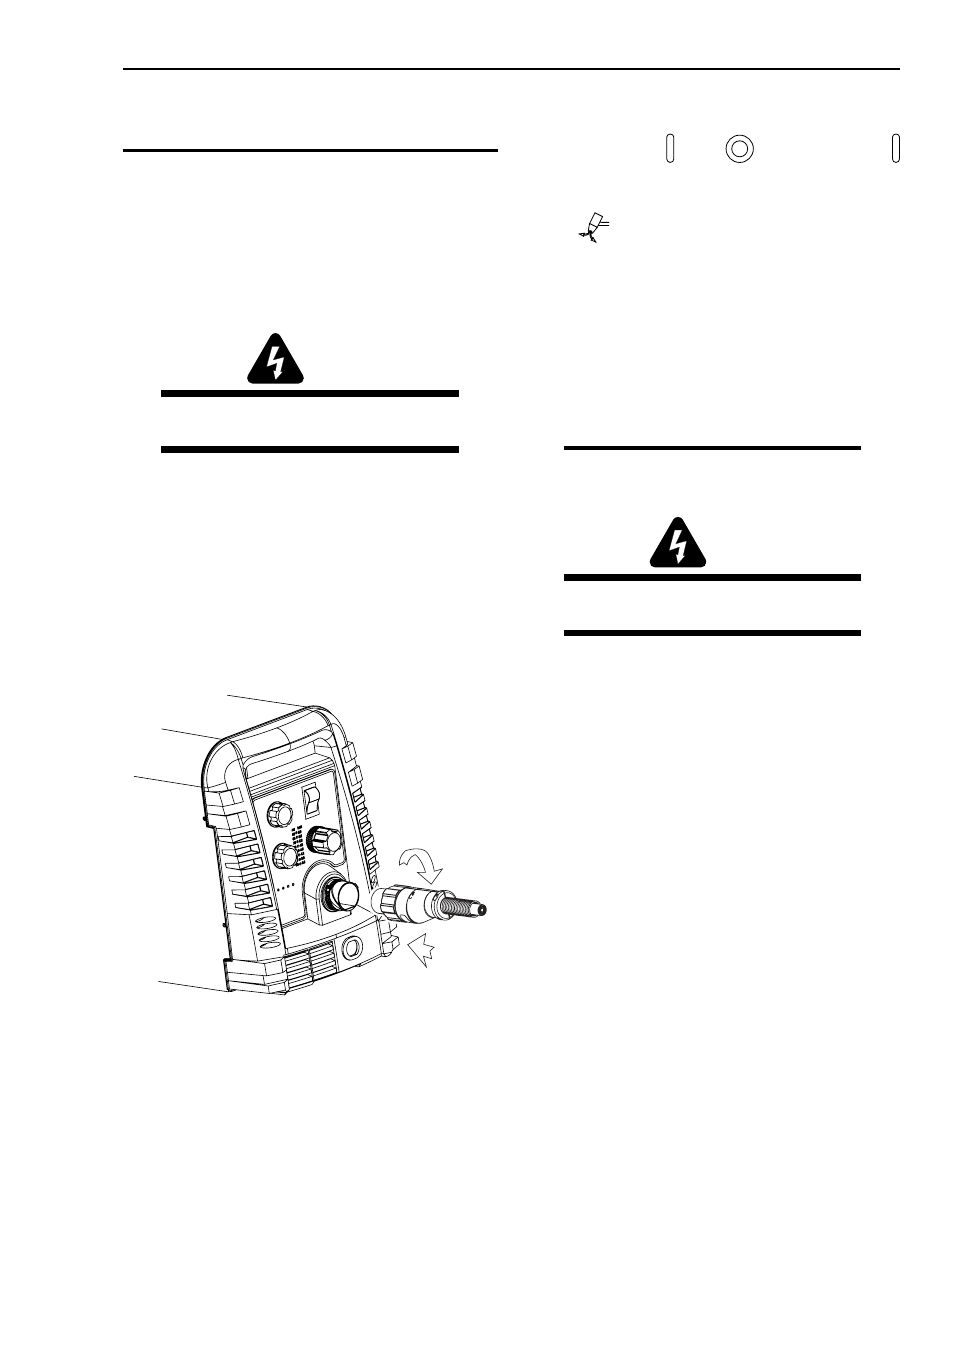
1. Align the ATC male connector (on the torch
lead) with the female receptacle. Push the
male connector into the female receptacle.
The connectors should push together with
a small amount of pressure.
2. Secure the connection by turning the lock-
ing nut clockwise until it clicks. DO NOT
use the locking nut to pull the connection
together. Do not use tools to secure the
connection.
1
2
Art # A-07885
Connecting the Torch to the Power Supply
3. The system is ready for operation.
Check Air Quality
To test the quality of air:
1. Put the
ON / OFF
switch in the ON
(up) position.
2. Put the Function Control switch in the SET
position.
3. Place a welding filter lens in front of the
torch and turn ON the air. Do not start an
arc!
Any oil or moisture in the air will be visible
on the lens.
3T.02 Setting Up Mechanical Torch
NOTE
An adapter is required to be installed in the
power supply if converting a hand torch sys-
tem to operate a machine torch.
WARNING
Disconnect primary power at the source before
disassembling the torch or torch leads.
The mechanical torch includes a positioning
tube with rack and pinch block assembly.
1. Mount the torch assembly on the cutting
table.
2. To obtain a clean vertical cut, use a square
to align the torch perpendicular to the sur-
face of the workpiece.