Center of gravity – E-flite Beechcraft Staggerwing 480 ARF User Manual
Page 23
23
E-flite Beechcraft 480 Staggerwing 480 ARF Assembly Manual
Use care when handling the top wing after
installing the antenna to prevent damage.
If you have assembled your model for hand-
launch,
do not cut the gear doors. Attach the
gear doors as supplied to the underside of the
wing with either silicone adhesive or tape.
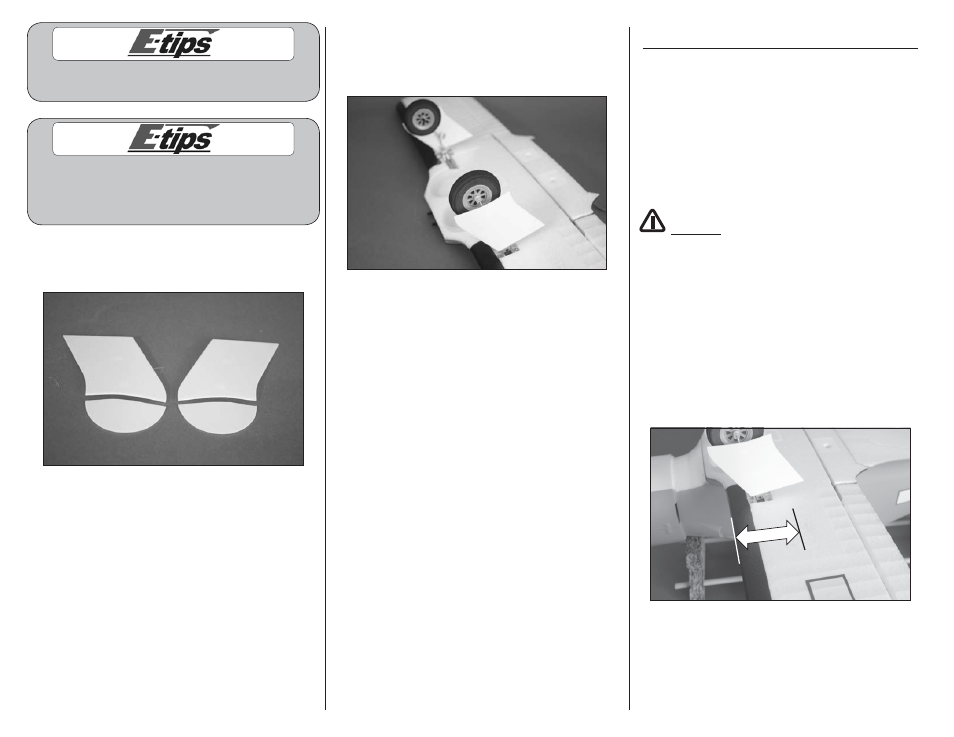
9. Use hobby scissors to trim the lower section from
the gear doors as shown. Use sandpaper to clean
the cut line.
10. Attach the gear doors to the landing gear struts.
Position the doors as close to the wing as possible.
Use a drop of silicone adhesive to keep the doors
from rotating.
Center of Gravity
Required parts
Assembled airframe
Required Tools and Adhesives
Felt-tipped pen
Ruler
Phillips screwdriver: #2
Balancing stand (optional)
An important part of preparing the aircraft for flight is
properly balancing the model.
CAUTION: Do not inadvertently skip this step or
property damage and injury could occur.
1. Assemble your model in preparation for flight,
making sure the wing is on securely and the motor
battery is installed as instructed in this manual.
2. The recommended Center of Gravity (CG)
location for your model is 2.25 to 2.50 inches (57
to 63mm) back from the leading edge of the bottom
wing as shown with the battery pack installed. Mark
the location of the CG on the top of the wing with a
felt-tipped pen.
2.25 to 2.50 inches
(57 to 63mm)