E-flite Beechcraft Staggerwing 480 ARF User Manual
Page 22
22
E-flite Beechcraft Staggerwing 480 ARF Assembly Manual
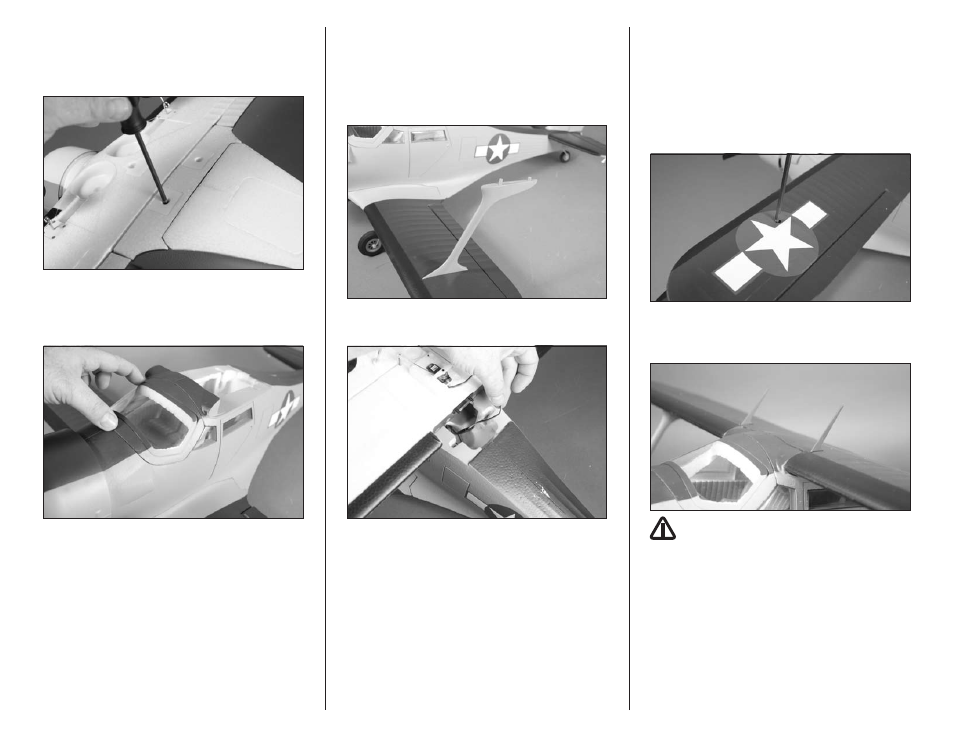
3. Check that the servo leads are inside the
fuselage. Use two 3mm x 25mm shoulder machine
screws and a #1 Phillips screwdriver to secure the
bottom wing to the fuselage.
4. Replace the front windscreen cover on the
fuselage, being careful not to contact the front seats
in the fuselage.
5. Place the narrow end of the interplane struts in
the grooves in the top of the bottom wing. The struts
will angle rearward as shown. Use a 2mm x 7mm
self-tapping washer-head screw and a #1 Phillips
screwdriver to secure the interplane strut to the
bottom wing. Install both struts at this time.
6. Connect the lead for the aileron to the extension.
7. Position the top wing on the fuselage, making
sure the interplane struts are positioned in the
grooves on the bottom of the top wing. The top
wing is secured to the fuselage using two 3mm x
25mm shoulder machine screws and a #1 Phillips
screwdriver. Use a 2mm x 7mm self-tapping
washer-head screw and a #1 Phillips screwdriver
to secure the interplane strut to the wing.
8. Use medium CA to glue the antenna to the top of
the top wing as shown.
NOTICE: Do not use a CA accelerator during
the assembly of your model. A CA accelerator will
damage the finish of your model and can damage
the foam as well. Even foam-safe accelerators will
damage the finish of your model. Allow the CA to
cure without the use of an accelerant.