E-flite Aeronca Champ 15e ARF User Manual
Page 5
5
E-flite Aeronca Champ 15e ARF Assembly Manual
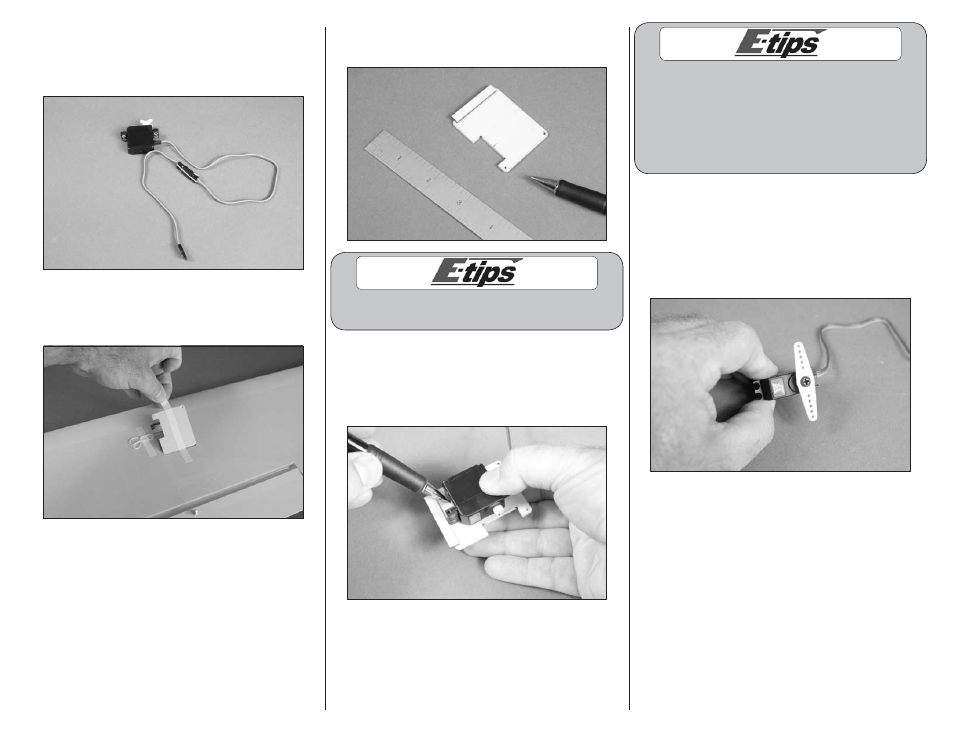
2. Connect a 6-inch (152mm) servo extension to
the servo lead. Use scissors to cut a 3-inch (76mm)
piece of string. Use the string to secure the extension
to the servo.
3. Remove the servo cover from the wing by lifting the
tape toward the leading edge. The cover has a tab at
the rear that will keep it in position near the aileron.
4. Use a pencil and ruler to mark the center of the
opening in the servo cover for the servo output shaft.
Make sure the servo is square on the servo cover
before marking the location for the sides of the servo.
5. Use a #1 Phillips screwdriver to remove the servo
horn from the servo. Position the servo so the servo
output is centered on the mark made in the previous
step. Use a pencil to transfer the edges along the
sides of the servo on the servo cover.
If you are using a computer radio, select an
unused model memory to begin the setup of your
model. It is highly recommended to reset the
model memory to make sure the programming
is set to the default settings. If you are using a
2.4GHz radio system, you will need to bind
the transmitter and receiver at this time.
6. Plug the servo into the receiver. Center the
stick and trim on the transmitter for the ailerons.
Use the transmitter and receiver to center the
aileron servo. Place a large servo horn on
the servo so it is perpendicular to the servo
centerline. Use a #1 Phillips screwdriver to
secure the servo horn to the servo.