E-flite Aeronca Champ 15e ARF User Manual
Page 15
15
E-flite Aeronca Champ 15e ARF Assembly Manual
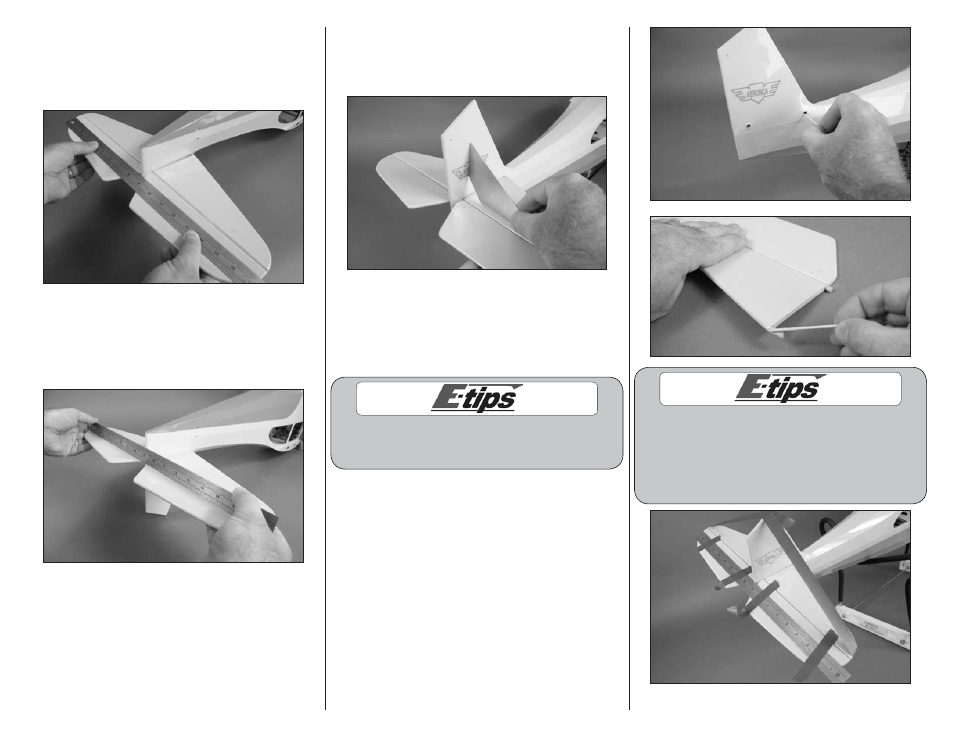
6. Use a straight edge to check that the hinge lines
between the right and left stabilizer are aligned with
each other. You won’t be able to fit the straight edge
right to the hinge line, but you can measure from
the hinge line to the straight edge for alignment.
7. Use a straight edge to check that the stabilizers
are parallel with each other as well. Although this
can be corrected slightly when installing the tail
bracing, it is best to try and set this alignment as
close as possible at this time.
8. The final alignment check is to make sure the
stabilizers are perpendicular to the fin. Use a
square to check this on both the right and left
stabilizer halves.
Note: Because the covering is flared near the
base of the fin, you will need to use a square
that is notched as shown in the photo, or
measure the angle as close to the hinge line as
possible to avoid the covering interfering with
checking the alignment.
Use a paper towel and rubbing alcohol to
remove any excess epoxy from the fuselage
and stabilizer before it fully cures.
9. Once the alignment has been checked, mix a
small amount of 12-minute epoxy and apply it to the
dowels on the stabilizers and into the tubes in the
fuselage using a toothpick. Position the stabilizers
and check the alignment as the epoxy cures.
We used low-tack tape between the stabilizers
and fin to keep the stabilizers in alignment until
the epoxy cured. We also taped the ruler to
the elevators to keep them from moving. Make
sure not to allow the stabilizers to move away
from the fuselage when applying the tape.