Wing installation – E-flite Aeronca Champ 15e ARF User Manual
Page 25
25
E-flite Aeronca Champ 15e ARF Assembly Manual
Wing Installation
Required Parts
Fuselage assembly Wing strut (2)
2mm locknut (4)
Wing strut support fitting (4)
Wing panel assembly (right and left))
Aluminum wing tube
2mm x 5mm machine screw (4)
2mm x 8mm sheet metal screw (4)
2.6mm x 10mm sheet metal screw (2)
Wing strut support, long (right and left))
Wing strut support, short (2)
Wing strut support cross brace (2)
Wing strut nylon fitting (4)
Required Tools and Adhesives
Drill
Drill bit: 1/16-inch (1.5mm)
Nut driver: 4mm
Phillips screwdriver: #1
Low-tack tape
Needle nose pliers
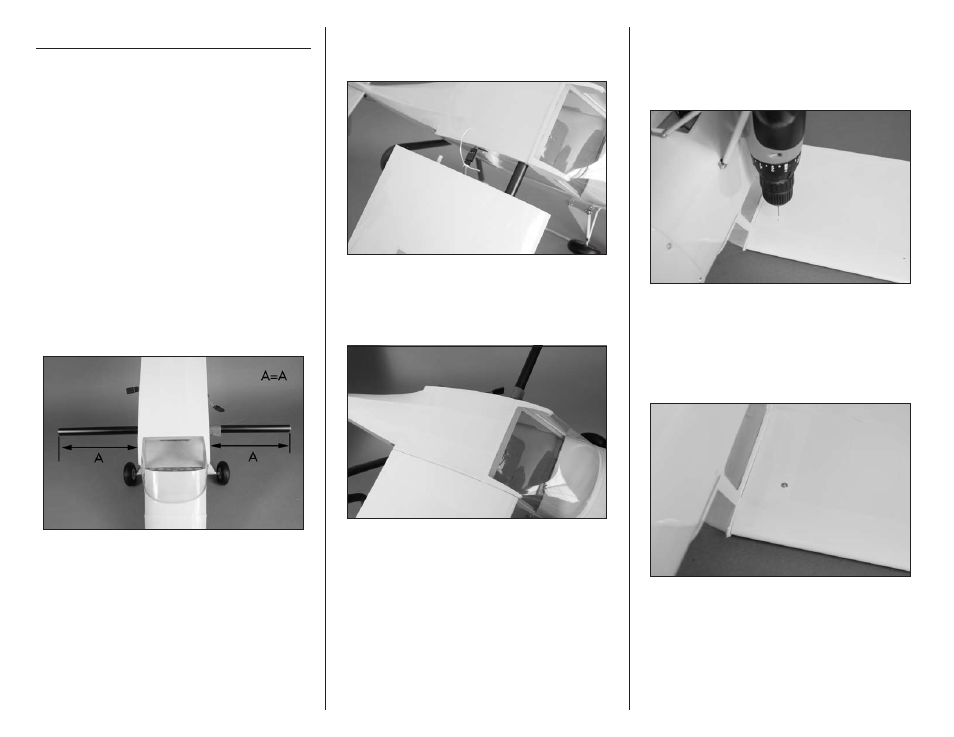
1. Slide the aluminum wing tube into the socket in
the fuselage. Position the tube so it is centered in
the fuselage. Wrap a small piece of low-tack tape
around the tube against the fuselage on one side so
it can be quickly positioned if it moves.
2. Slide a wing panel on the wing tube on the
side without the tape. Make sure to connect the
extensions from the wing and fuselage.
3. Slide the wing tightly against the fuselage. Check
to make sure the wing tube has not slid out of
position. If so, reposition the wing tube so the tape
is against the fuselage.
4. Use a drill and 1/16-inch (1.5mm) drill bit to
drill a hole through one wall of the wing tube. There
is a small hole in the wing in the correct location
to use as a guide. Use care not to drill completely
through the tube and through the top of the wing.
5. Use a #1 Phillips screwdriver to install the 2.6mm
x 10mm sheet metal screw that holds the tube in
the wing panel. Use care not to strip the head of
the screw during its installation as you are tapping
the aluminum tube to fit the screw. Remove the tape
from the tube on the other side.