Elevator and aileron servo installation – E-flite F-16 400 DF ARF User Manual
Page 9
9
E-flite F-16 ARF Assembly Manual
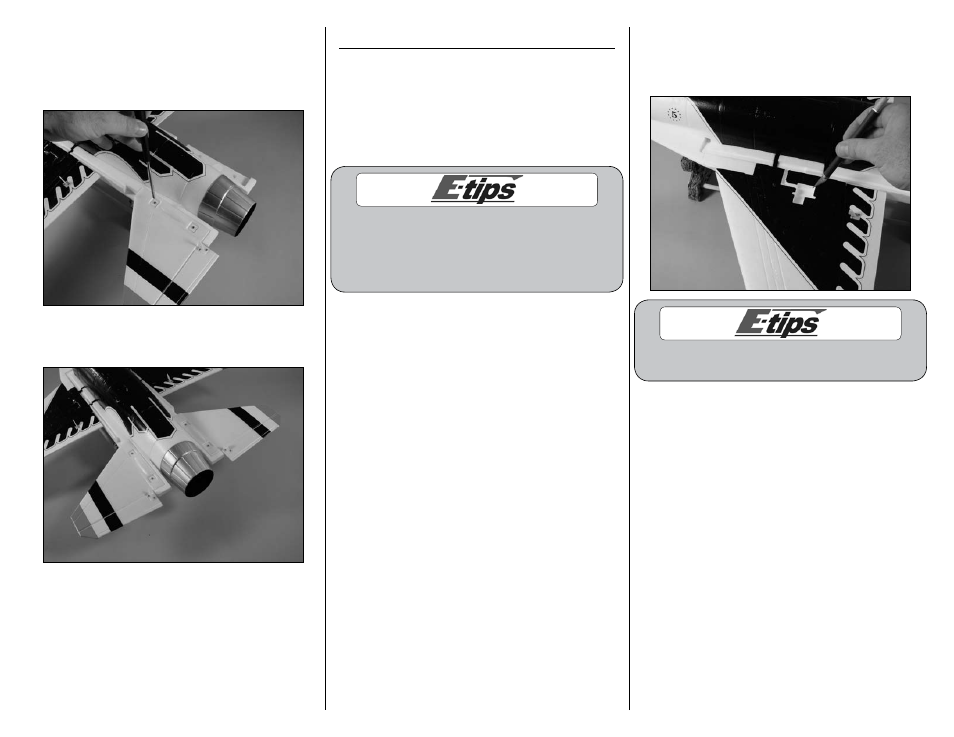
8. Use two 2mm x 12mm self-tapping screws and
a #1 Phillips screwdriver to secure the stabilizer
to the fuselage. Use care not to over-tighten the
screws and cause damage to the fuselage or
stabilizer.
9. Repeat Steps 6 through 8 to attach the
remaining stabilizer to the fuselage.
Note: The stabilizer tips will be lower than the
center of the stabilizer at the fuselage when the
fuselage is upright. This is scale for the F-16
and is correct.
Elevator and Aileron Servo Installation
Required Parts
Servo (4)
Assembled airframe
Radio system
Fuselage decal (right and left)
Standard single-sided servo arm (4)
2
7
/
8
-inch (73mm) pushrod wire w/clevis (2)
5
7
/
8
-inch (150mm) pushrod wire w/clevis (2)
There are to different sets of servo extensions listed
for the F-16. The high power setup requires a
different length of extensions so that the receiver
can be placed farther forward and the battery in
the aft compartment to achieve the correct CG.
Required for Sport Ducted Fan:
3-inch (76mm) servo extension (2)
9-inch (228mm) servo extension (2)
Required for High-Power Ducted Fan:
6-inch (152mm) servo extension (2)
12-inch (305mm) servo extension (2)
Required Tools and Adhesives
6-minute epoxy
Mixing cup
Mixing stick
Epoxy brush
Paper towel
Rubbing alcohol
Sandpaper
Pin drill
Dental Floss/String Felt-tipped pen
Drill bit: 1/16-inch (1.5mm)
Phillips screwdriver: #00
Hobby knife w/#11 blade
1. Use a hobby knife to trim the decal on the
bottom of the wing to expose the pocket for the
aileron servo. Prepare both the right and left wing
at this time.
You can use compressed air to blow
away the remains of the decal.
Note: Before preparing the aileron and
elevator servos for installation, it is suggested
to read through the Radio Programming
section of this manual beginning on Page
18. This section will guide you through
setting up the necessary mixing required to
operate the servos installed in your F-16. This
mixing reduces the amount of complexity and
extensions required, keeping the weight at its
lowest for the best performance for your model.