E-flite F-16 400 DF ARF User Manual
Page 8
8
E-flite F-16 ARF Assembly Manual
Note: You can use a paper towel that has had
rubbing alcohol applied to it to remove any
excess epoxy from your airframe. Use care
not to get the alcohol on the decals as it could
damage them.
3. Slide the wing panel back into position on
the fuselage, pressing the wing tightly against
the fuselage. It is best to hold the wing panel in
position until the epoxy cures, as tape will
damage the decal if it is applied directly to the
decal. Be sure to check the alignment of the wing
while the glue is drying. Use the picture in the
next step for reference.
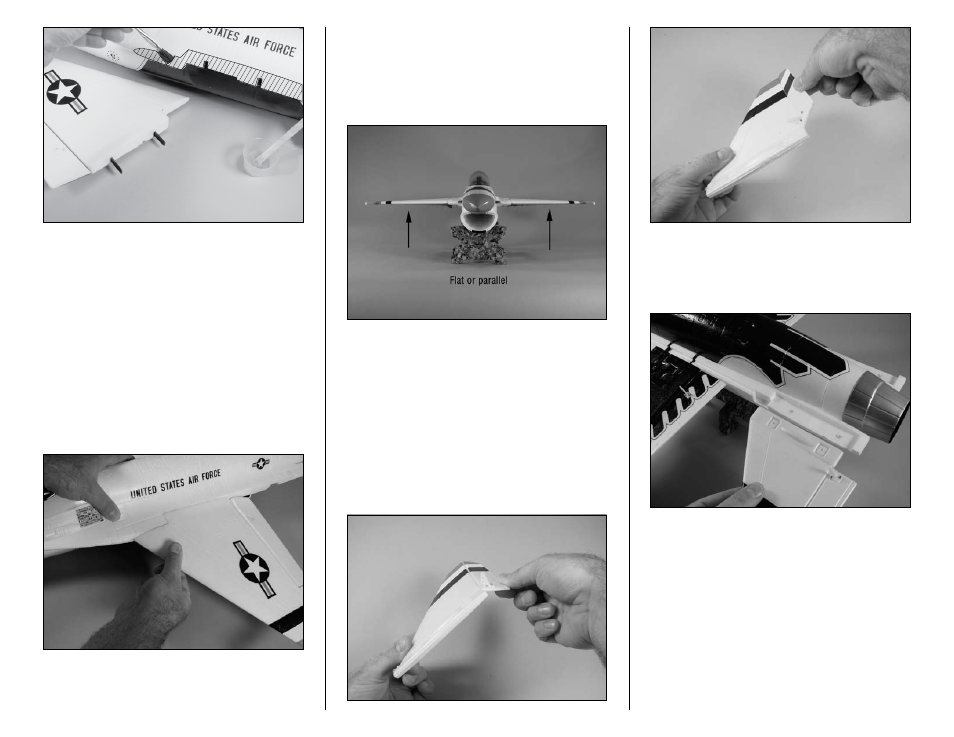
4. Fit the remaining wing panel to the fuselage.
Stand 6–9 feet (2–3 meters) from the front of the
airframe. When viewed from the front, both panels
should be flat (parallel) along the bottom to be
properly aligned. Use sandpaper to lightly sand the
plastic joiner to correct the alignment.
5. After fitting and aligning the second wing
panel, repeat Steps 2 and 3 to glue the wing
panel to the fuselage.
6. Before installing the stabilizer, you will need to
break in the elevator hinges. This is done by flexing
the elevator up and down a few times. Don’t move
the elevator too far and damage the hinge. Start
with small movements and work up to an amount
that will be slightly greater than the suggested high
rate elevator control throw found on Page 31.
7. Check the fit of the stabilizer to the fuselage.
Note that the control horn on the stabilizer will
face toward the bottom of the fuselage when the
stabilizer is installed.