E-flite F-16 400 DF ARF User Manual
Page 6
6
E-flite F-16 ARF Assembly Manual
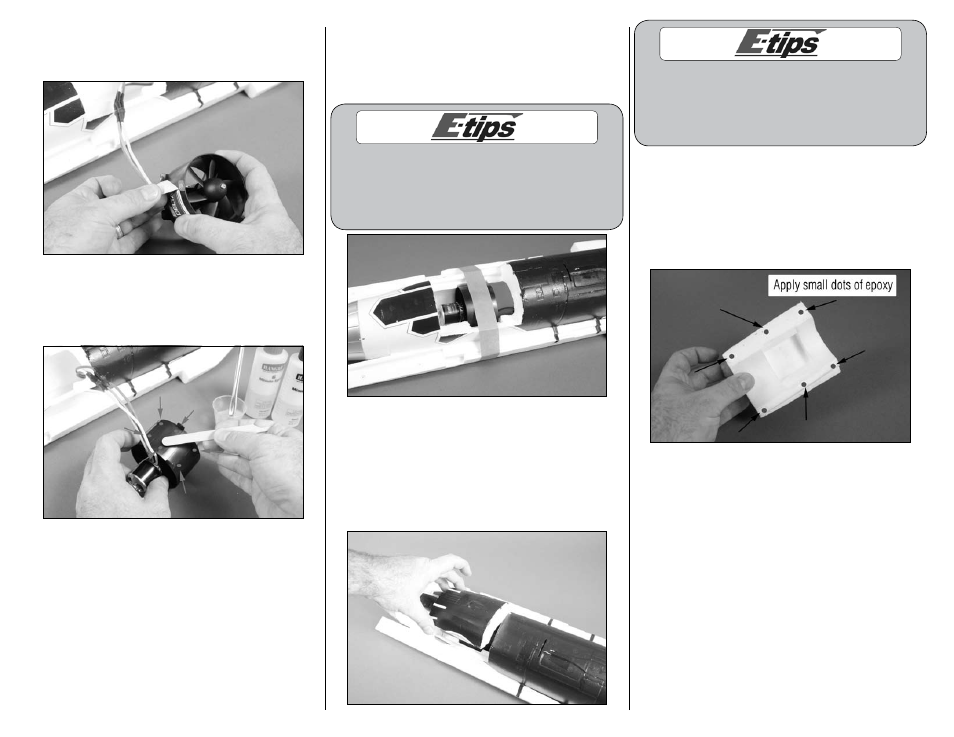
5. Remove the decal from the fan assembly. This
will allow the epoxy to be applied directly to the
housing in the next step.
6. Mix a small amount of epoxy and apply a few
dots of it to the fan housing where it will contact the
fuselage. Do not use an excess of epoxy in case the
fan requires removal for maintenance.
7. Insert the fan assembly into the fuselage,
making sure to guide the wires into the notch in the
fuselage. If not, the fan hatch will not fit correctly
when it is time to install. Use low-tack tape to keep
the fan held in position until the epoxy fully cures.
Make sure the tape does not come in contact
with the fuselage decals. If it does, the tape could
remove the decal from your model. Make sure to
pay attention to ALL the decals near the fan hatch
on both the top and bottom of the fuselage.
8. Remove the tape from the fuselage. Test fit the
fan hatch over the fan. Press the hatch tightly
against the fan housing so the tabs on the housing
leave indentations on the inside of the hatch. If
the hatch does not fit the fuselage flush after the
indentions have been made use a hobby knife to
enlarge the indentions.
Use a black or dark blue marker on the edges
of the hatch and fuselage where the decal is
placed to hide their edges when the hatch is
installed. Test your marker where it can’t be
seen to make sure it won’t attack the foam.
9. Once the hatch has been fit, use a small amount
of 6-minute epoxy to glue the hatch in position. The
hatch only required a few dots of epoxy to keep in
position. Using too much epoxy will make it difficult
to remove the hatch if the fan assembly or motor
require maintenance.