E-flite F-16 400 DF ARF User Manual
Page 27
27
E-flite F-16 ARF Assembly Manual
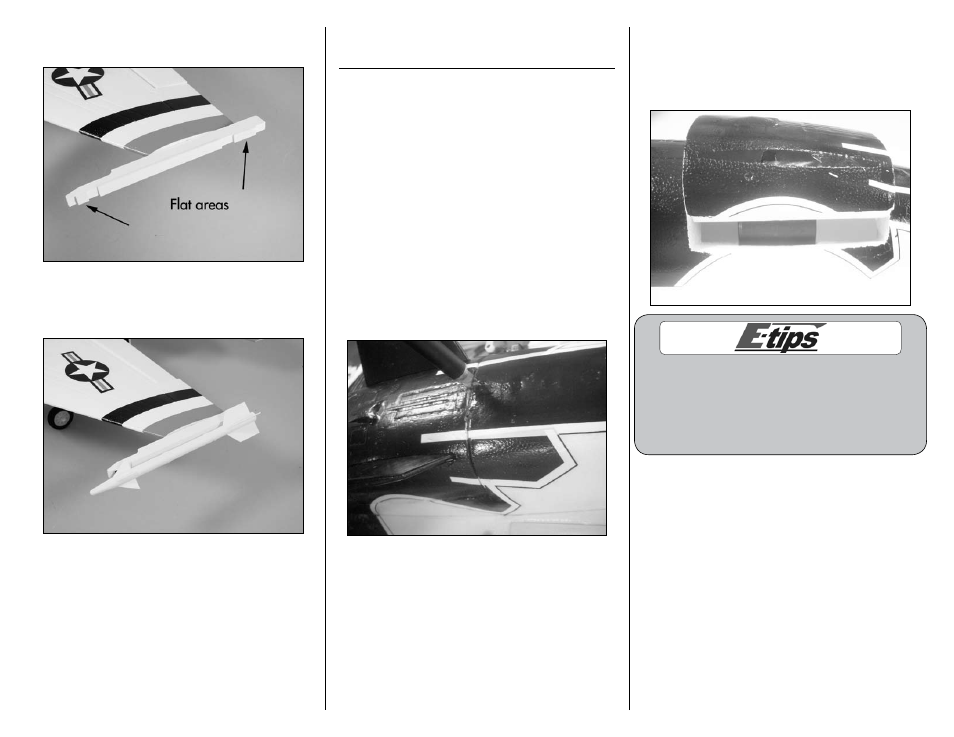
2. The missile rails on the wing have flat spots that
will correspond to the flat areas on the missile.
3. Use medium CA to glue the missile to the mount
at the wing tip. Allow the CA to fully cure before
installing the remaining missile.
4. Repeat Steps 1 through 3 to install the remaining
missile to the mount on the opposite wing tip.
Removing Fan and Motor
for Servicing or Replacement
Required Tools and Adhesives
6-minute epoxy
Mixing cup
Mixing stick
Epoxy brush
Paper towel
Rubbing alcohol
Sandpaper
Hobby knife w/#11 blade
Please note that the hatch is glued in with small
amounts of glue as instructed earlier in this manual.
If you have removed your hatch we suggest that you
glue it back in at the same glue locations with a small
amount of 6-minute epoxy. We also suggest that you
use a fresh sharp #11 blade to make all cuts. This will
help make the process easier and the cut line will be
smaller, cleaner and much less noticeable.
1. Use a hobby knife with a #11 blade, or a razor
saw with a fine tooth blade, to cut through the glue
joints on the hatch.
2. Once you are sure that you have cut through the
hatch joints, use a small amount of force to rock
the hatch in a rolling motion side to side. A small
amount of movement should break any missed glue
joints. Remove the hatch/fan assembly.
When gluing the hatch back in position make
sure that the motor wires are routed in the slot
on the top of the fuselage. If they are not in
this slot the hatch will not seat properly. Follow
the procedure at the beginning of the manual
to replace the fan assembly and hatch.