Wing and stabilizer installation – E-flite F-16 400 DF ARF User Manual
Page 7
7
E-flite F-16 ARF Assembly Manual
Tape should not be used to hold the hatch
in position while the epoxy cures during
this step as it will remove the decal. Use
either weights or rubber bands to keep the
hatch in position until the epoxy cures.
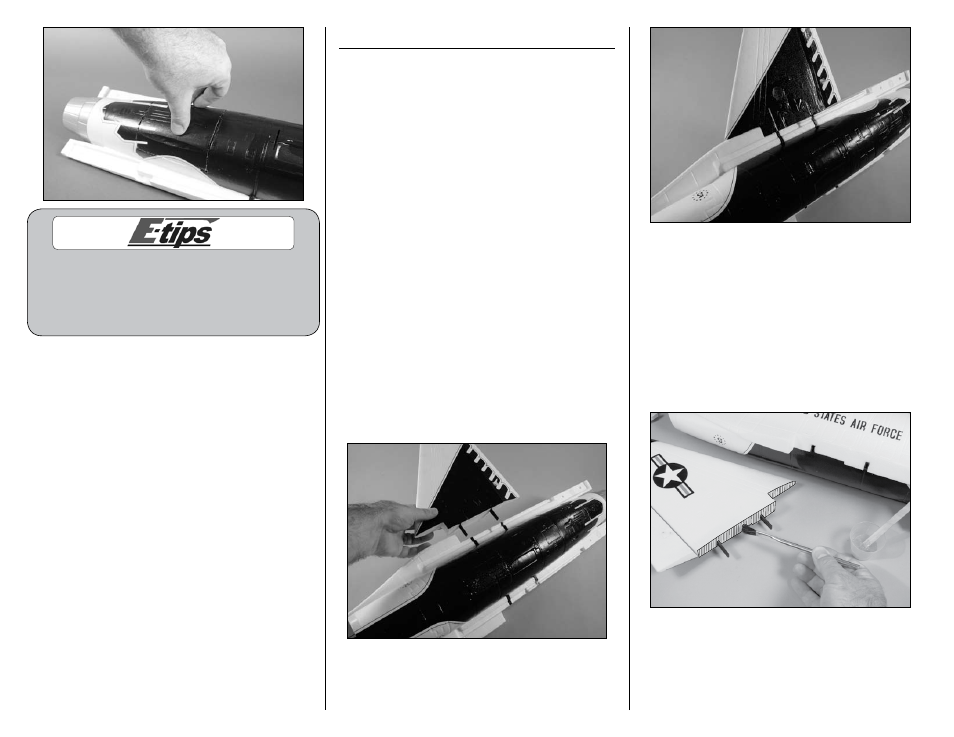
Wing and Stabilizer Installation
Required Parts
Fuselage
Wing panel (right and left)
Stabilizer (right and left)
2mm x 12mm self-tapping screw (4)
Required Tools and Adhesives
6-minute epoxy
Mixing cup
Mixing stick
Epoxy brush
Paper towel
Rubbing alcohol
Sandpaper
Phillips screwdriver: #1
Small hand file
Note: During the manufacturing process it is
possible that a slight amount of glue may seep
into the inner side of the wing joiner socket.
If you are having trouble with the wing fitting
flush against the fuselage, check the inside of
the joiner socket. If some glue has seeped into
the socket, use a small hand file to remove it.
1. Test fit the wing panel to the fuselage by sliding
the joiners into the joiner sockets of the fuselage.
The panel must fit tightly against fuselage when
installed. If it does not, you may be required to
sand the end of the joiner slightly so the wing will
have a flush fit against the fuselage.
Important: You will be required to quickly
perform the next few steps before the epoxy
begins to cure. Read through the following
steps to prepare yourself for the gluing process.
2. After checking the fit, remove the wing panel
from the fuselage. Prepare 1/4-ounce (10cc) of
6-minute epoxy and brush a very light coating of
epoxy on the wing and fuselage where they
contact each other. Also brush some glue into the
inside of the joiner socket.