Installing the aileron servo – E-flite LR-1A Pogo ARF 15e User Manual
Page 5
8
E-flite LR-1A Pogo 15e ARF Assembly Manual
9
E-flite LR-1A Pogo 15e ARF Assembly Manual
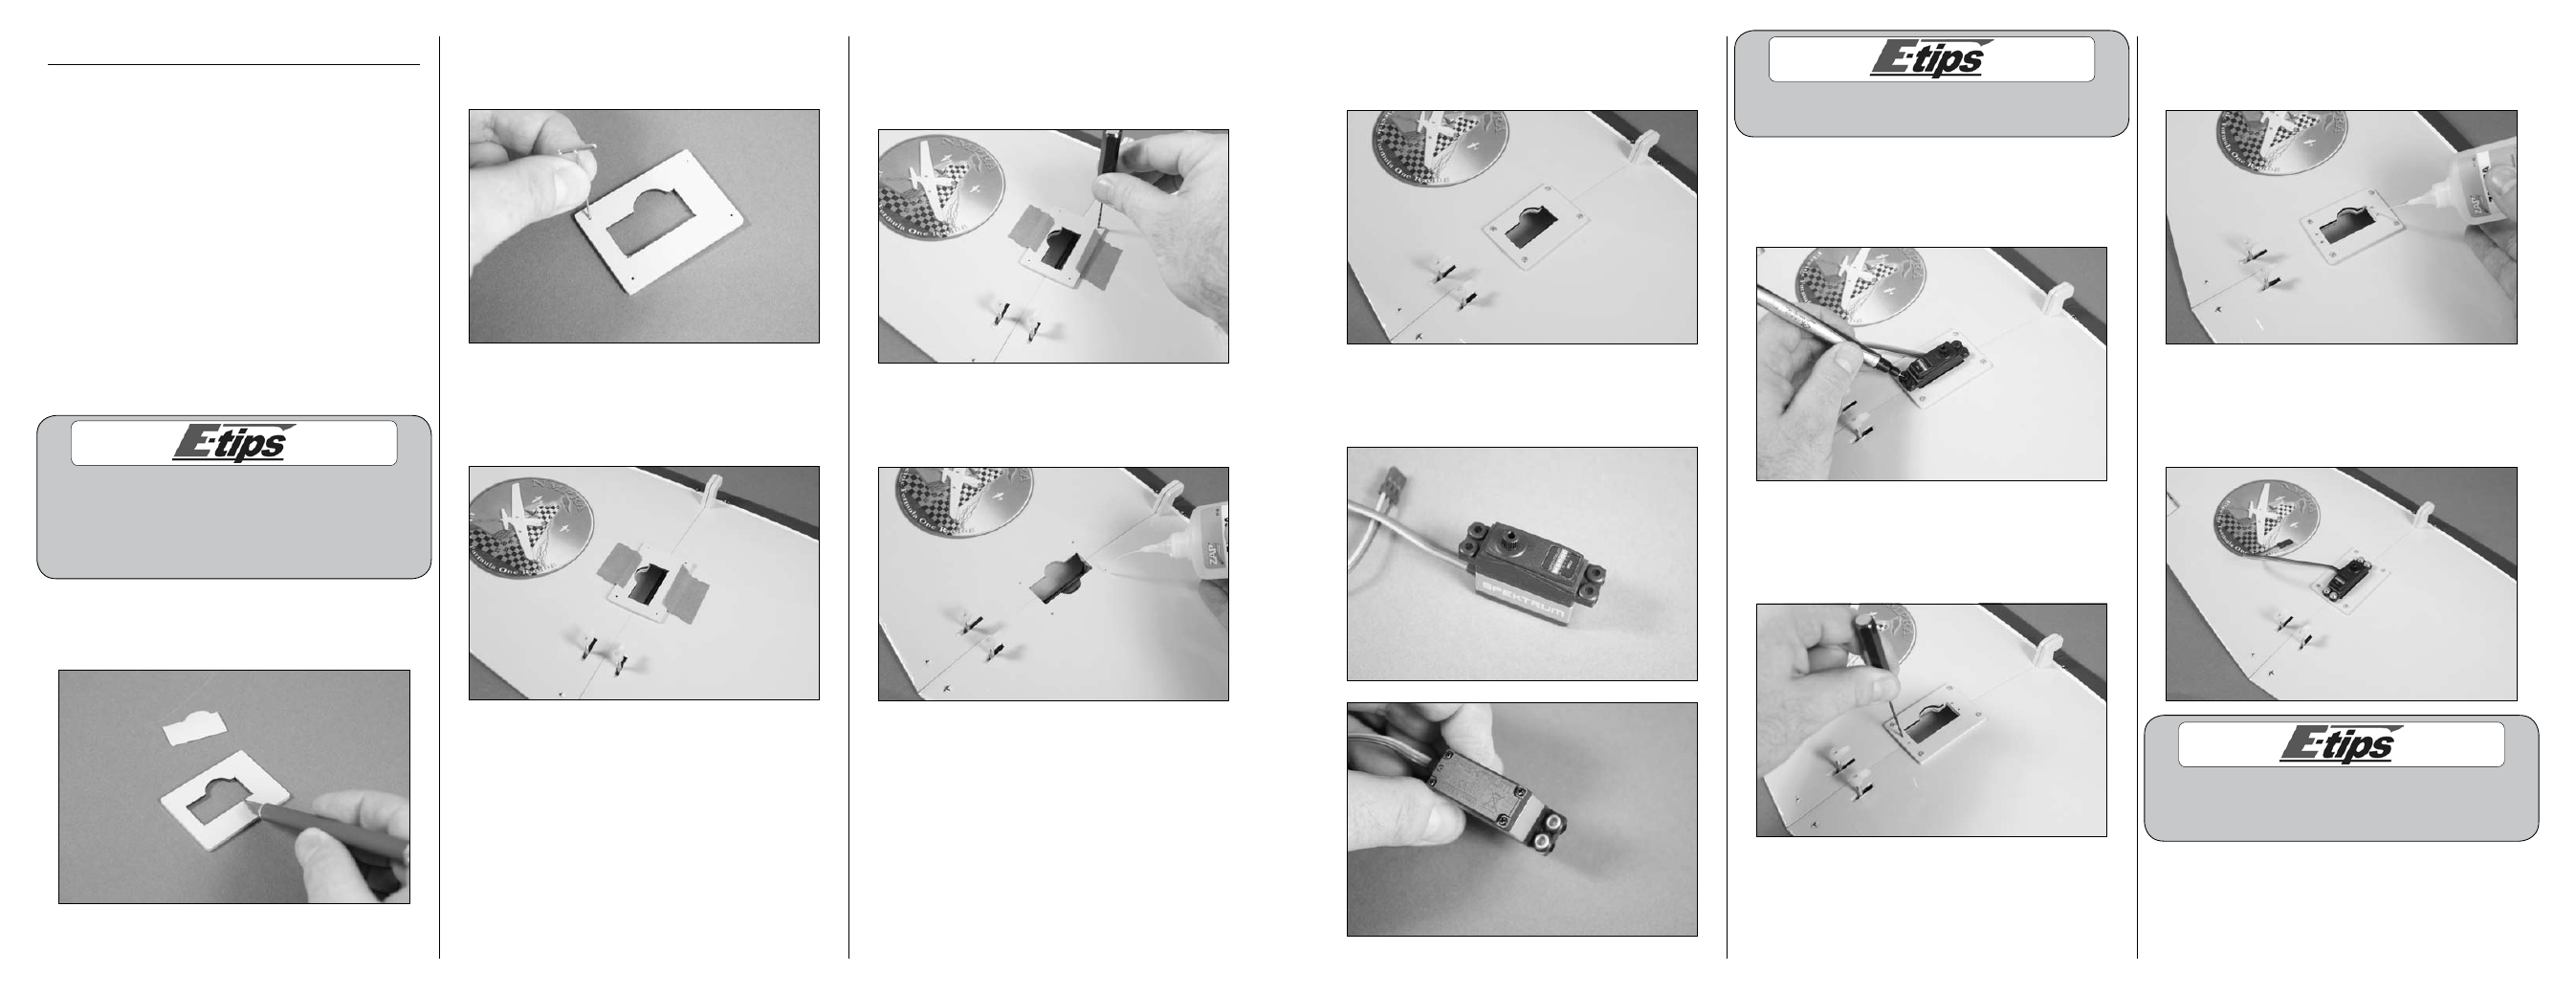
6. Use a #1 Phillips screwdriver to install the four
2mm x 12mm sheet metal screws to secure the
mount to the wing.
7. Follow the instructions provided with the servo to
install the rubber grommets and brass eyelets in the
servo mounting tabs.
Install the rubber grommets and eyelets in the
rudder and elevator servos at this time as well.
8. Place the aileron servo in the mount with the
output of the servo facing the leading edge of the
wing. Use a felt-tipped pen to transfer the locations
for the servo mounting screws onto the mount.
9. Use a pin vise and 1/16-inch (1.5mm) drill bit
to drill the holes through the mount and into the
wing. Use care not to drill holes through the bottom
of the wing.
10. Place 2–3 drops of thin CA in each hole to
harden the surrounding wood. This harder surface
makes the screws more secure when installed.
11. Place the servo back into the mount. Use a
#1 Phillips screwdriver to install the four screws
included with the servo to secure the aileron servo
in position.
When using a computer radio, it is recommended
to start with a new model that has been reset
to remove any sub-trims or programming.
Installing the Aileron Servo
Required Parts
Wing assembly
Aileron servo mount
Metal clevis (2)
Aileron servo with hardware
Transmitter
Receiver
2mm nut (2)
Battery
Silicone keepers (2) Nylon pushrod keeper (2)
2mm x 12mm sheet metal screw (4)
Aileron linkage wire, 4
3
/
4
-inch (120mm) (2)
Required tools and Adhesives
Low-tack tape
Hobby knife with #11 blade
Pin vise
Ruler
Drill bit: 1/16-inch (1.5mm), 5/64-inch (2mm)
Thin CA
Felt-tipped pen
Needle nose pliers Flat blade screwdriver
Side cutter
Phillips screwdriver: #1
When cutting the covering make sure not to cut into
the underlying wood and weaken the underlying
structure. Another option is to use a soldering
iron or hot knife to melt the covering, rather than
cutting, to avoid damaging the stabilizer.
1. Use a hobby knife with a #11 blade to remove
the covering from the inside of the aileron servo
mount as shown.
2. Use a T-pin to poke holes through the covering
in the locations for the mounting screws at each
corner of the mount.
3. Position the aileron servo mount on the wing.
Align the opening in the mount with the opening in
the wing. Use low-tack tape to hold the mount to
the wing.
4. Use a pin vise and 1/16-inch (1.5mm) drill bit
to drill the holes through the mount and into the
wing. Use care not to drill holes through the bottom
of the wing.
5. Place 2–3 drops of thin CA in each hole to
harden the surrounding wood. This harder surface
makes the screws more secure when installed.