Dulce Systems PRO Mini User Manual
Page 44
PRO MINI Installation and User’s Manual
7
th
Step – Once you have removed the failed disk drive, insert the new drive and
secure it with 2 screws (one on top and one on bottom). If the seven other disk
drive screws required loosening, please retighten them.
NOTE: 2.5” Disk Drives have aluminum casings. Care must be observed to not
over tighten/torque the disk drive retaining screws during installation & assembly.
8
th
Step – Replace the 16 disk drive screws from Step 4 (above), and replace the
four screws from Step 3 (above).
9
th
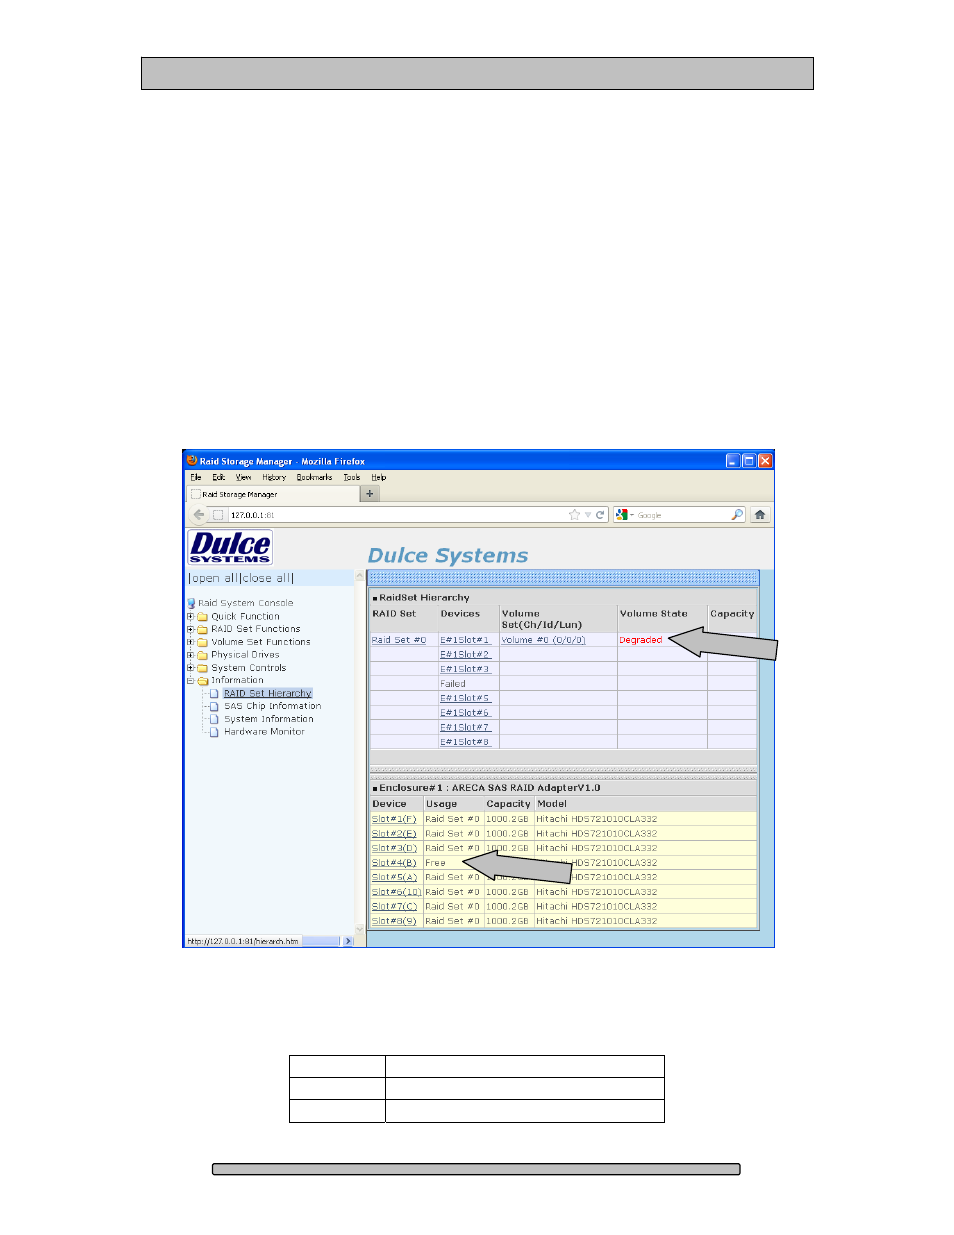
Step – Launch the Dulce PRO Mini RAID Manager and insert the MPD Pack
into the PRO Mini Chassis (Hot Insertion). Allow the Dulce Systems RAID
Controller to initialize the disk drives (60 Seconds). Verify the RAID Set
Hierarchy’s ‘Volume State’ is ‘Degraded’ and the replaced disk drive (#4 in this
example) is shown as ‘Free’ in the ‘Usage’ column as shown below:
If the RAID Set Hierarchy’s ‘Volume State’ is ‘Degraded’ and the replaced disk
drive is shown as ‘Free’ in the ‘Usage’ column, then proceed to Step 10;
otherwise contact Dulce Systems Technical Support:
Phone 818-435-6008
FAX 818-576-0324
E-mail [email protected]
Page 44