Camera wiring and shutter control, Camera wiring – DJI Z15-5D III (HD) User Manual
Page 10
Zenmuse Z15-5D III (HD)
User Manual
10
©2014 DJI. All Rights Reserved.
Camera Wiring and Shutter Control
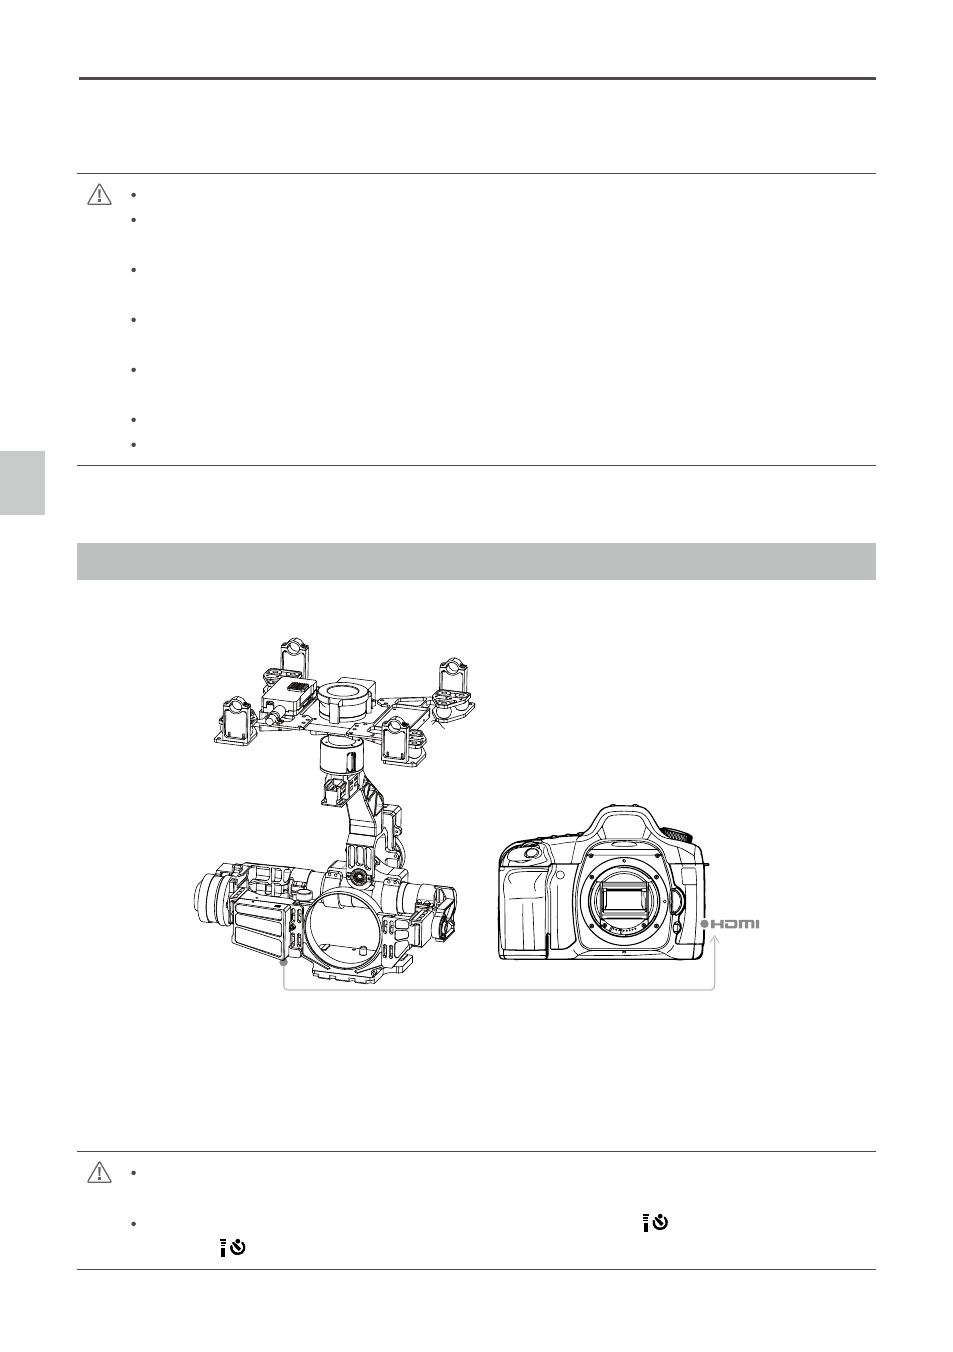
Camera Wiring
The Z15-5D III (HD) gimbal can use a transmitter signal for shutter control. Ensure the camera is setup first,
and then complete the following steps to connect the camera and the gimbal.
1. Connect the gimbal HDMI-HD/AV module to the camera HDMI port with a HDMI-HD/AV connection cable.
2. Toggle the HD/AV Switch to the AV position if using a normal wireless video TX module. Toggle the HD/AV
Switch to the HD position if using a DJI HD wireless video TX module. (See Page 7 for the location of the
HD/AV Switch)
When disconnecting the cable between the HDMI-HD/AV module and the camera, first dismount
the camera, then unplug the HDMI-HD/AV interface.
Make sure to press the AF.DRIVE button and set the drive mode to (10-sec. self-timer/Remote
control) or
2
(2-sec. self-timer/Remote control).
4. Mount the gimbal onto the landing gear with the mounting brackets. Tighten the screws and use thread
locker.
Ensure the lens is pointing in the same direction as the aircraft nose.
Ensure the top and bottom plates of the damping unit stay parallel when mounting. This prevents
stretching and distortion.
Maintain good overall balance when mounting in order to ensure the center of gravity is balanced
on each of the three axis lines.
The gimbal’s center of gravity has been set by the factory. The center of gravity directly determines
the gimbal’s overall performance. Do not adjust the gimbal’s center of gravity yourself.
The gimbal is highly precise and depends on this precision for optimal performance. Do not remove
any screws on the gimbal, as this may result in poor performance or damage to the gimbal.
Do not unplug any cables attached to the gimbal ports or change the mechanical structure.
Make sure the wiring is correct, otherwise the gimbal may behave abnormally.
Camera Wiring and Shutter Control
HDMI-HD/AV Cable