Physical installation, Obdii adapter plug installation diagram, Detailed instructions – Bully Dog 40450 GTT+ User Manual
Page 30
40450
GT T
+
29
PhysICAl InstAllAtIon
Detailed Instructions
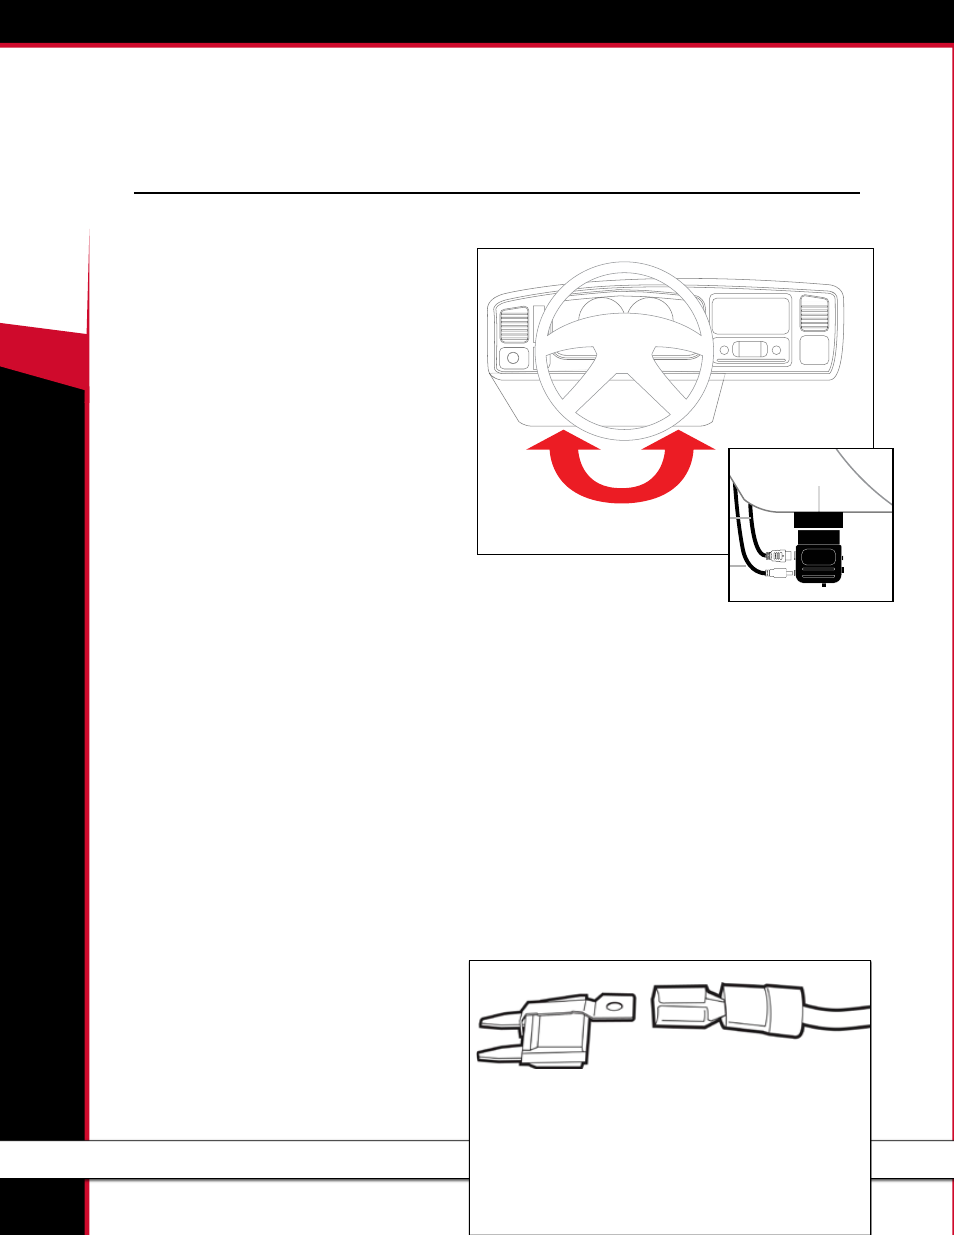
1. Connect The OBDII Adapter Plug to the OBDII Port. See page 6 for a detailed description of the different parts of the OBDII
adapter plug.
• Find the OBDII port in your vehicle. As shown in the
illustration, the specific location of the port can vary between
different vehicles, but it is always somewhere under the
driver’s side dash. The OBDII port will have the same shape as
the end of the adapter plug.
• Once you have found the port, simply connect the adapter
plug to it.
2. Connect The Power Cable. The power cable is not
really optional if you want to enjoy the originally
designed functions of the GT T+. It is only optional
under one of the following circumstances:
You do not want to keep the GT T+ permanently installed
and plan on disconnecting it when you are not actively using
the unit.
You want the GT T+ to remain on at all times, regardless of
the effect that this could have on your car battery
You prefer physically switching the GT T+ on and off and do not want it to automatically power down when you
turn the key to the off position.
Otherwise, in order for the GT T+ to work as originally designed, it is very important for the power cable to be installed as
described below:
1. Locate an ignition fuse.
• An ignition fuse is one that is controlled by the position of the key.
• Sometimes we call this a “key-on” or “key-off” fuse.
• The fuse that controls the front windshield wiper is usually perfect, but any fuse that turns off when the key is turned off will work just fine.
• Every vehicle is different. There is no way to provide wiring diagrams for all vehicles. You will be able to find the information for your vehicle
in the owner’s manual or online.
• Some vehicles have a fuse box inside the cab. If your vehicle does not have a fuse box inside the cab, you will need to locate the fire wall and
connect the power cable to the fuse box under the hood.
2. Connect the power cable to the fuse.
• You may have received a fuse tap with your GT T+. See below for an illustration and instructions on using the fuse tap to install the power
cable.
• You can also simply put the power cable into the fuse
box along with the fuse that is normally installed in
that location. See the diagram and picture for more
information.
• If you did not receive a fuse tap, but prefer to use
one to install your power cable, you can purchase
one at your local auto parts store. Be sure to ask for
installation instructions if none are included with the
fuse tap.
Using the Fuse Tap and Spade
1. Find and pull the fuse that you are going to use to insert the GT T+ Power
Cable.
2. Slip the fuse tap over the prong on the fuse.
3. Fit the spade over the fuse tap and crimp them together with pliers.
4. Put the tapped fuse back into the fuse box.
OBDII Plug
Main Cable
Power Wire
OBDII Adapter Plug Installation Diagram
GT