Replace only the actuator cylinder, Assemble the electric cylinder – Rockwell Automation TLAR Electric Cylinders Replacement User Manual
Page 10
10 MP-Series and TL-Series Electric Cylinders Replacement Parts
Rockwell Automation Publication MPAR-IN002B-EN-P - September 2012
Replace Only the Actuator Cylinder
1.
Remove the coupling hub from the actuator cylinder.
2.
Remove the bolt from the coupling hub.
3.
Position the coupling hub on the shaft of the actuator cylinder.
Use the dimension shown on the table in
step 6
on page
9
.
4.
Tighten the coupling hub bolt to the torque shown on the table in
step 6
on page
9
.
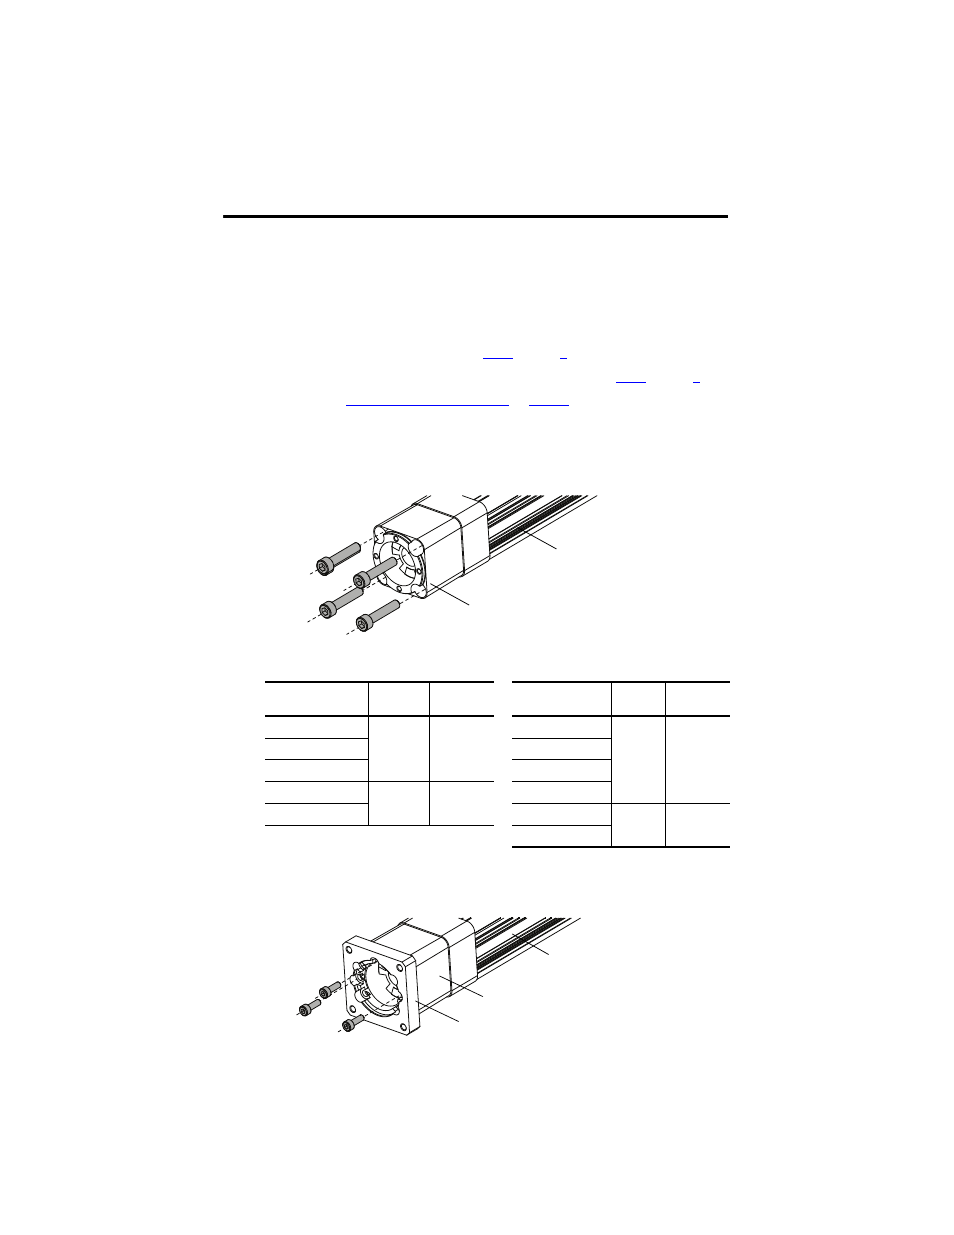
Assemble the Electric Cylinder
on
.
Assemble the Electric Cylinder
1.
Attach the coupling housing by using four bolts.
2.
Torque the bolts as shown in this table.
3.
Attach the motor flange by using the required number of bolts.
See table in following the step for the bolt quantity.
Cat. No.
Bolt
Size
Torque
N•m (lb•in)
Cat. No.
Bolt
Size
Torque
N•m (lb•in)
MPAR-x1xxxx-xxA
M6 x 30
4.2 (37.17)
TLAR-A1xxxB-BxA
M6 x 20
4.2 (37.17)
MPAR-x2xxxC-xxA
TLAR-A1xxxE-BxA
MPAR-x2xxxF-xxA
TLAR-A2xxxC-BxA
MPAR-x3xxxE-xxA
M8 x 40
7.8 (69)
TLAR-A2xxxF-BxA
MPAR-x3xxxH-xxA
TLAR-A3xxxE-BxA
M8 x 40
7.8 (69)
TLAR-A3xxxH-BxA
Coupling Housing
Actuator Cylinder
Coupling Housing
Actuator Cylinder
Motor Flange