Remove 2099-bm11-s and 2099-bm12-s covers – Rockwell Automation 2099-K7KCB-1 Kinetix 7000 DC-DC Converter and Control Board Kits User Manual
Page 7
Publication 2099-IN002B-EN-P — October 2008
Kinetix 7000 DC-DC Converter and Control Board Kits
7
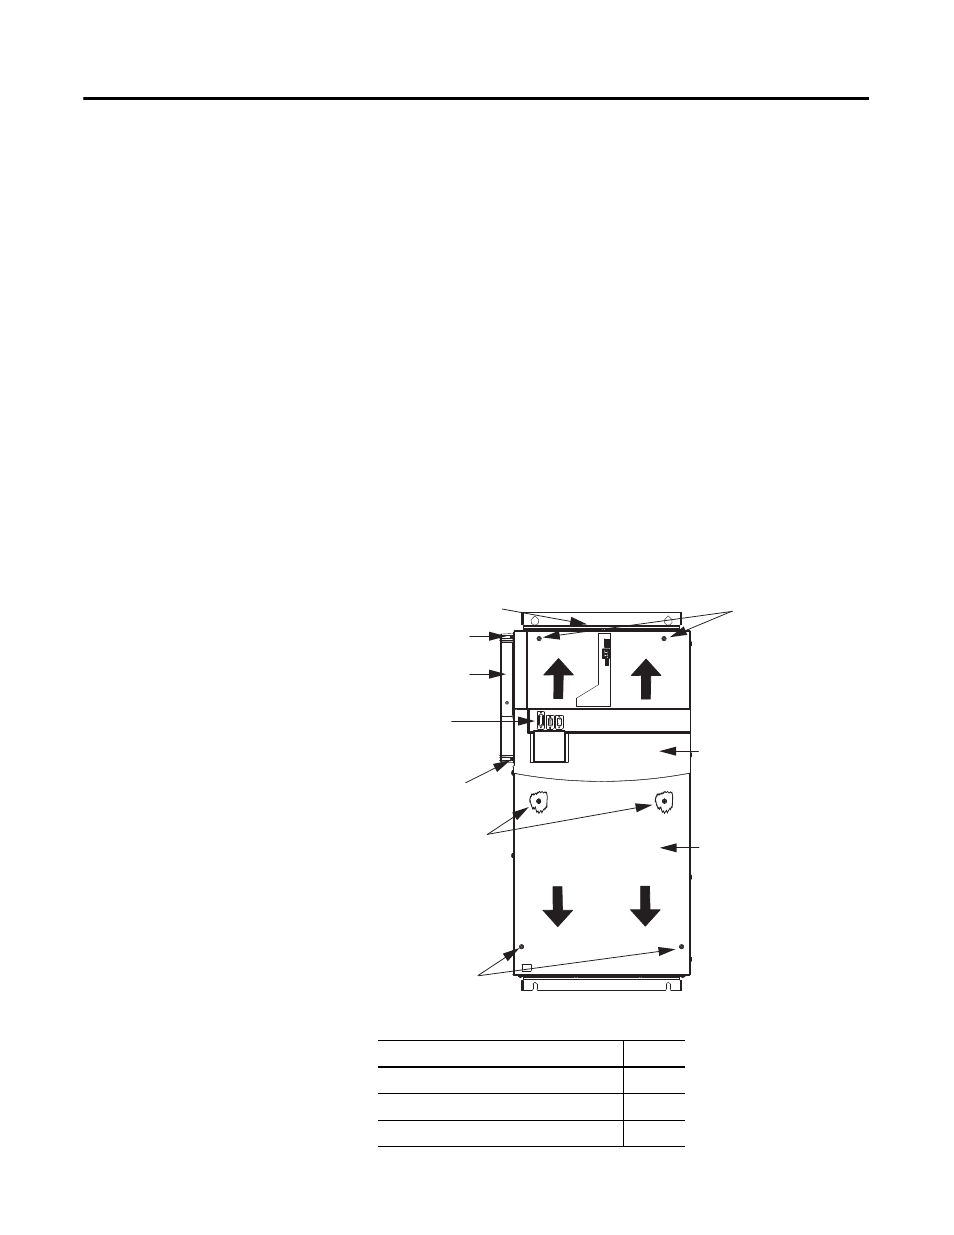
Remove 2099-BM11-S and 2099-BM12-S Covers
Follow these steps to remove the drive covers.
1.
Loosen the two bottom-cover captive screws and pull the cover slightly
away from the drive module.
2.
Slide the bottom cover downward until the upper tabs clear the top
cover slots.
3.
Loosen the two lower-top cover screws.
These screws were covered by the bottom cover.
4.
Loosen the two top-cover captive screws and pull the cover slightly away
from the drive module.
5.
Slide the top cover upward until the cover clears the lower screws.
6.
Remove the two dc-dc converter cover screws.
7.
Pull the dc-dc converter cover outward and away from the drive.
8.
Install your kit.
Kinetix 7000 Drive
(2099-BM11-S is shown)
Top Cover
DC-DC Converter Cover
Bottom Cover
Upper DC-DC Converter Cover
Captive Screw
Lower DC-DC Converter Cover
Captive Screw
I/O and Feedback
(IOD, MF, and AF) Connectors
Fiber-optic (Tx and Rx) Connectors
Bottom Cover Captive Screws
Lower Top Cover Screws
(under bottom cover)
Top Cover Captive Screws
Topic Page
Install the DC-DC Converter Kit