Remove 2099-bm09-s and 2099-bm10-s covers – Rockwell Automation 2099-K7KCB-1 Kinetix 7000 DC-DC Converter and Control Board Kits User Manual
Page 6
Publication 2099-IN002B-EN-P — October 2008
6
Kinetix 7000 DC-DC Converter and Control Board Kits
Remove 2099-BM09-S and 2099-BM10-S Covers
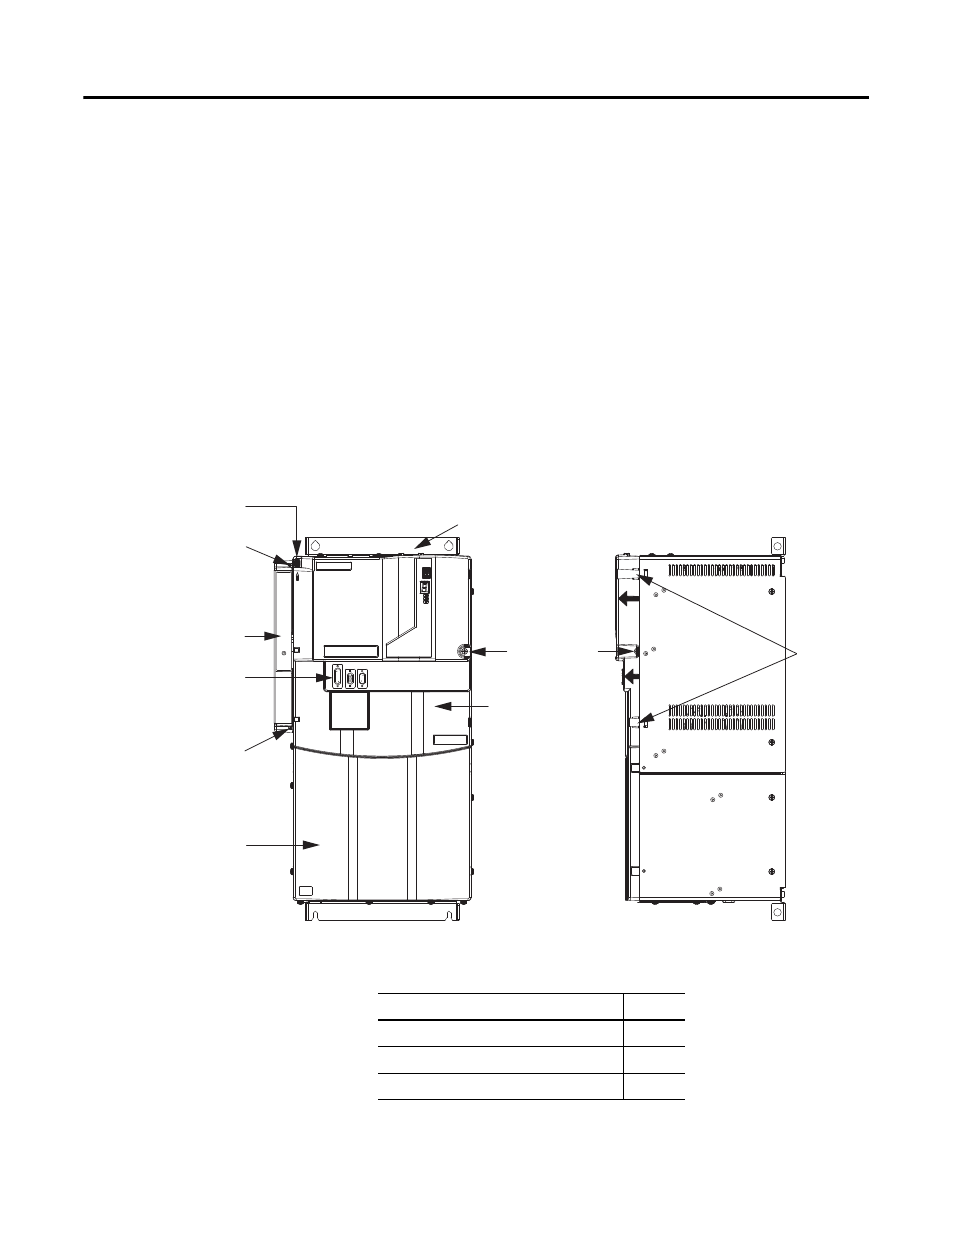
Follow these steps to remove the drive covers.
1.
Remove the two dc-dc converter cover screws.
2.
Pull the dc-dc converter cover outward and away from the drive.
3.
Pull the top cover fastener rod upward approximately 12 mm (0.5 in.).
If the rod is pulled far enough, the three latch points on the rod will
disengage with the chassis.
4.
Remove the top cover screw.
5.
Depress the two snap-fits on the right-hand side of the top cover and
pull the cover outward and away from the drive.
6.
Install your kit.
Kinetix 7000 Drive
(2099-BM09-S is shown)
Snap-fits
Top Cover
Side View
Front View
DC-DC Converter Cover
Bottom Cover
Upper DC-DC Converter Cover
Captive Screw
Lower DC-DC Converter Cover
Captive Screw
I/O and Feedback
(IOD, MF, and AF) Connectors
Fiber-optic (Tx and Rx) Connectors
Top Cover Screw
Cover Fastening Rod
Topic Page
Install the DC-DC Converter Kit