Mount the display computer in a panel – Rockwell Automation 6181F_P Series E Integrated Display Computers Installation Instructions User Manual
Page 14
14 Industrial Integrated Display Computers
Rockwell Automation Publication 6181P-IN010F-EN-P - July 2013
Mount the Display Computer in a Panel
Mounting clips secure the display computer to the panel. The number of clips varies by model.
Follow these steps to mount the computer in a panel.
1. Remove power from the panel.
2. Cut an opening in the panel by using the appropriate panel cutout dimensions.
3. Attach cables to the computer before installation if rear access to the computer is limited
Connect Peripherals on page 15
for where to attach cables.
4. Place the computer in the panel cutout.
5. Slide the mounting clips into the holes on the top, bottom, and sides of the computer.
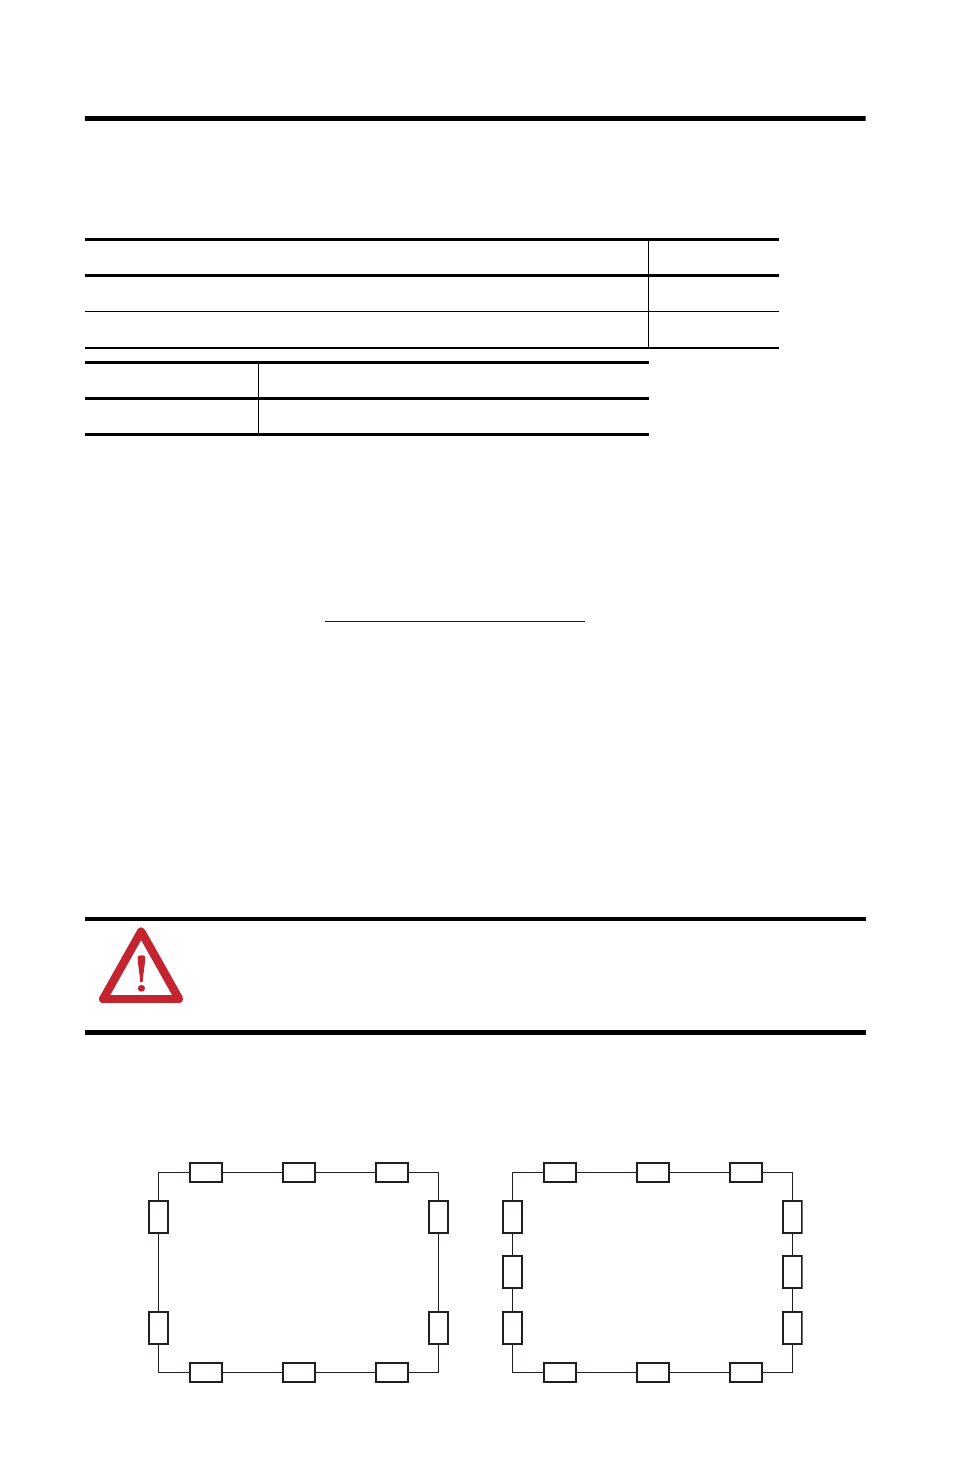
6. Hand-tighten the mounting clips around the bezel by following the tightening sequence
shown below.
7. Tighten the mounting clips to a torque of 1.35 N•m (12 lb•in) by following the
torquing sequence shown below, making sure to not overtighten.
8. Repeat the torque sequence at least three times until the clips are properly torqued,
making sure the gasket is compressed uniformly against the panel.
Mounting Clips Tightening and Torque Sequence
Computer Model
Number of Clips
All display models with aluminum bezel and 1500P display with stainless steel bezel
10
1700P display with stainless steel bezel
12
Cat. No.
Description
6189V-MCLPS3
Replacement mounting clips (14)
ATTENTION: Tighten the mounting clips to the specified torque to provide a proper seal and
prevent damage to the computer. Rockwell Automation assumes no responsibility for water or
chemical damage to the computer or other equipment within the enclosure because of improper
installation.
All Display Computers with Aluminum Bezel
and 1500P Display with Stainless Steel Bezel
5
4
3
6
9
1
10
8
2
7
1700P Display with Stainless Steel Bezel
5
4
3
6
9
1
10
8
2
7
11
12