Installing a locator, Changing a locator – Rockwell Automation 2090-Series Circular-DIN Connector Kits, Flange Kits, and Crimp Tools User Manual
Page 10
Rockwell Automation Publication 2090-IN042A-EN-P - May 2011
10
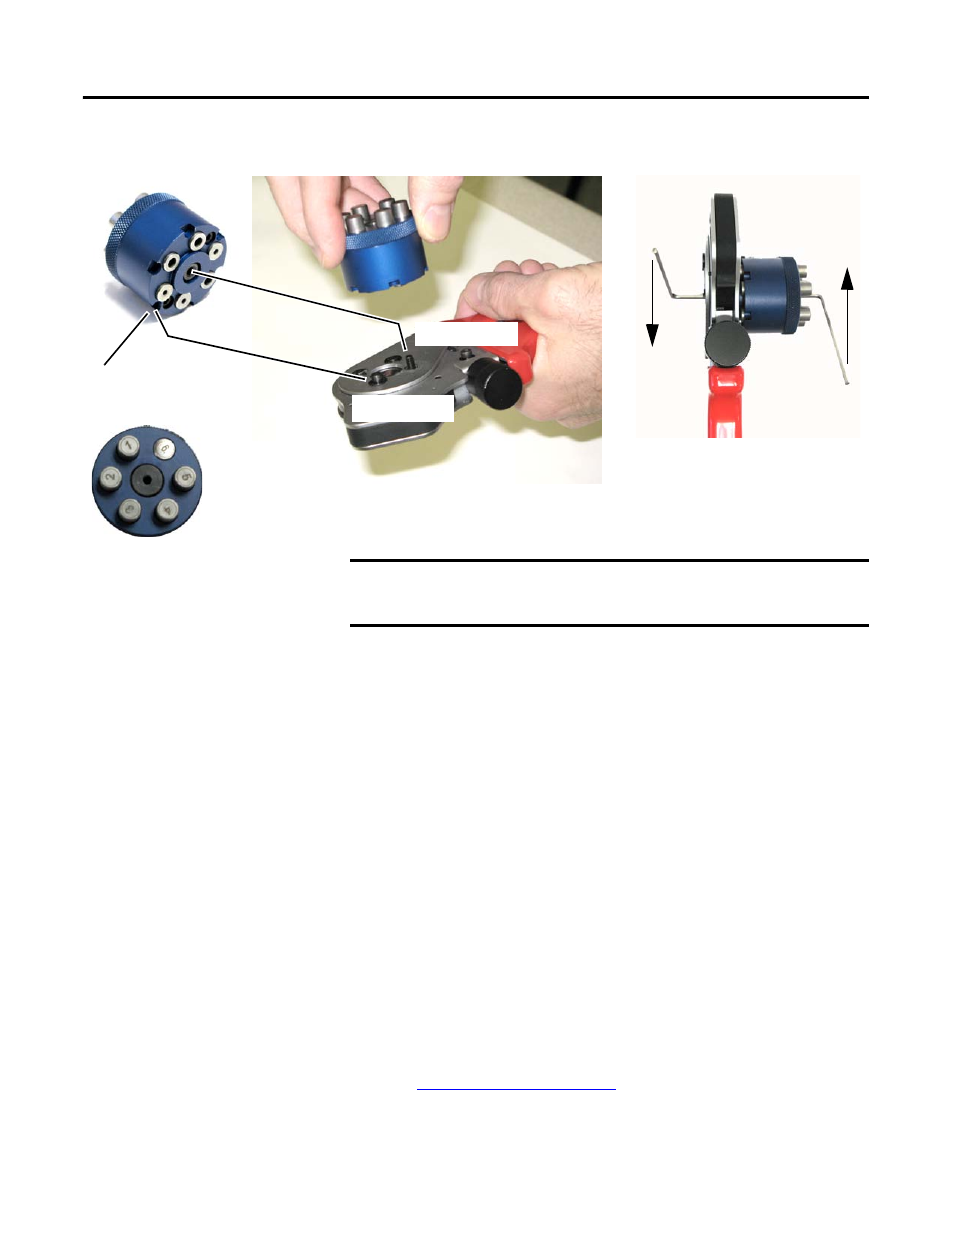
Installing a Locator
1. Screw the locator onto the threaded post and slowly turn the locator until
it makes contact with the positioning pin on the crimp tool.
2. Align one of the positioning grooves on the locator with the positioning
pin on the crimp tool.
3. Insert one Allen wrench into the Allen fitting in the rivet on front of the
crimp tool, and hold in place.
4. Insert the other Allen wrench in the center of the locator and turn the
Allen wrench clockwise to draw the locator down on the threaded post.
Note: The locator is properly installed when the Allen wrenches can no
longer be tightened, but the locator can still rotate.
Changing a Locator
1. Insert one Allen wrench into the Allen fitting in the rivet on front of the
crimp tool, and hold in place.
2. Insert the other Allen wrench in the center of the locator and turn
counterclockwise to lift the locator off the threaded post.
3. See
Installing a Locator on page 10
to install a different locator.
Positioning Grooves (6)
on Locator
Threaded Post
Positioning Pin
Use the locator with the cartridges numbered 1...6.
IMPORTANT
The 8-point indent crimp tool comes with two locators. Install the locator
with the cartridges numbered 1...6. The connector kits do not use the
locator with the cartridges numbered 7...12.