Panel cutout dimensions, Mount the c200, c300, or c600 terminal in a panel – Rockwell Automation 2711C-xxxx PanelView Component HMI Terminals Installation Instructions User Manual
Page 10
10 PanelView Component HMI Terminals
Publication 2711C-IN001H-EN-P - July 2014
Panel Cutout Dimensions
Use the template shipped with your terminal to mark the cutout dimensions.
Mount the C200, C300, or C600 Terminal in a Panel
PanelView Component C200, C300, and C600 terminals install easily in a panel without any tools or
hardware. The terminals have panel clamps that automatically latch when the terminal is pushed into the
panel opening.
Follow these steps to mount the terminal in a panel.
1. Cut an opening in the panel using the template shipped with the terminal.
2. Make sure the sealing gasket is properly positioned on the terminal.
This gasket forms a compression type seal. Do not use sealing compounds.
3. Place the terminal in the panel cutout.
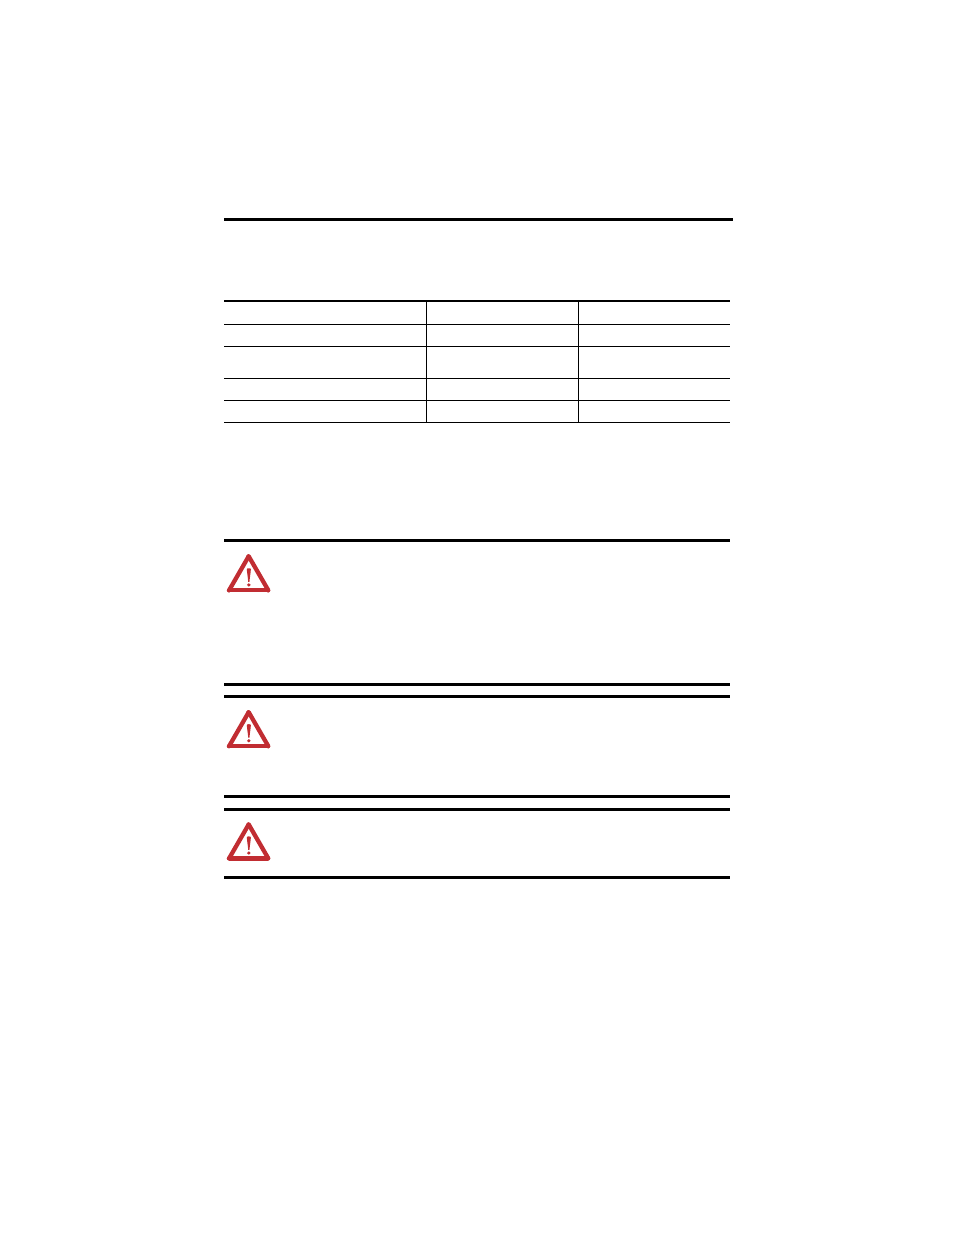
PanelView Component Terminal
Height, Approx., mm (in.)
Width, Approx., mm (in.)
C200 Function Key and C300 Touch
64.0 ± 1.0 (2.52 ± 0.04)
99.0 ± 1.0 (3.90 ±0.04)
C200 and C300 Keypad
C400 Touchscreen and function keys
99.0 ± 1.0 (3.90 ± 0.04)
119.0 ± 1.0 (4.69 ±0.04)
C600 Touch
135.0 ± 1.0 (5.31 ± 0.04)
189.0 ± 1.0 (7.44 ±0.04)
C1000 Touch
231.0 ± 1.0 (9.09 ± 0.04)
289.0 ± 1.0 (11.38 ±0.04)
ATTENTION: Disconnect all electrical power from the panel before making the panel cutout.
• Make sure the area around the panel cutout is clear.
• Take precautions so metal cuttings do not enter any components already installed in the
panel.
• Failure to follow these instructions may result in personal injury or damage to panel
components.
WARNING: If you connect or disconnect the serial cable with power applied to this module or
the serial device on the other end of the cable, an electrical arc can occur. This could cause an
explosion in hazardous location installations.
Be sure that power is removed or the area is nonhazardous before proceeding.
WARNING: When used in a Class I, Division 2, hazardous location, this equipment must be
mounted in a suitable enclosure with proper wiring method that complies with the governing
electrical codes.