Replacing scan window – Rockwell Automation 2755 High Performance VLD Scanner User Manual
Page 42
6–2
Maintenance and Troubleshooting
The scan window fits into an opening behind the front of the scanner.
A bezel and gasket create a NEMA Type 4 seal.
The table below lists replacement numbers for ordering a glass or
plastic window kit. Do not substitute other material for a damaged
window. The windows have an optical coating necessary to scanner
performance.
Replacement Numbers
Window Kit Description
77125-898-01
Replacement Glass Window Kit
Includes bezel/window assembly with anti-reflective,
optical glass window.
77125-899-01
Replacement Plastic Window Kit
Includes bezel/window assembly with hard coated,
anti-reflective, optical quality, plastic window.
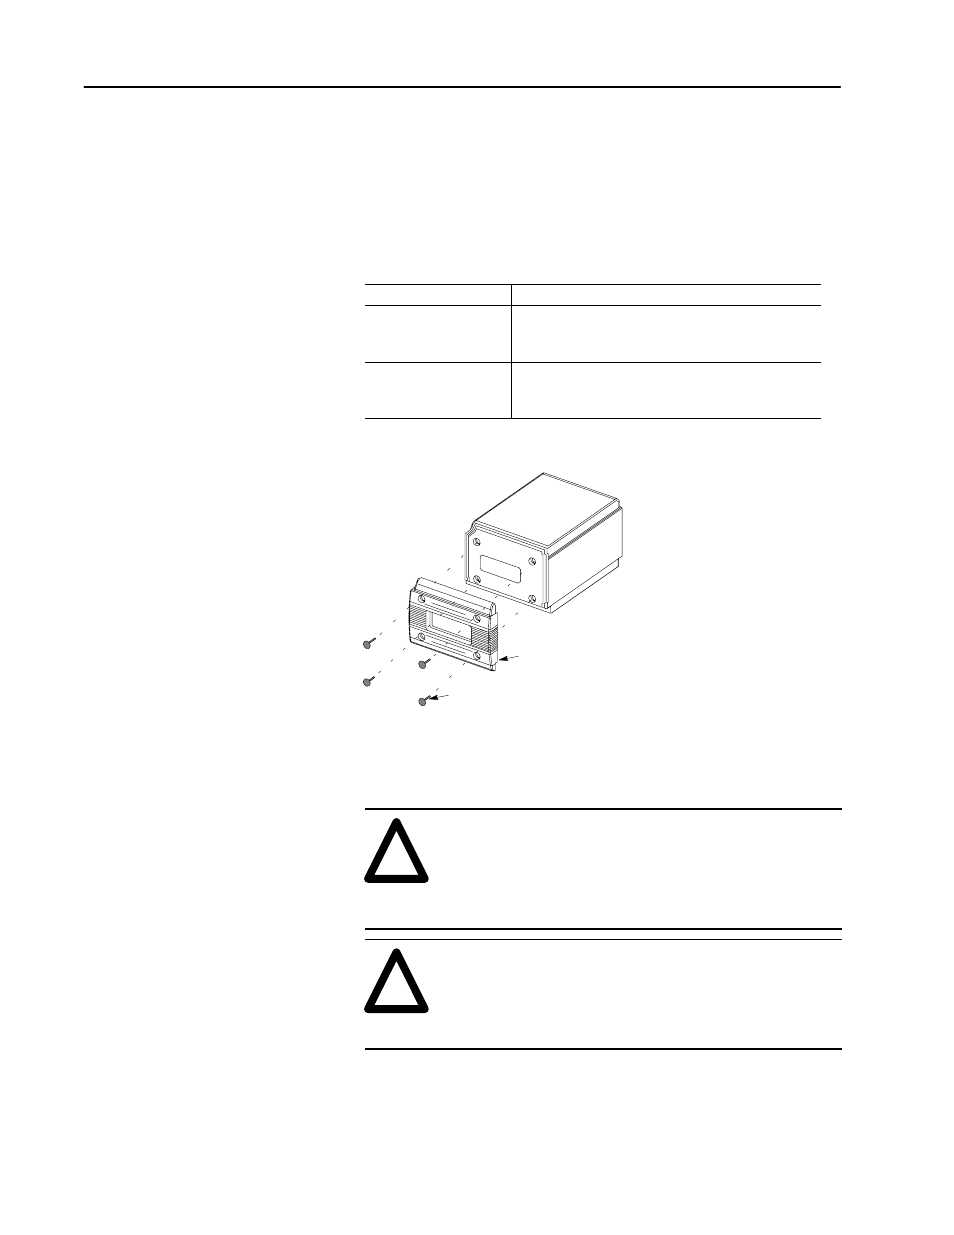
Figure 6.1
Scan Window Removal
Bezel Screws (4)
Bezel/Window Assembly
To remove the scan window:
1. Remove four screws from front cover of scanner.
!
ATTENTION: Many electronic components in the
scanner are static sensitive. Anyone servicing the
scanner should be well grounded through an ESD strap
and ground cord. For additional protection from static
discharge, the scanner should be attached to the
decoder.
!
ATTENTION: Do not touch the internal mirrors!
Smudges from fingerprints will deteriorate read
performance. The internal mirrors cannot be serviced
in the field.
2. Lift bezel/window assembly away from scanner.
3. Replace window with the appropriate window kit.
4. Tighten screws to a torque of 10 inch-pounds.
Replacing Scan Window