Catalog number explanation, Install the module, Set the network address – Rockwell Automation 1732E-XXXX Ethernet/IP 24Vdc 16 Input Modules User Manual
Page 6
6 ArmorBlock 16-Point EtherNet/IP Module, Series A
Publication
1732E-IN002B-EN-E - February 2011
Catalog Number Explanation
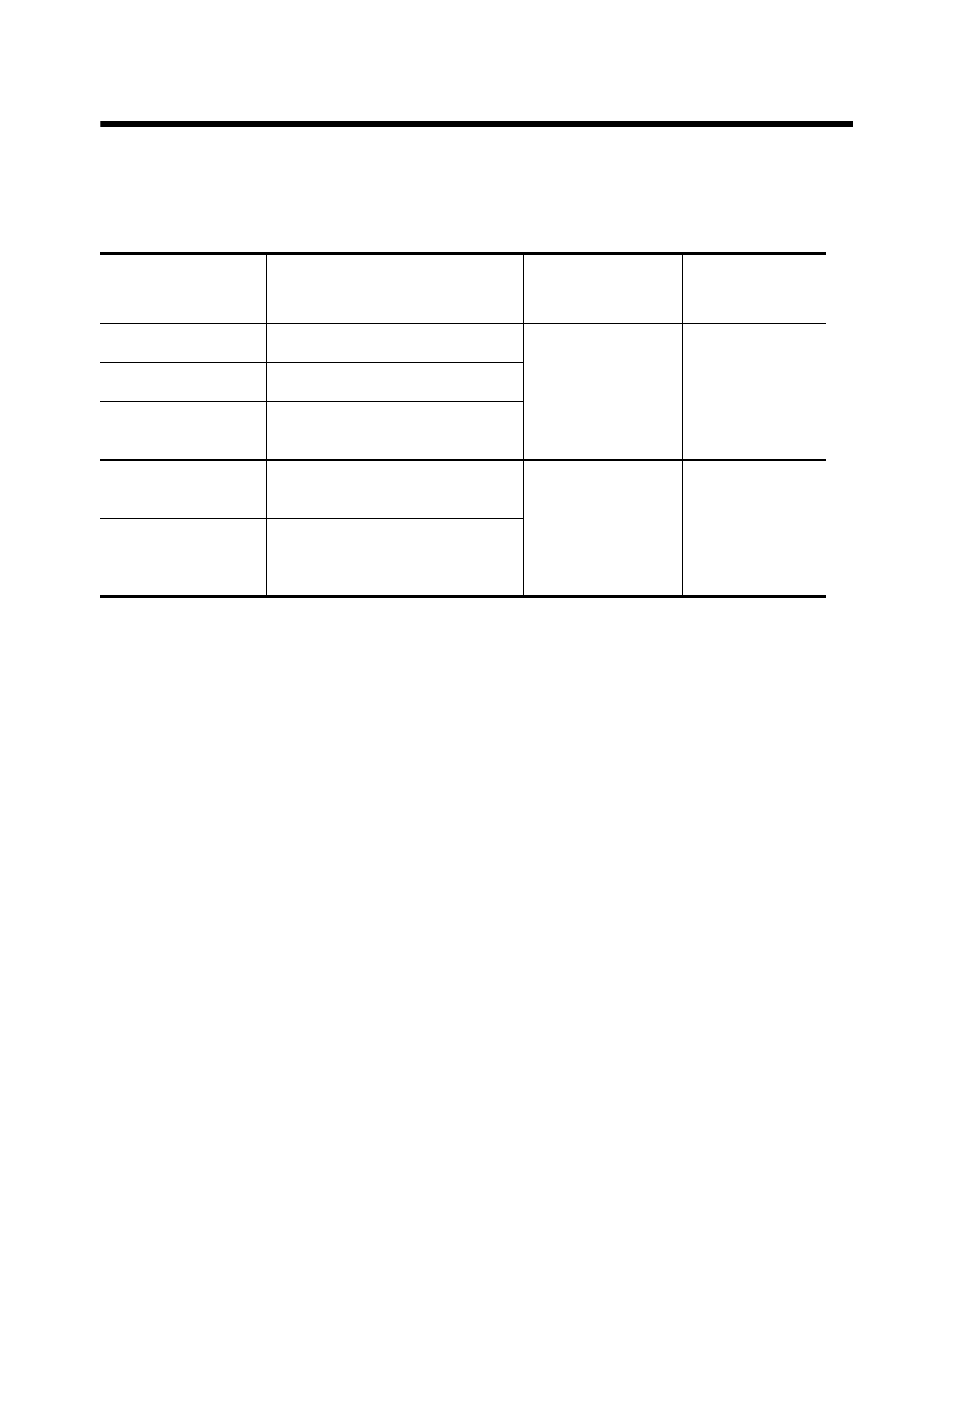
Refer to the table for a description of the catalog numbers.
Install the Module
Refer to the following sections to install your module.
•
Set the Network Address
•
Mount the Module
•
Connect the I/O, Network and Auxiliary Cables to the ArmorBlock
Module
Set the Network Address
The I/O block ships with the rotary switches set to 999 and DHCP-enabled.
To change the network address, you can do one of the following:
•
adjust the switches on the front of the module.
•
use a Dynamic Host Configuration Protocol (DHCP) server, such as
Rockwell Automation BootP/DHCP.
•
retrieve the IP address from nonvolatile memory.
The I/O block reads the switches first to determine if the switches are set to a
valid number. Set the network address by adjusting the 3 switches on the front
Cat. No.
Description
Network
Connector
Auxiliary
Power
1732E-IB16M12
EtherNet 24V DC 16 Input
Single D-Code M12
Single 4-pin
mini
1732E-OB16M12
EtherNet 24V DC 16, 2 A Output
1732E-16CFGM12
EtherNet 24V DC 16 Selectable
Points
1732E-IB16M12W
EtherNet 24V DC 16 Input
WeldBlock Metal Housing
Single D-Code M12
Single 4-pin
mini
1732E-16CFGM12W
EtherNet 24V DC 16 Selectable
Points
WeldBlock Metal Housing