Step 4: install the controller – Rockwell Automation 1794-FLA FlexLogix Controller Installation Instructions User Manual
Page 12
12 FlexLogix Controller System
Publication 1794-IN002G-EN-P - January 2004
Step 4: Install the Controller
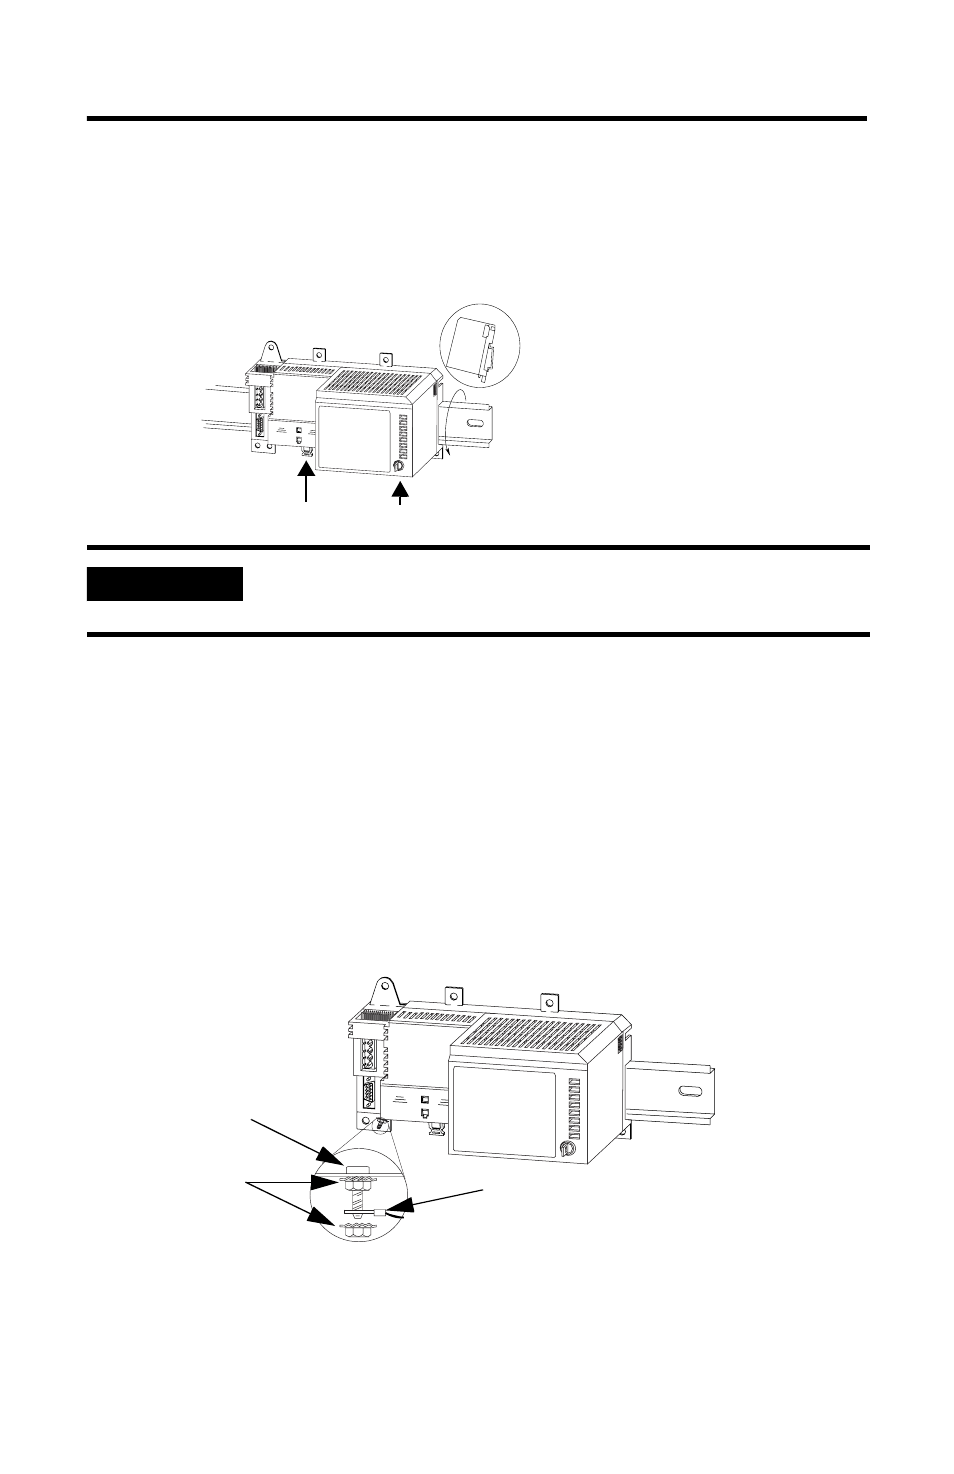
1. Position the FlexLogix controller on the DIN rail at a 5
° angle and rotate the
controller onto the DIN rail.
2. Press the controller down onto the DIN rail until flush. The locking tabs will
snap into position and lock the controller onto the DIN rail.
If the controller does not lock in place, use a screwdriver or similar device to
move the locking tabs down while pressing the controller onto the DIN rail.
Release the locking tabs to lock the controller in place. If necessary, push up
on the locking tabs to lock.
3. Ground the controller. The DIN rail and the common, conductive surface
behind the DIN rail provide functional ground for the controller. Use the
grounding stud to meet safety ground requirements.
For information about wiring and grounding, see the Industrial Automation
Wiring and Grounding Guidelines publication 1770-4.1.
IMPORTANT
You can mount the FlexLogix controller either vertically or
horizontally (as shown).
A
A
locking tabs
grounding stud
Equipment grounding conductor (ground lug
with 2.08 sq. mm [#14 AWG] wire) to ground bus
nuts with captive
star washer