Installation and operation, 1 installation, 1-1 ac adapter installation – BIXOLON IMPACT PRINTER SRP-270 User Manual
Page 9: 1-2 interface cable installation, 1-3 cash drawer cable installation, 1-4 ribbon cartridge installation, 9 2-1-2 interface cable installation, 9 2-1-3 cash drawer cable installation, 9 2-1-4 ribbon cartridge installation, Srp-270
Rev. 3.02
- 9 -
SRP-270
2. Installation and Operation
2-1 Installation
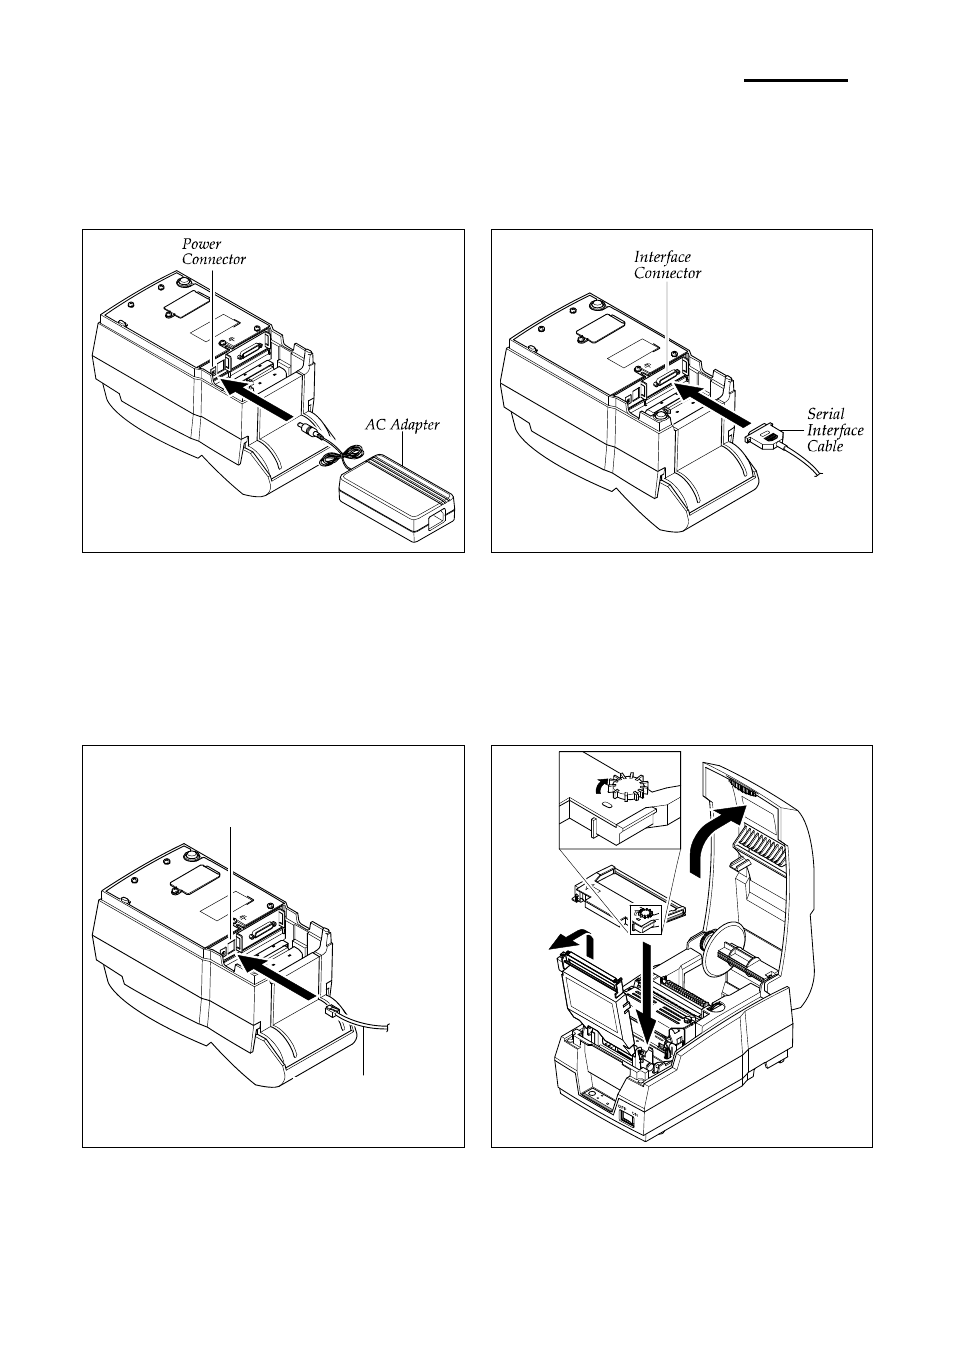
2-1-1 AC Adapter Installation
2-1-2 Interface Cable Installation
1. Mack sure the printer is turned off with the “Off”
side of the switch is pressed down.
2. Check the label on the AC Adapter to make sure the
voltage required by the AC Adapter matches that of the
electrical outlet.
3. Plug the DC cord connector into the power jack on the
printer.
4. Plug the AC Adapter power cord into the wall outlet.
2-1-3 Cash Drawer Cable Installation
1. Turn off the printer, host ECR and Computer.
2. Plug RS-232, RS-485, USB or Parallel Cable
connector into the I/F connector on the printer.
3. Tighten the screws on both sides of the connector.
4. Turn on the printer, host ECR and Computer.
2-1-4 Ribbon Cartridge Installation
1. Turn the printer off.
2. Plug the Cash Drawer cable connector into the
connector on the printer. (To remove the Cash Drawer
cable, press the clip on the connector, grasp the
connector and pull it out.)
3. Secure the Shield Wire on the bottom of the printer.\
1. Before inserting the ribbon cartridge, turn the Knob.
2. Insert the ribbon cartridge. Pay particular attention to
the placement of the ribbon behind the Print Head.
3. After inserting the ribbon cartridge, turn the knob
clockwise again to make sure the ribbon moves freely
in the cartridge.
Cash Drawer Connector
Cash Drawer Cable