Mechanical angle applicator method – USG Sheetrock Paper-Faced Metal Bead and Trim User Manual
Page 7
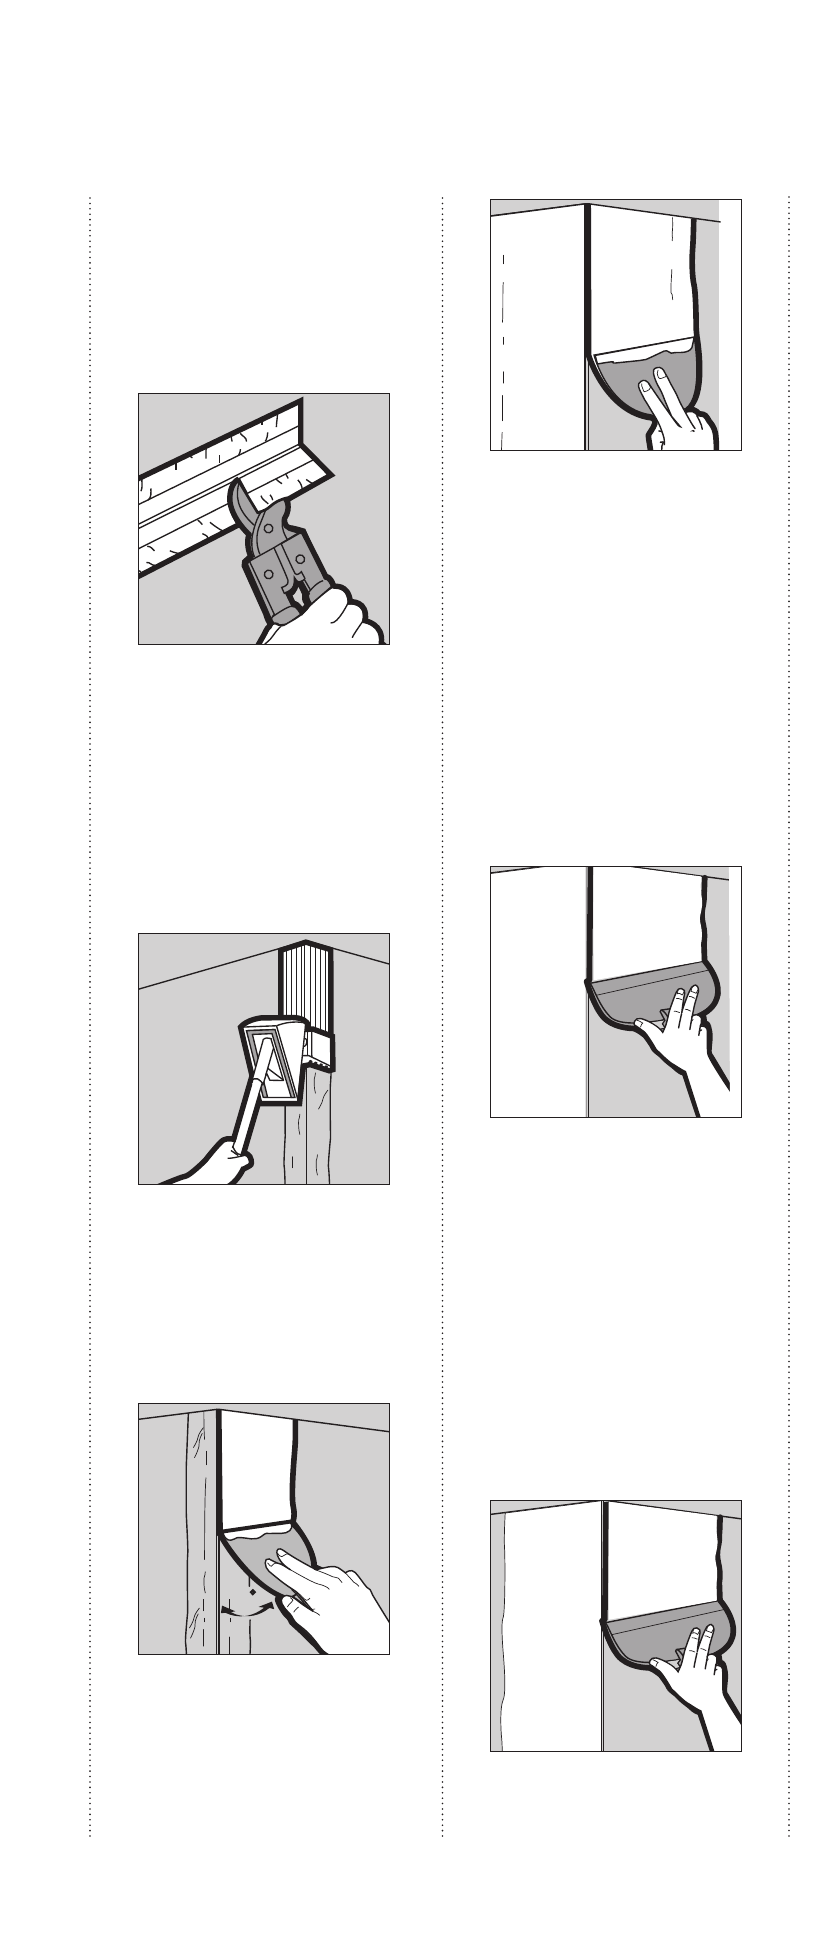
1 Measure length of corner;
cut trim to length with metal
snips. On vertical wall instal-
lations, cut the corner trim
1/2 (12.7 mm) shorter
than the wall height.
1
2
2
2 Apply ready-mixed s
hEEtrock
joint compound (taping,
all-purpose, or lightweight
all-purpose) or s
hEEtrock
D
urabonD
or E
asy
s
anD
setting-type joint compound
to drywall using mechanical
angle applicator.
1
2
2
3 Place trim on wall and press
into position. Corner bead
should be pressed tight to
ceiling. Embed trim by run-
ning the knife over it with
even pressure at a 45° angle.
PG 6 Paper Faced Metal Bead and Trim Installation Guide Illustrations
6
Mechanical Angle Applicator Method
45
3
5
2
1
4
4 Wipe off excess compound
with a damp sponge (or a 4
taping knife), eliminating any
air bubbles under the paper.
Allow to dry.
PG 6 Paper Faced Metal Bead and Trim Installation Guide Illustrations
6
Mechanical Angle Applicator Method
45
3
5
2
1
4
5 Using a 6 taping knife for outside
corners (4 for inside corners),
apply a second coat of joint
compound as smoothly as pos-
sible. (Do not use D
urabonD
or
taping joint compound for this
step.) Feather out 5 to 6 (125
to 150 mm) on each side from
nose of trim for outside corners
(1 (25 mm) for inside corners).
Let dry. Sand sides lightly where
needed.
PG 6 Paper Faced Metal Bead and Trim Installation Guide Illustrations
6
Mechanical Angle Applicator Method
45
3
5
2
1
4
6 Use an 8 or larger finishing
knife for outside corners (4-6
knife for inside corners) to apply
a finishing coat of compound.
(Do not use D
urabonD
or taping
joint compound for this step.)
Feather compound 8 (200 mm)
from nose of trim for outside cor-
ners (1 (25 mm) past previous
coat for inside corners). Let dry;
sand and prime.
PG 6 Paper Faced Metal Bead and Trim Installation Guide Illustrations
6
Mechanical Angle Applicator Method
45
3
5
2
1
4
6
Mechanical Angle
Applicator Method