Step 2: installation of main tees – USG Curvatura 2x 2 Ceiling System User Manual
Page 4
K.
M.
N.
O.
Q.
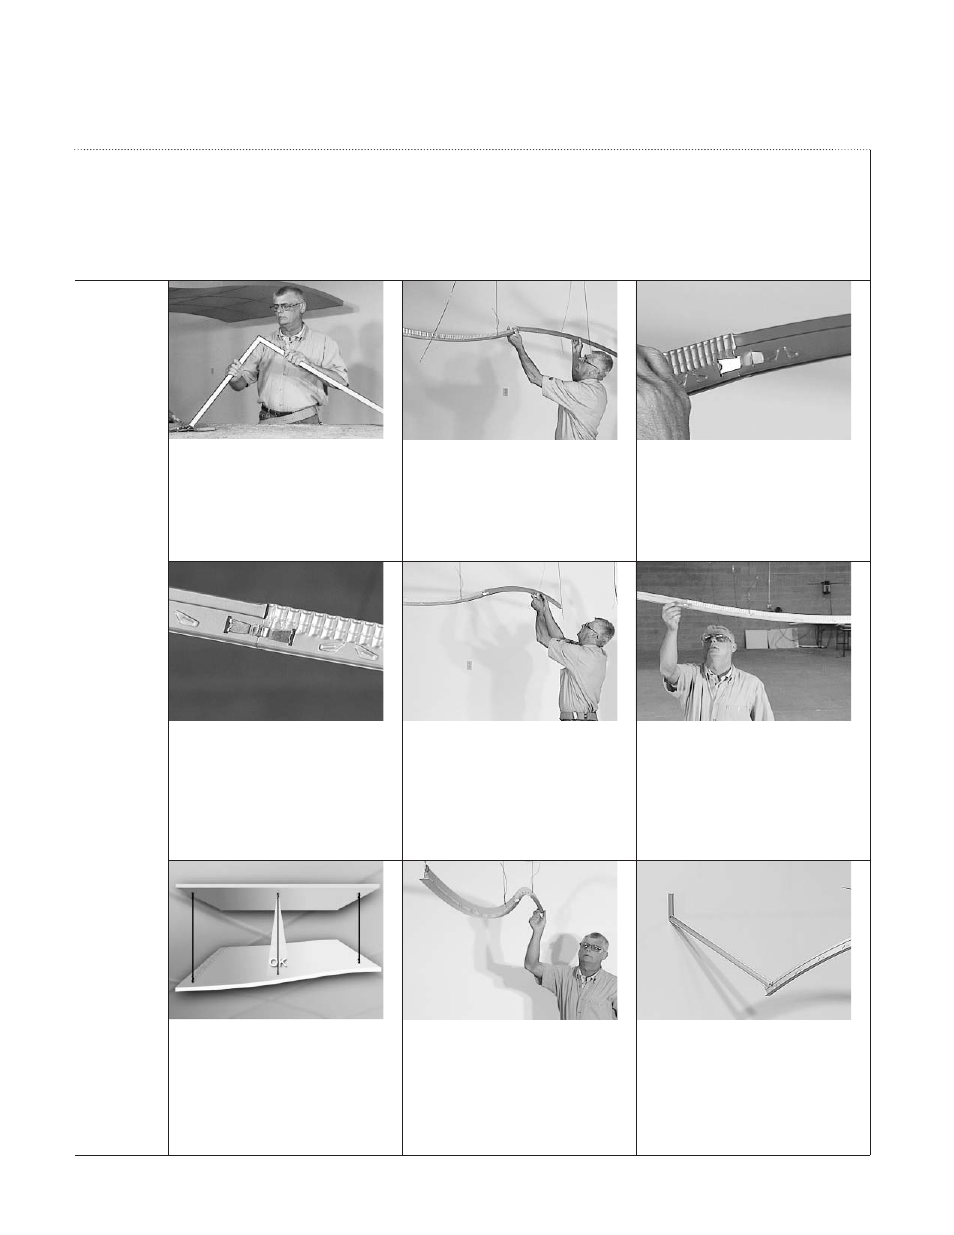
Continue installing Main Tee segments.
Refer to the Ribbon Drawing to select
each tee.
To connect Main Tees, use a Main Tee
Splice. Insert the splice tabs into the slots
at the ends of the adjoining Main Tees.
Then, partially bend the tabs inward.
Once both tees are suspended and
aligned, the tabs can be fully bent down.
The accuracy of the first row of Main
Tees will ultimately determine the quality
of the installation so be sure to check
the integrity of the completed row. Extra
care at this point will prevent alignment
problems in the rest of the installation.
Next, examine the profile of the completed
row from the side. The curve of one tee
should flow smoothly into the curve of the
next. If the curves are not flowing smoothly,
adjust the hanger elevations either up or
down.
Wire should hang straight and plumb
within 1 in 6, about 10 degrees. If hang-
ers need to be relocated, move them
now. If necessary, you can punch or drill
extra hanger holes into the Main Tee to
ensure plumb wires.
Now, examine the completed row of
Main Tees from one end. It should be
straight and plumb. If you need to install
additional hanger wires, install them now.
It’s important that the first row of Main
Tees remains stable during the entire
process. As a final step, install temporary
bracing to the ceiling or walls, as each
row is completed to ensure that it remains
straight and rigid.
C
URVATURA
2
Ј x 2Ј
Ceiling System
Installation
Instructions
Step 2: Installation
of Main Tees
J.
The finished field-cut Main Tee with the
cross Tee installed should look like this.
Page 4 of 8
L.
R.
P.