Heavy duty plastic lockers – 40000 series, Sloping hood installation instructions – Salsbury Industries 40000 Series Heavy Duty Plastic Lockers User Manual
Page 4
Heavy Duty Plastic Lockers – 40000 Series
Sloping Hood Installation Instructions
The Slope Tops are shipped in two (2) standard lengths of 1-wide (12”) and 3-wide (36”) to fit the lockers without any cutting or trimming. Wall strips
will be either 12” or 36” in length. The color of the wall strips may vary, but they are not visible after installation.
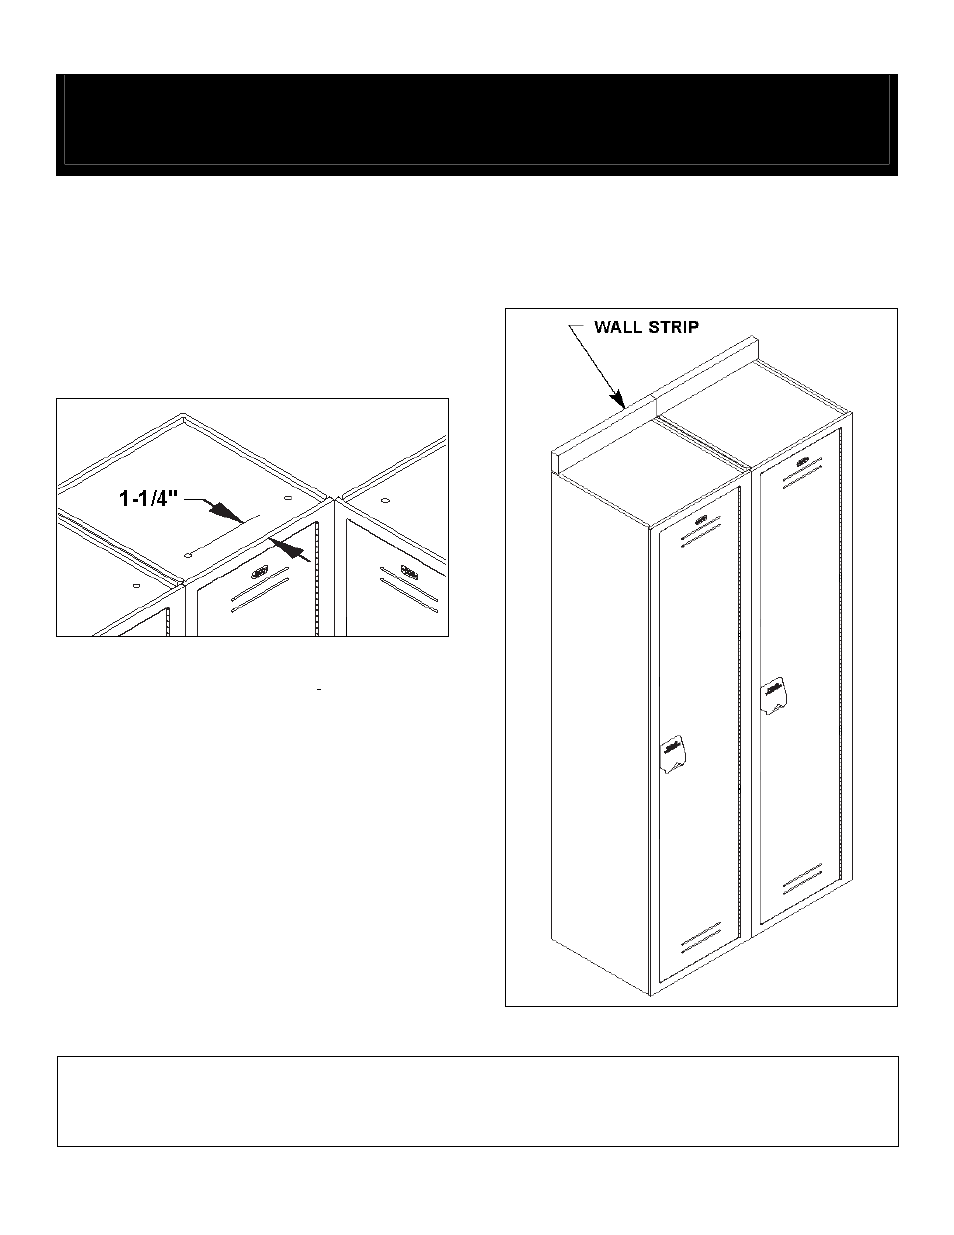
1. Drill two (2) 3/16” diameter clearance holes through the top of
each of the installed lockers as shown in the illustration below,
making sure that the holes are located 1-1/4” from the front edge of
the locker. This dimension is critical to ensure proper installation.
HOLE LOCATIONS
2. Position the wall strip (or strips) on top of the lockers flush against
the wall as shown in the illustration to the right. Measure, scribe and
drill 1/4” mounting holes into the wall strip as follows:
CONCRETE or BLOCK WALLS: Put two (2) holes 1” in from each
end of each 12” wall strip. Do the same for each 36” wall strip and
put a third (3
rd
) hole in the center. The holes must be located at least
1-1/4” from the bottom edge of the wall strip. Use a 3/16” diameter
masonry drill bit and 1/4” x 2-1/4” long Tapcon screws to fasten the
wall strip to the wall.
STUD WALLS: Drill the mounting holes at every stud location
covered by the wall strip. The holes must be located at least 1-1/4”
from the bottom edge of the wall strip. Anchor the wall strip to the
wall with 1/4” x 1-3/4” long pan head screws.
NOTE: The 12” wide wall strips are too short to span two (2)
studs in a conventionally framed wall.
LOCATION OF WALL STRIPS
SALSBURY INDUSTRIES
1010 East 62
nd
Street, Los Angeles, CA 90001-1598
Phone: 1-800-562-5377 Int’l Phone: 323-846-6700
Fax: 1-800-562-5399 Int’l Fax: 323-846-6800
www.lockers.com engineering
@
lockers.com
Installation instructions are provided as general guidelines. It is advised that a professional installer be consulted. Salsbury Industries assumes no product assembly or installation liability.
Copyright © 2010 Salsbury Industries. All rights reserved. (Rev. 05, 1/13/2010) Page 4 of 6