Retsch RM 200 User Manual
Page 25
11/6/2012
25
Retsch GmbH 0002
Please not that the properties, and therefore the
dangerousness of your sample, can change during
the milling operation.
Quantities from approx. 10 to 190 ml and a max. charging
grain size of 8 mm can be milled and homogenised with the
RM200, without any manual use of force.
The ideal filling quantity depends on the sample quantity and
the properties of the materials to be milled.
Selection of the milling tools depends on the sample material
and the subsequent analysis.
Different milling tools have different characteristics, e.g. the
materials contained in them, hardness or abrasion resistance.
For reliable analytical results you should select the milling
tools in such a way that the milling process is neutral with
regard to contamination.
Please ask for advice in case of doubt.
Crushing, mixing and milling of samples with grain
size < 3mm
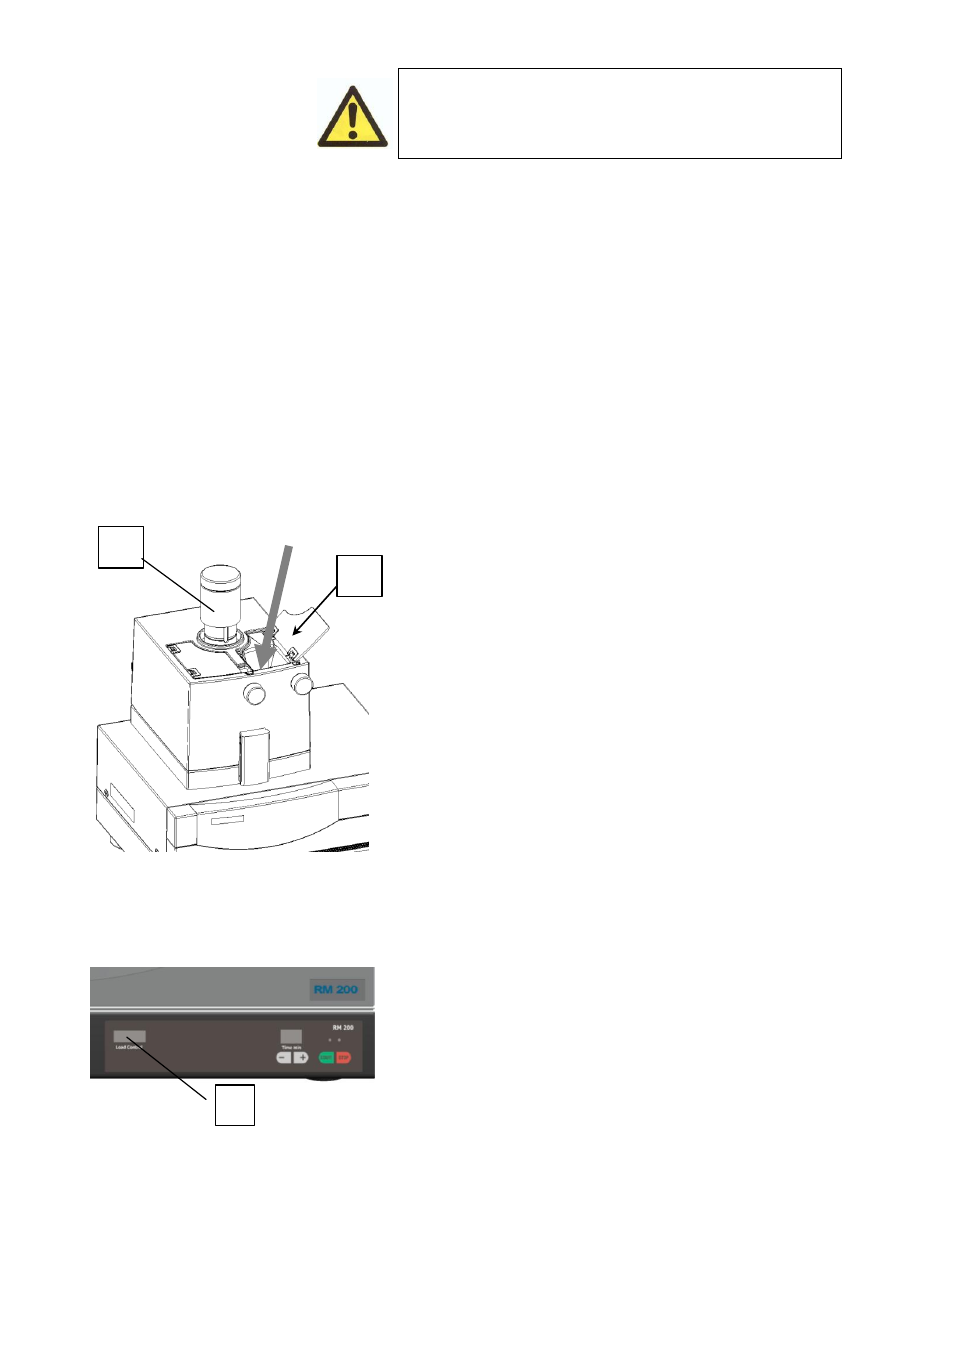
Fig.16
Fig.17
Connect the RM200 to the power supply, switch on
and start.
The sample is slowly added to the rotating mortar
through the filling opening I . For this purpose the
right-hand Plexiglass cover I is opened. Fig.16
The pestle, which is offset in relation to the centre of
the mortar, presses on the bottom of the mortar and
the material to be milled through spring tension and
its own weight.
Through the resulting friction the pestle is also
rotated with the mortar and this crushes the material
to be milled through pressure and friction. The
pressure can be varied by means of the rotary grip G
Fig.16
The scraper ensures that the sample material is
scraped off the inside wall of the mortar, recirculated
and refed to the milling gap between the pestle and
mortar.
This forced feeding of the material ensures that the
complete sample quantity is well mixed and that
every particle is continuously fed to the milling and
pulverizing process.
Load Control and safety switch off
The load indicator “Load Control” N Fig.17 and 18
serves as a guide for the user. It indicates loading of
the drive motor in 6 stages. At low to full load 1 to 4
green LEDs light up. At slight overloading a yellow
LED lights up in addition.
G
N
I