Installing or changing the pestle – Retsch RM 200 User Manual
Page 17
11/6/2012
17
Retsch GmbH 0002
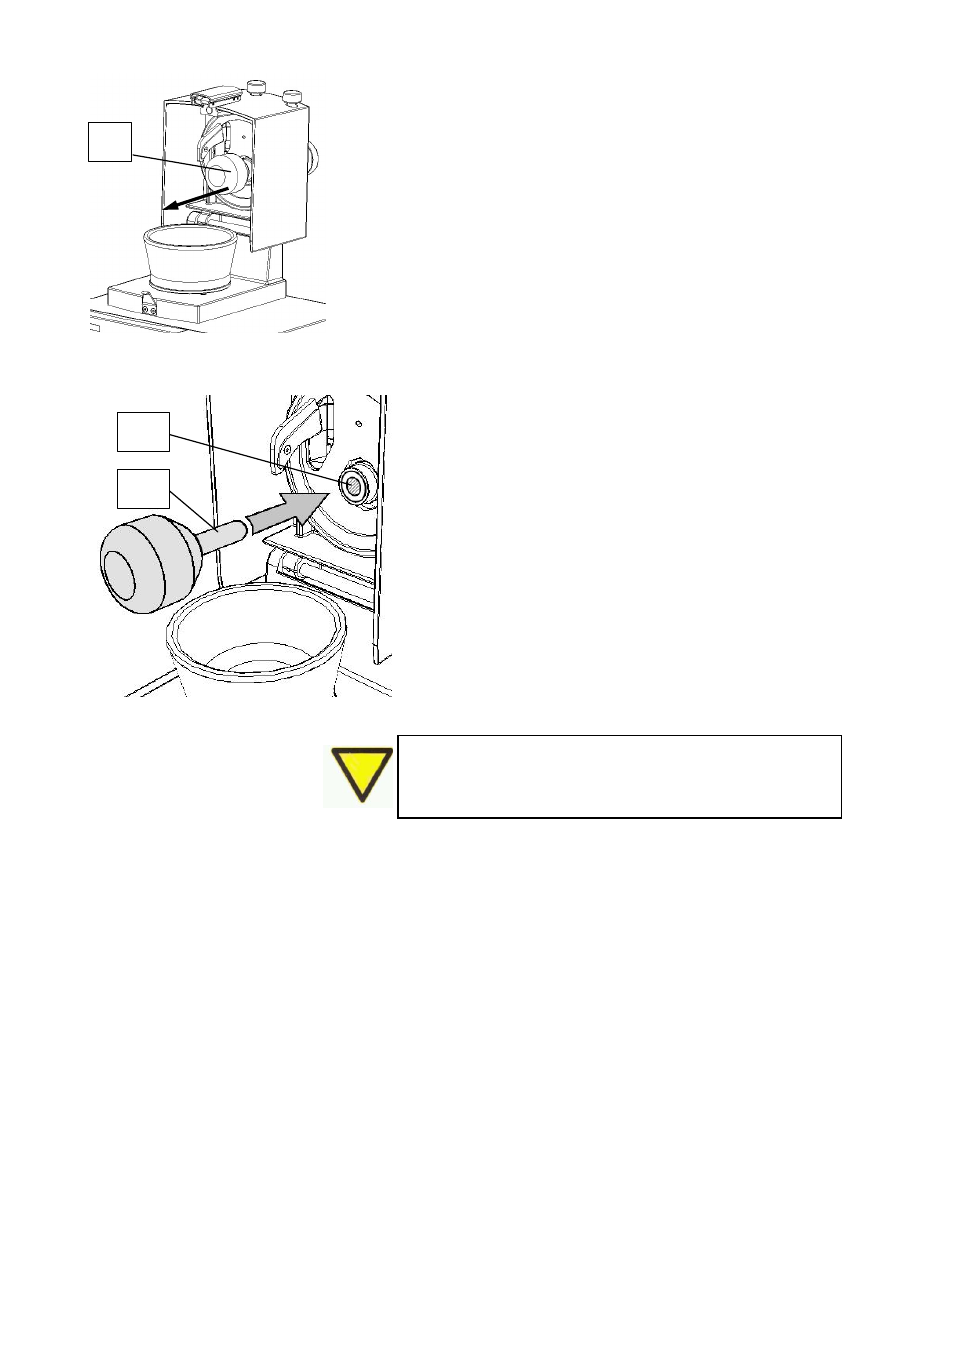
Installing or changing the pestle
• Remove the pestle V horizontally from its holder
while holding the hood firmly Fig.4
• Insert a new pestle into the holder until it
noticeably engages.
• If the pestle does not engage turn this slightly
and, if necessary, hold the holder firmly with the
other hand so that the locking pins can engage at
this position. Fig.5
To prevent contact corrosion, take the pestle out of
the machine if the machine is idle for a long time.
Fig. 4
Ensure that the pestle bolt Pb is not contaminated.
No dirt should get into the pestle holder Pa Fig.4.1
Fig. 4.1
Make sure that the pestle is locked in position.
Otherwise it may fall out when the lid is closed and
damage the mortar.
Pa
V
V
Pb
- BB 50 (41 pages)
- BB 100 (24 pages)
- BB 200 (24 pages)
- BB 300 (24 pages)
- Cryomill (68 pages)
- CryoMill Autofill 50l (28 pages)
- DM 200 (20 pages)
- DM 400 (60 pages)
- Emax (67 pages)
- GM 200 (44 pages)
- GM 300 (44 pages)
- MM 200 (32 pages)
- MM 400 (32 pages)
- PM 100 (44 pages)
- PM 400 (36 pages)
- PM GrindControl (48 pages)
- RS 200 (32 pages)
- SK 100 (24 pages)
- SM 100 (48 pages)
- SM 200 (48 pages)
- SM 300 (44 pages)
- Cyclone - SM 300 (20 pages)
- SR 200 (24 pages)
- SR 300 (24 pages)
- TWISTER (44 pages)
- ZM 200 (32 pages)
- AS 200 jet - Automatic Vacuum Regulation (6 pages)
- AS 200 control - natural frequency (32 pages)
- AS 200 (36 pages)
- AS 200 jet (56 pages)
- AS 200 jet (48 pages)
- AS 200 tap 30.025.0001 (28 pages)
- AS 200 tap 30.025.1001 (28 pages)
- AS 300 (32 pages)
- AS 400 (32 pages)
- AS 400 (28 pages)
- AS 450 basic (40 pages)
- AS 450 basic (44 pages)
- AS 450 control (52 pages)
- DR 100 (40 pages)
- DR 100 (28 pages)
- PP 25 (32 pages)
- PP 40 (28 pages)
- PT 100 (36 pages)