Adjusting the pestle, Adjusting the pestle pressure – Retsch RM 200 User Manual
Page 18
11/6/2012
18
Retsch GmbH 0002
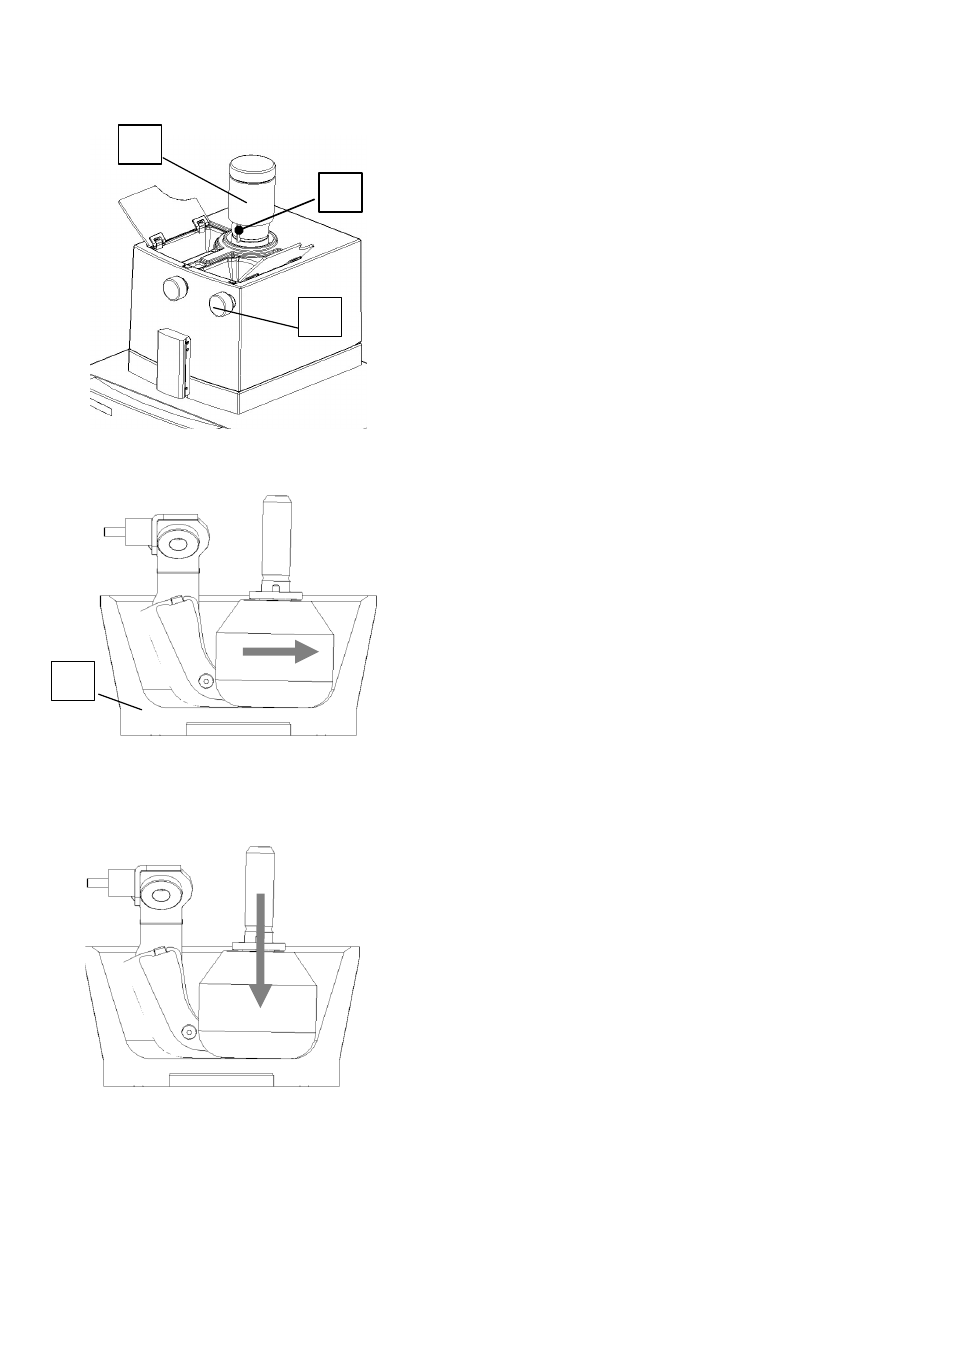
Adjusting the pestle
Fig.5
Fig.6
Fig.7
Fig.5
• The mortar V is installed
• The pestle W is installed and locked in position
• Close the lid M and press the closing grip F shut.
• Turn the rotary grip G anticlockwise and remove.
• Start the machine by switching on with the on/off
switch D and pressing the start button Q
• Move the pestle forwards. To do this turn the pestle
knob L to the left until this reaches the stop. The
setting range is only a few millimeters for several
rotations of the setting knob.
• Then move the pestle backwards again until
resistance is felt. To do this turn the pestle knob L
to the right. Fig.6
• In Fig.6 the optimum setting has been reached
since the lower rounded surface of the pestle is
now running in the lower rounding of the mortar.
• As soon as the pestle shaft is pressed upwards
during the setting process the pestle moves
upwards on the mortar wall and setting is no
longer optimum. In this case turn the pestle knob
back slightly.
Adjusting the pestle pressure
The correct pestle pressure should be determined by
carrying out tests and depends on the material to be
milled and the required degree of fineness.
Increasing the pressure: Fig.5
• Turn the sleeve G clockwise
• This increases the pressing force downwards Fig.7
• The value can be read off on scale H
Reducing the pressure: Fig.5
• Turn the sleeve G anticlockwise
• The values on scale H are reduced
The values indicated on scale H are only for use as
a guide during setting. They can be used as an aid
in reproducing the conditions. However, no
mathematical conclusion regarding the contact
pressure is possible since this depends on the
material to be milled.
G
L
H
W