Retsch PM GrindControl User Manual
Page 32
Wireless Grinding Jar Cover
32
•
Unscrew the antenna (4).
•
Remove the two black caps from the venting holes (9).
•
Remove the three screws (13) on the pre-assembled standard cover
baseplate and lift the plate up from the cover housing.
•
Place the cover baseplate with the venting holes (12) in front of you with the
recess for the filter fleece (8) pointing upwards.
•
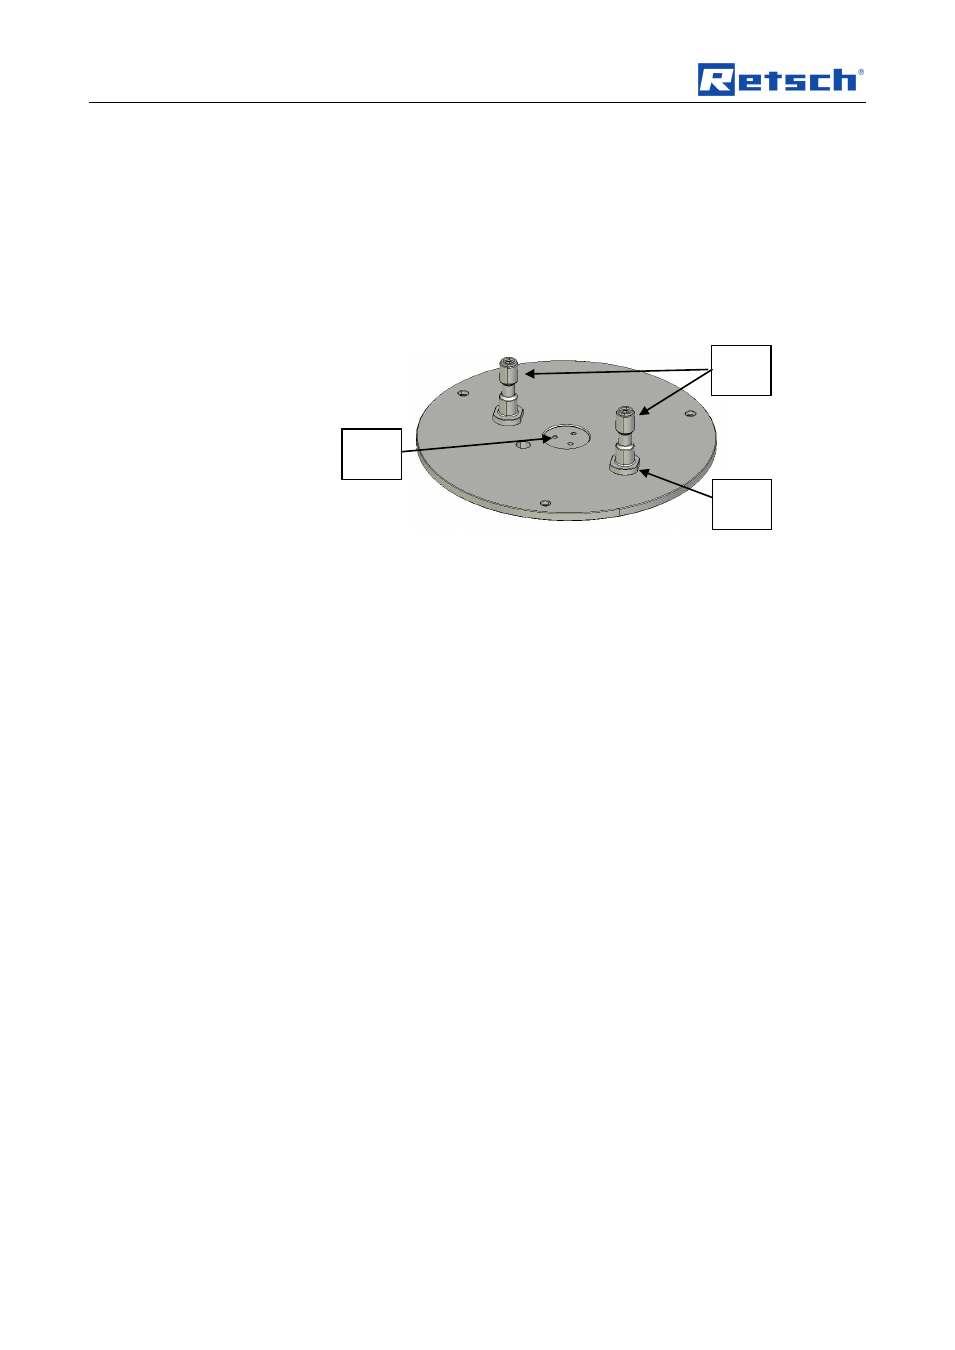
Caution! When inserting the two de-aerating tubes (14), the surface
with which the tubes are fitted (flat) (10) must point downwards. After
tightening, this flat fits on the cover baseplate.
Fig. 44: Position of the de-aerating tubes
•
Screw the two de-aerating tubes (14), as described, from the top downwards
into the cover baseplate (12) and tighten it with a 13-mm open-jaw wrench.
•
Before assembly, check the state and the correct position of the seals and
the filter fleece.
•
Now, insert the cover baseplate with the de-aerating tubes mounted on it into
the cover housing; when doing so, pay attention to the position of the filter
fleece (11).
•
Next, tighten the cover baseplate with the three screws (13).
•
Screw the two de-aerating valves (2) into the venting holes (9) and tighten
them with a 13-mm open-jaw wrench.
•
Screw the antenna (4) onto the grinding jar cover.
Pos : 8.18 /00020 BDA Softwar e/20005 PMGC Kapitels ammlung/Ü bersc hriften/1.1 Übersc hriften/11 Filter vlies Wec hs el @ 0\mod_1209389799774_9.doc @ 742 @ @ 1
6.8 Changing the Filter Fleece
Pos : 8.19 /00020 BDA Softwar e/20005 PMGC Kapitels ammlung/F unk Mahlbec herdec kel/Modul Wec hs el des Filter vli es es @ 0\mod_1214313335584_9.doc @ 1774 @ @ 1
Depending on the application and the period of use, it may be necessary to replace
the filter fleece that is located in the grinding jar cover.
Replace the filter fleece if it is very dirty.
6.9 Replacing the Filter Fleece When Using the Standard Cover Baseplate
Tools required:
Hexagon socket screw key 2.5 mm
•
Unscrew the antenna (4).
•
Remove the three screws (13), on the pre-assembled standard cover
baseplate and lift the plate up from the cover housing.
14
8
10