Setup, adjustment and operation, 4 mk-101 tracker setup for operation, Set cutting depth – MK Diamond MK-101 Tracker User Manual
Page 17
MK-101 TRACKER
Revision 06/05, Effective Date June 07, 2005
Page 17
SETUP, ADJUSTMENT and OPERATION
4 MK-101 TRACKER Setup for Operation:
1. Before powering or starting, check for damage that could prevent this equipment from proper
operation or performing its intended function. Check for binding and alignment of moving parts.
Check for damaged, broken, or missing parts.
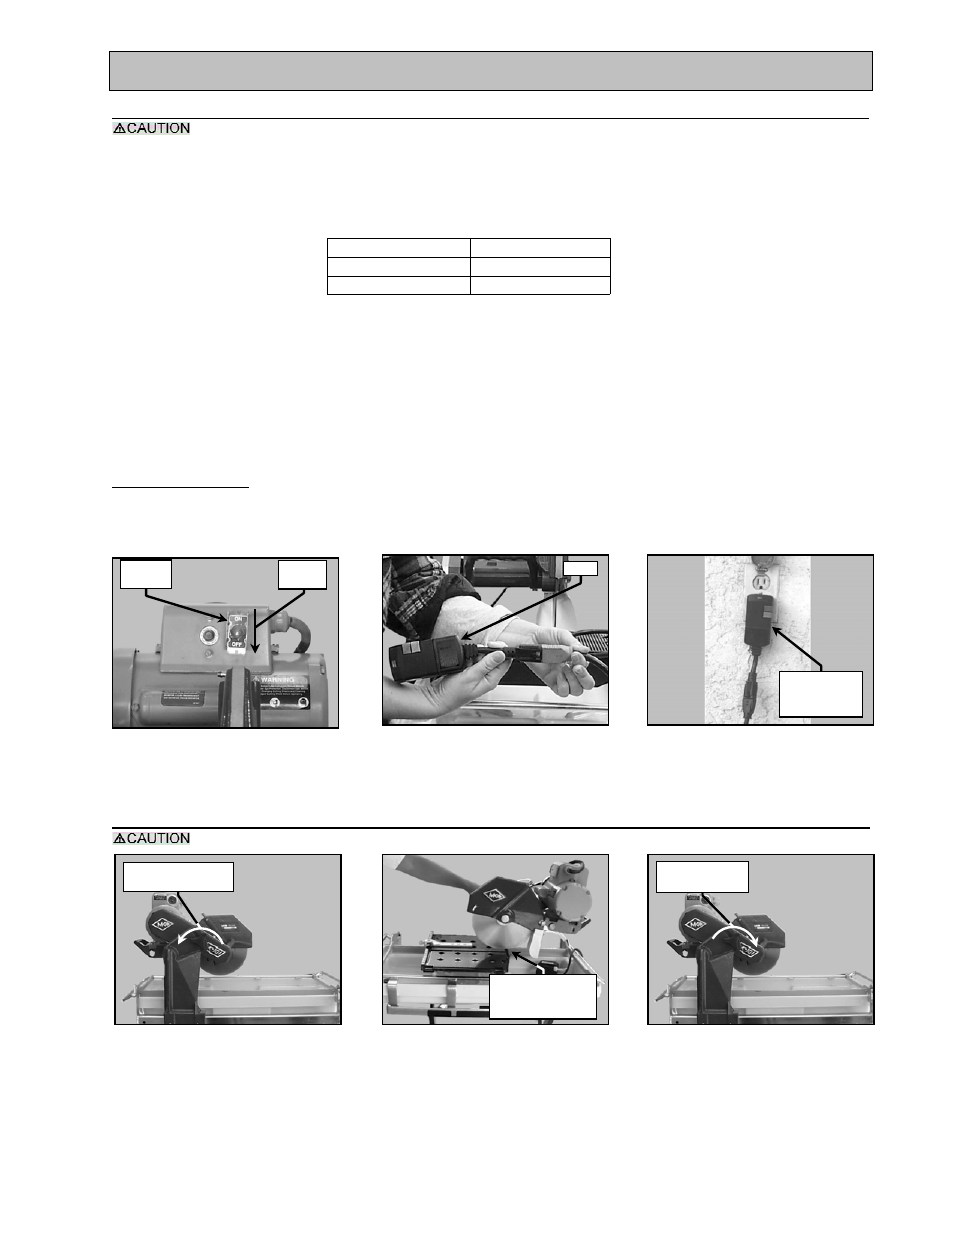
2. Verify the On/Off switch is in the OFF position.
3. Before connecting the MK-101 TRACKER to a power supply, be sure the voltage, cycle and
phase of the job site power source meet the requirements of TABLE 3
VOLTAGE: 115v
CYCLE: 60hz
PHASE: 1-phase
TABLE 3
4. If using an extension power cord, made sure, the length and wire gauge correspond to the
requirements listed in TABLE 1 on page 9. An extension power cord that is too small in wire
gauge (diameter), or too long in length, will cause the motor to overheat and could cause
premature failure.
5. Use an approved Ground Fault Circuit Interrupter (GFCI)
6. Do not cover the motor vents as this could lead to motor overheating.
NOTE: In order to avoid breaker tripping, a 20-amp circuit breaker should be used.
Portable Generator:
If using a portable generator, ensure the generator meets the following minimum requirements:
5 KW
120/240 volts
41.7/20.8 amps
Single Phase
5. Set Cutting Depth:
When loosing the Cutting Head Adjusting Knob, the Cutting Head will pivot down unless held.
* A GFCI wall socket is the preferred protective device.
Off
Position
ON/OFF
Switch
(A)
Ensure the ON/OFF Switch
is in the OFF position
(B)
Plug MK-101 TRACKER into the
GFCI
(C)
Plug the GFCI into the
Power source *
(A)
Loosen Cutting Head
Adjusting Knob
(B)
Set cutting depth approximately
1/4 to 1/2 inch below the surface
of the Movable Cutting Table
(C)
Ensure the Adjusting Knob
is tight
GFCI
GFCI Plugged
Into Power
Source
Turn Counter-
clockwise to loosen
Turn Clockwise
to tighten
Adjust Cutting
Head to Cut Depth
of Approx ¼” to ½”