Bedienung, 1 gerät einschalten, 2 auswechseln der sekundärsicherung – Leica Biosystems EG1150 C User Manual
Page 16: Operation, Switching on the instrument, Replacing the secondary fuse
16
Leica EG1150 C
5. Operation
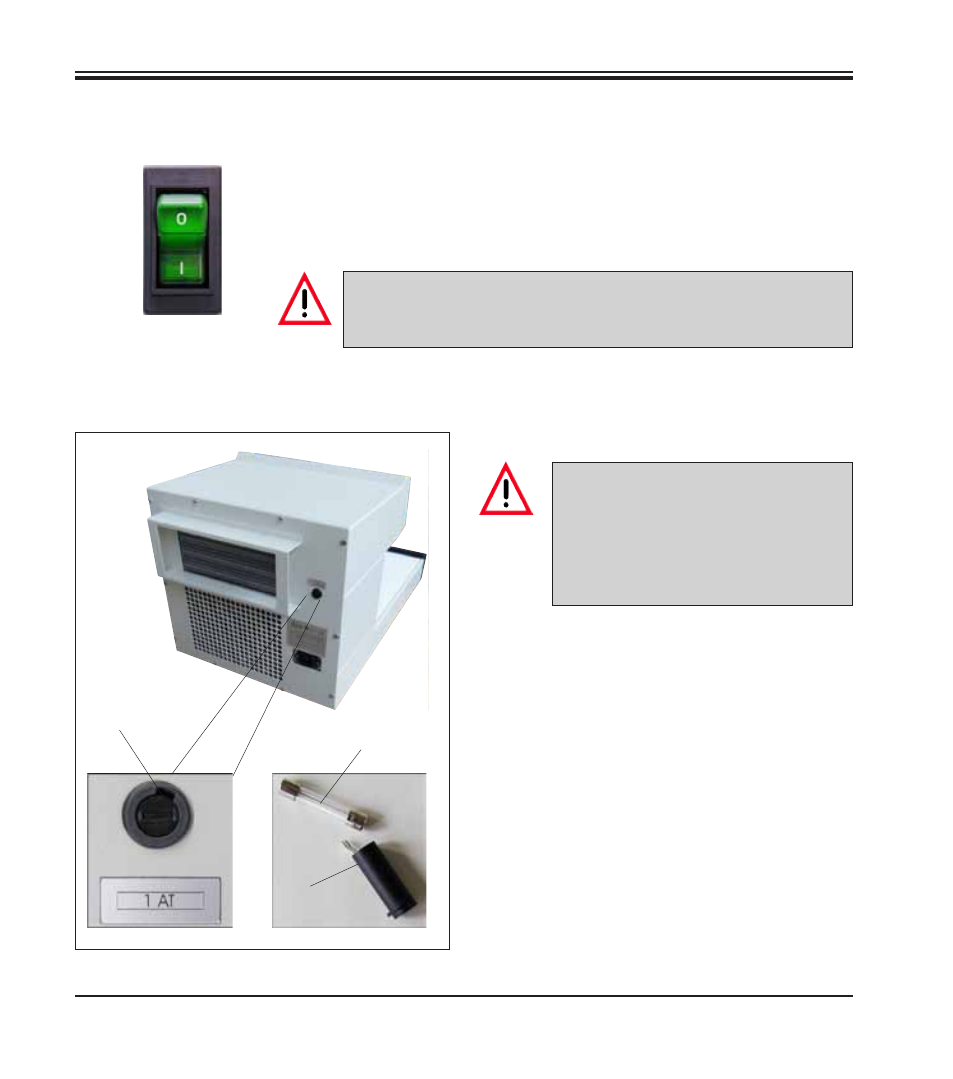
A miniature fuse to protect the electronic com-
ponents is located on the rear of the instrument.
To replace the fuse, please proceed as follows:
• Using a screwdriver, lightly press the fuse
holder (9) and turn counterclockwise about
1
/
4
turn.
• Remove the fuse holder and take out the
fuse (10).
• Replace it with a new fuse of the same type.
• Replace the fuse holder (9).
• Using a screwdriver, gently press the fuse
holder and turn it clockwise about
1
/
4
turn.
• Reconnect the instrument to an AC power
outlet and switch it on.
Fig. 7
5.1 Switch on the instrument
After installation as described in
Chapter 4
, the Leica EG1150 C is ready for
operation. Switch on the device with the On-Off switch at the front left of
the instrument ("I" = ON). A lamp lights up in the switch to indicate that the
unit is operational and the refrigeration unit will start working.
Depending on the room temperature, the working temperature of the cool-
ing surface (-5 °C) will be reached in around 25 minutes (see also
Ch. 4.1
).
9
5.2 Replacing the secondary fuse
10
9
Before replacing the fuse, always
switch the instrument off and pull the
power plug from the wall socket.
Only miniature fuses of the type speci-
fied in the chapter "Technical data"
may be used.
The cooling surface may not be loaded with molds until the cooling
time has elapsed. Otherwise, the working temperature of -5 °C may
not be reached.